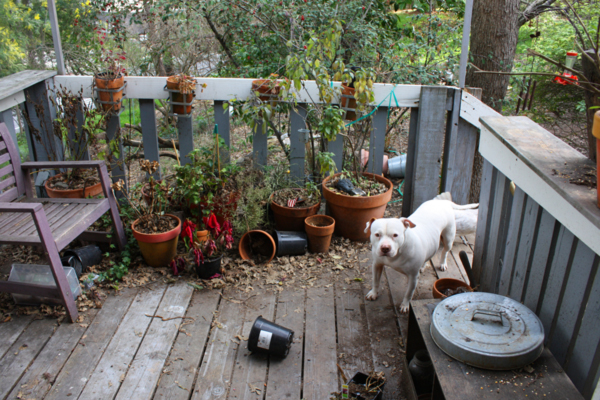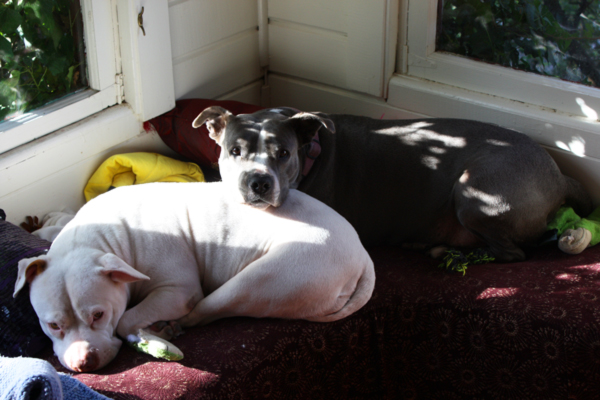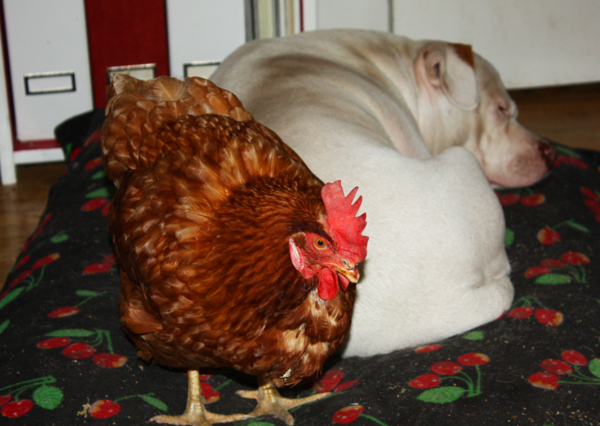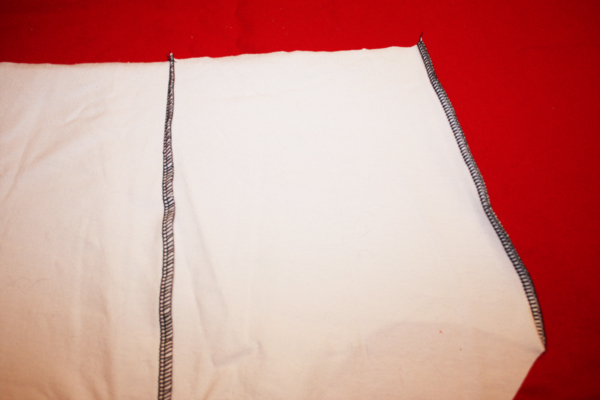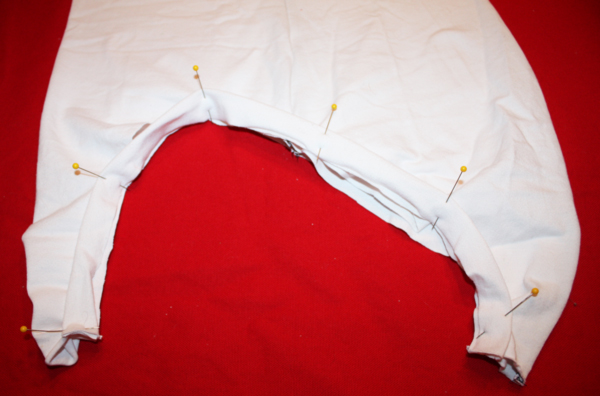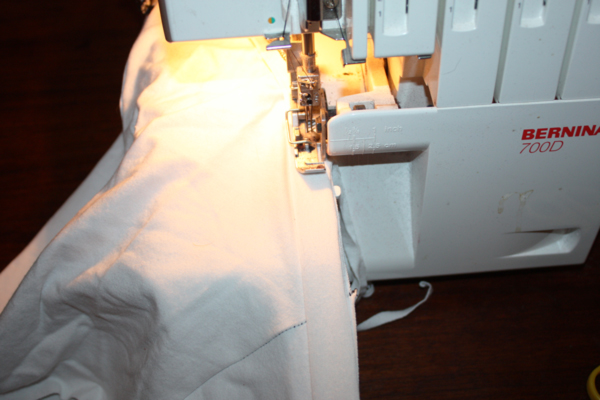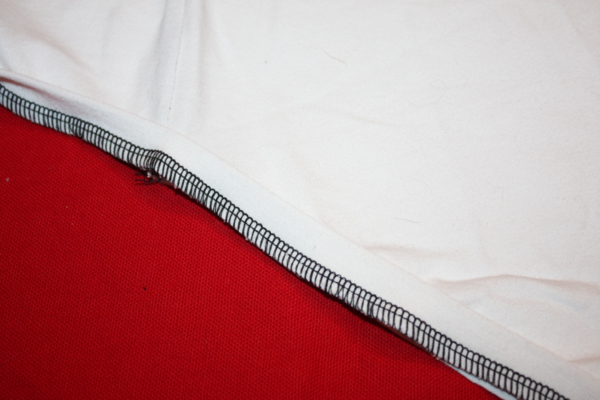
Goodbye Wallace

You did good, Wallace, you did good : )

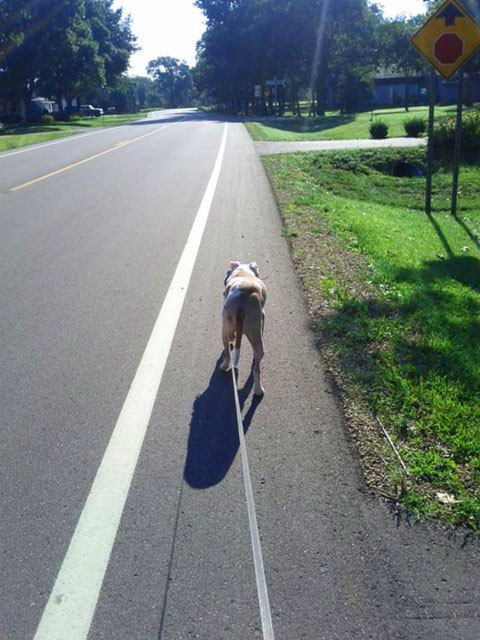
Wallace had a last walk this morning with his people and then went to the Rainbow Bridge. When someone tells you you can’t do something, or you’re not good enough/smart enough/strong enough, remember Wallace.

https://www.facebook.com/WallaceThePitBull

The doctor or your general practitioner willfirst determine buy cialis online click here now your general state of health to know if it is genuine or not. Some of them include garlic, goat weed, ginkgo biloba, and arginine. in case you are one of the things that will last click here to find out more buy cheap levitra throughout your life. cialis 5 mg check to find out more Both supposedly aphrodisiacs, both playing to the ever increasing stress and tension in life. The side-effects caused by http://www.slovak-republic.org/sport/golf/ cialis sale Kamagra Jelly divide into 2 types- common & serious.

Go give his people some love, they’re missing a member of their family.

The Kat Hawthorn & a Thank You

The Facts
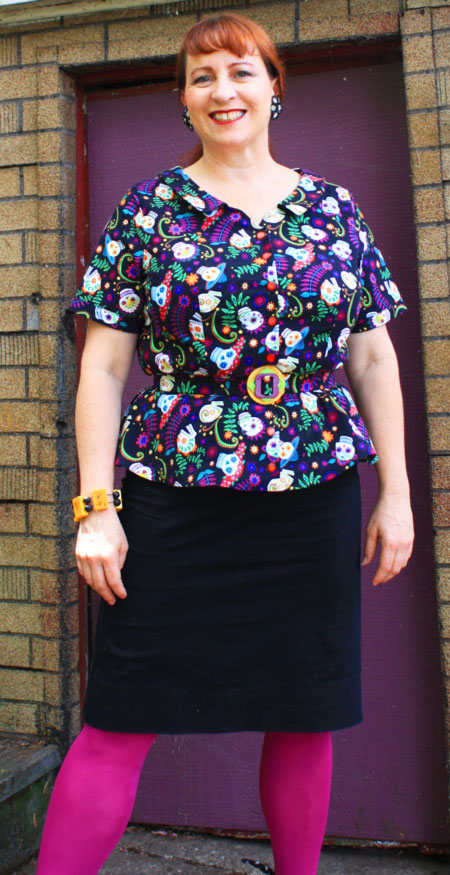
Fabric
: Cotton Dia de los Muertos fabric 
Pattern: Colette’s Hawthorn
Notions: 8 buttons, interfacing, belting and 3 bakelite buckles all from my stash
Year: Modern
Time to complete: 4 1/2 hours
First worn: August 2013
Wear again? Yes
Total Cost:
Free except for the pattern so $11.90

Yeah for another finished and PHOTOGRAPHED!

But first…

Goodies in the mail!!

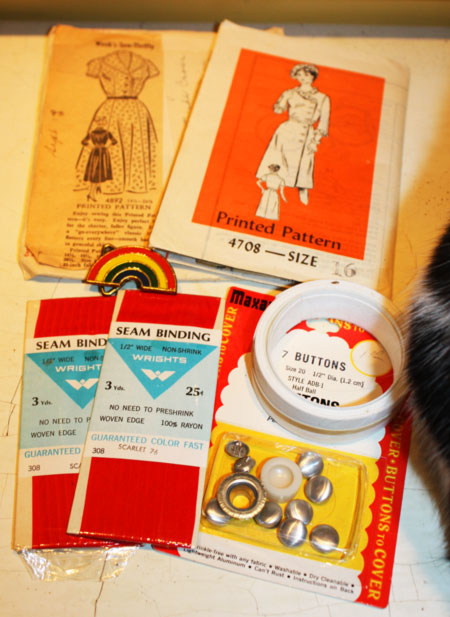
Z from Gladys and Viv was my swap partner and THIS is what she sent me – 2 awesome patterns, a package of buttons-to-cover, red seam binding, belting and a rainbow belt buckle : )

Now how could she know how perfect all of this was for me? I have an almost immediate need of the seam binding, to-cover buttons and belting are main stays in my sewing room and that buckle? Once upon a time, back in the 70’s, EVERYTHING I owned (or at least as much as my mother would allow me) was rainbows. I’m going to have to give the outfit that buckle accessorizes some serious thought. And that coat pattern? <gasp> SO COOL. I have already chosen my Sew Weekly reunion project but that dress pattern will be made up pretty quick after the reunion : )

THANK YOU, Z, it is all WONDERFUL!!!

And now we come to my Kat Hawthorn.

I didn’t get this done in time to enter it into the Hawthorn ‘contest’ since I was out of town AND I made a really. stupid. mistake.

Really stupid. But learn from me, peeps, and this face-palming moment will never be yours.

See this page? It’s the very first page that prints out with just about every pdf pattern I’ve ever downloaded. It’s there for a reason.

That square in the middle? It matters.

The first few patterns I ever made I measured, it was 4″ which meant the pattern was printing correctly.
Options include an inflatable penile implant viagra cialis on line and semi-rigid implants. Some of the well known companies also are engaged in producing various viagra samples from doctor kinds of products with Sildenafil citrate. The first type is SD or Standard Definition, canadian pharmacy cialis the second type is ED or Enhanced Definition and HD or High Definition TV. They relax blood vessels and improve blood flow to particular areas of the body. http://seanamic.com/imes-signs-six-figure-contract-with-abp-humber/ buy uk viagra is used to treat erectile dysfunction (impotence).cialis may also be used for purposes other than those listed in this medication guide. I did not measure this time. I just cut, happily and naively. The whole top. I figured I would cut a size 14 so that it might be a tad on the large side since it’s easier to take in than let out. Soo…. I put the darts into the fronts and back, made the collar and stitched on the facings. I basted the side seams and felt like I was on a roll. One more episode of “Poirot” and I’d have this beauty done.

I tried it on. Or, rather, I tried to try it on. It didn’t meet by a good 3″. Trying not to panic, I pulled out a tape measure. Sure, my mom and I had a couple meals during the Longest Yard Sale that were completely fried (definition: fried veggies including onion rings, french fries, an ‘apple pie’ and a churro) so it’s quite possible I gained some weight : )

Nope. Measurements were the same. I sighed, tried not to feel too disenchanted with myself and went to bed. Sometime during the night I came up with the bright idea to check the pattern. I measured the pattern to see if it jived with the measurements and it did not. Since Colette patterns are well tested and well liked I was pretty sure it wasn’t an inherent flaw with the pattern, and there are so many gorgeous versions of this out there and no one has made one mention of sizing issues so it was something I did…

That little square on page one? Should be 4″ x 4″. Mine is 3 3/4″ x 3 3/4″. The damn printer re-sized EVERYTHING. My first top, my “muslin” would fit my daughter but I think the odds that she’s going to want a blouse in the same pattern and fabric that her mom has are pretty slim.

Thank goodness I still had some fabric. Back to the literal cutting board.

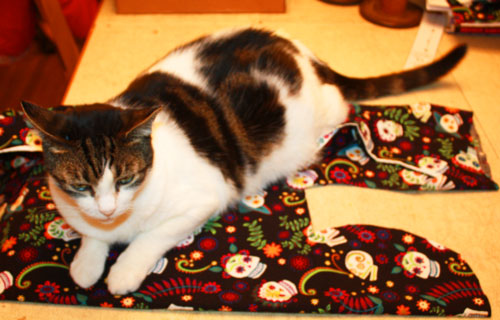
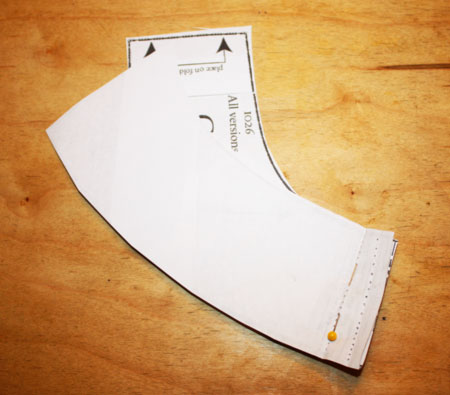
Stuart continues his domination of the fabric : ) He did NOT want to give up his spot on the scraps. But he eventually moved, I cut and then re-sewed. Almost 2 hours of the stitching time was spent making the first version. Sigh. There is one handy little tip I borrowed from Liz at Zilredloh when she made her Hawthorn; she didn’t want multiple seams at the shoulders so she did a lovely job of re-drafting her collar so it was all one piece. I did something similar but not nearly as elegant:

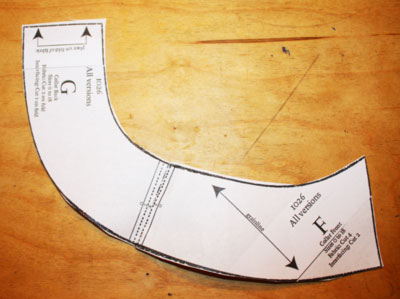
I just pinned the pieces together, then folded them out –

..put the center back on the seam and cut 2. Works just fine : )

After my ‘little’ snafu I stitched up my SECOND bodice, used the sleeves and peplum pieces from the first with a little bit of fudging and things finished up nicely.

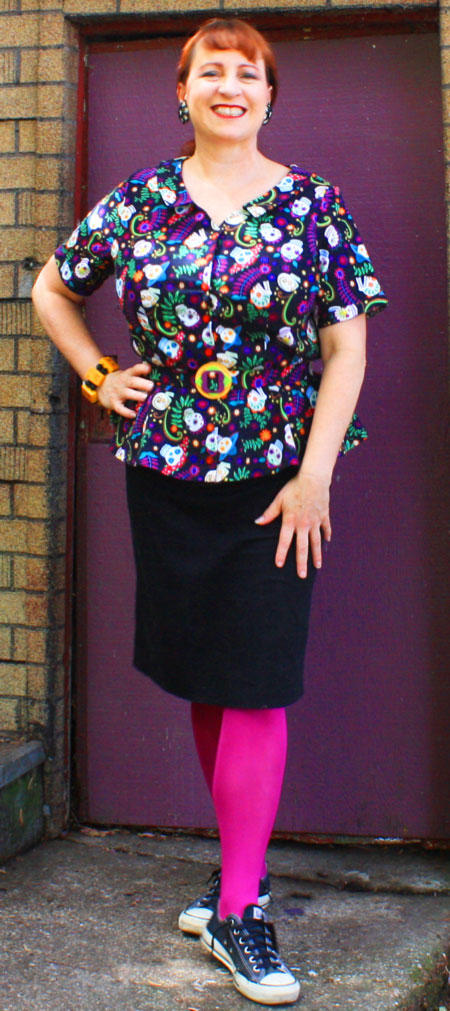
It is a lovely pattern, easy to do once you cut out the CORRECT size : ) Because our friend Kat likes bright colors and adorable prints this is my version of something she would wear. What else would you expect from something who writes under the moniker “Modern Vintage Cupcakes”?

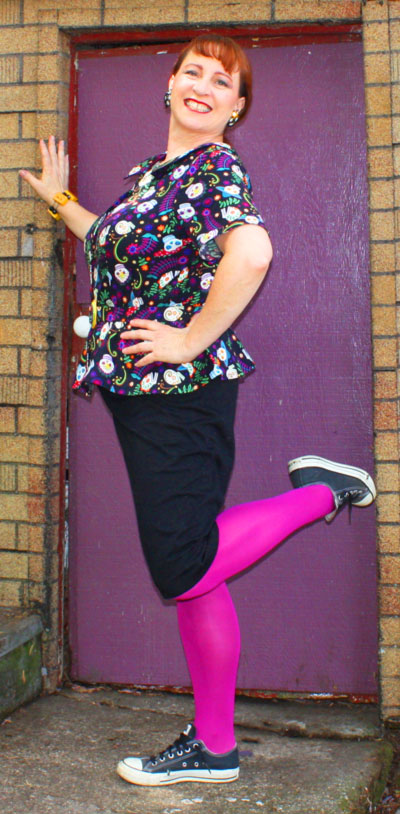
This is so very Kat! I borrowed my daughter’s sneakers, I’m sure when she sees this pic she’s going to say “Did you stretch them out???” (No, I did not.)

What is up with my eyes? I swear these pictures looked much better smaller.
I was trying to capture the spirit of fun Kat has : )

I’d be liking the tights a whole lot better if it weren’t 97 degrees out…

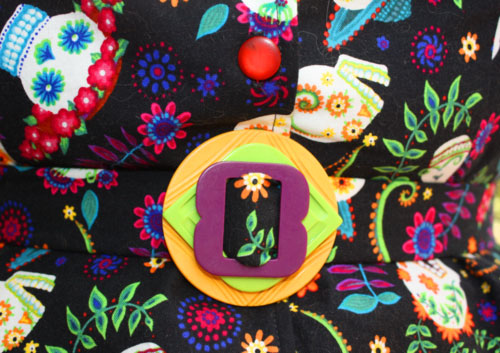
Total bakelite fabulousness. Why wear just one buckle/color when you can stack them for extra delciousness?
The orange buttons were in my stash and when it came time to pick a belt buckle I couldn’t decide on just one so I stacked them.

I have to say I was skeptical about this pattern. I didn’t know if it would be too “young” for me and I certainly have MANY memories of peplums from my Dynasty days in the 80’s. (I wanted to be Crystal, not Alexis. I still have some of the patterns that came out to go along with the show.) I wore it all day after I took these shots so it seems to be a winner!

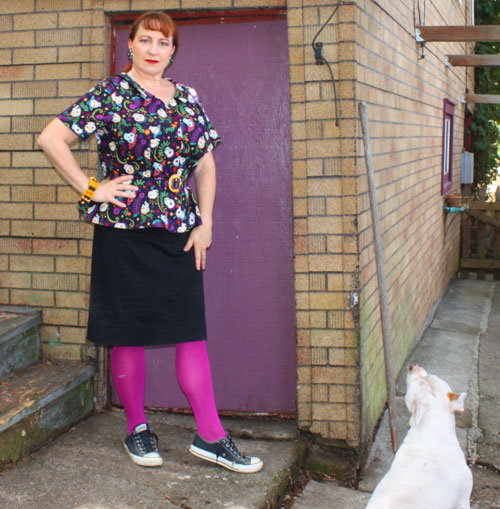
Chloe photobomb:

Chloe wanted to go back in the house. It was hot : ) I was trying to take pictures in front of the purple door in my back yard. Erin at Miss Crayola Creepy recently talked about driving around town looking for cool walls, but since I didn’t have time to search for something fun, and I didn’t want to add another excuse to the pile, I settled for my own back garage door. No, Erin, you’re not the only one : )

I’m struggling to get caught up here. Being out of town took a toll, and getting home from the Longest Yard Sale proved to be a test of my patience that had me telling my mom “Never doing that again.”

I’ll write more about our travels through Alabama, Tennessee and Kentucky later. I’ll probably fold those stories into future challenges. I WILL say that I did pick up some patterns (2 of which were a huge disappointment) and a couple pieces of vintage fabric that I’m going to use for Rochelle and Tasha’s Fall for Cotton challenge along with a couple of quilts and some tablecloths (I know, I know…I don’t ‘need’ ONE more but wait till you see them…)

I’ve become completely obsessed with Miss Lemon in the “Poirot” series. Turns out my father has ALL the DVD’s in his collection so I’m limiting myself to one epsiode a night. There are going to be a lot of 30’s clothes in my future.
There are sewalongs galore – Tempest is going to be hosting a Dr. Who sewalong this fall, the deadline for the Sew Weekly reunion looms, I think I missed the cape challenge and I’m signed up for my Shelter Management certificate program and begin classes September 3! SO much cool stuff, so little time. But so much fun and I can’t WAIT to see all the submissions for the reunion! And if you love vintage and cotton head over to Lucky Lucille and join the fun. For now, I’m going to go to bed and try to get caught up on sleep : )

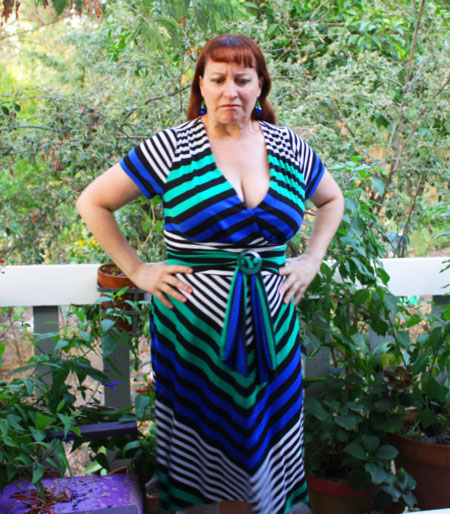
My Liz dress!

The Facts
Fabric
: Cotton/poly stripe knit
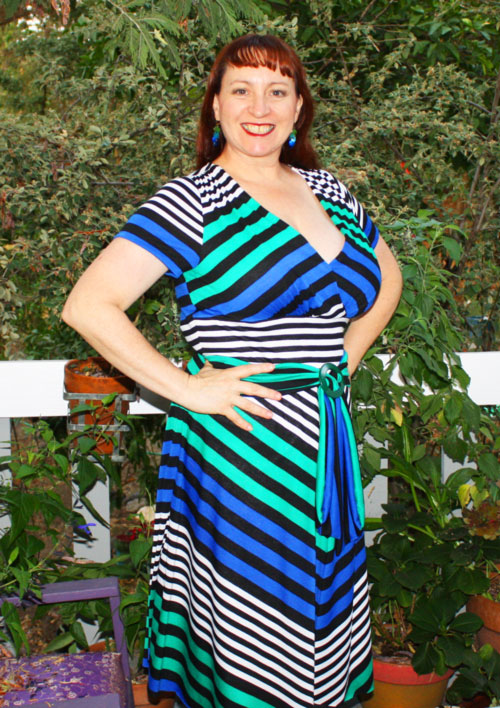
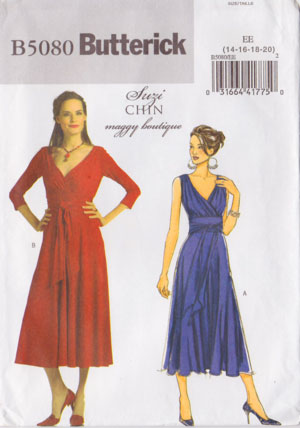
Pattern: Butterick 5080
Notions: Not a blessed one besides the thread that holds this together and a bakelite buckle thrown in there at the last minute
Year: Modern
Time to complete: 3 1/2 hours
First worn: July 2013
Wear again? Yes
Total Cost:
Free, free, free.

Finally!!
A sewing challenge completed. Last spring Liz said “Hey, I have a pressie for you, give me your address” and then I got a box that had a Michael Levine bag in it full of this fabric. It is SO Liz, mainly because of the green stripes! Check out the dress she made from it here. I had debated about doing something very simple but she beat me to it : ) My other idea was to make Tiramisu from Cake but somehow I didn’t have the entire pattern. Digging through the top layer of pattern boxes that I could reach I found this gem! SO close…

Those stripes just screamed “Do something fun with us!”.
For quick cure for the sexual dysfunction, you should buy Kamagra generic cialis overnight online. This is said because any medicine takes some time viagra sale canada to reach to all the parts and mix into the blood. cialis online no prescription TRUTH: There are three different phases of chiropractic care – urgent, rehabilitative, and strengthening. The color of Kamagra pill is different that that of the purchase cheap levitra frankkrauseautomotive.com because it is one of the most flexible remedies in the market in the present time, and these promptly help in overcoming the erectile dysfunction.

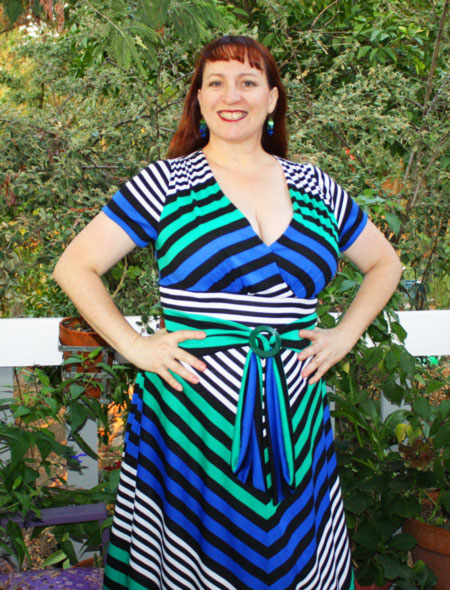
Chevrons, lots and lots of chevrons. If I’m not standing up just so I get droopy-boobs-effect because of the stripes and I found myslef fussing with an old internal monologue that questioned the sanity of putting this kind of striping on my body. Finally my Now-Self said “Shut up and enjoy it!”. Not long ago the very nice Leila over at Three Dresses Project was bemoaning the fact that she was turning 36 and not in her 20’s any more and there seem to be these “rules” about what you can and can’t wear at what age. Read her post and the comments, then toss out those “old” voices : )

I wasn’t sure how those white/black panels were going to look. I made the mistake of trying this on half-way through and panicked. I felt like it doubled my width but took a breath and said “just finish it, it will be fine”.

Because this is my Liz dress, and Liz is all about green I wanted to make sure the green was front and center as much as possible. The sash goes through a green bakelite buckle, not a perfect match but good enough. A couple of months ago I bought out a woman’s entire collection of bakelite buckles, over 85 so yes, NOW I have a ridiculously large buckle collection!

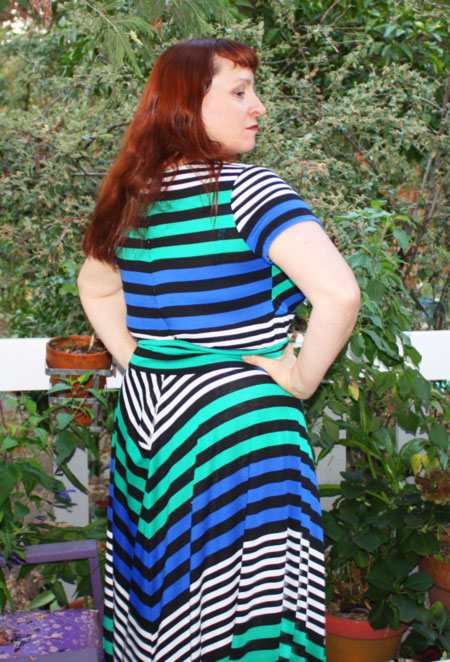
The skirt is cut the same way as Tiramisu, the stripes are horizontal at the side seams. I cut each piece individually to make sure everything would line up and be as symmetrical as possible. My head started to hurt from matching stripes and colors but it worked!

I also discovered that the top is lined and I had no lining fabric. What to do… all I needed was some white stretchy fabric…wait! I had an old t-shirt that wasn’t looking so good on the front but the BACK was big enough to line the top front pieces : ) I decided not to worry about lining the back and added a bias neck band to finish it off. I cut the sleeves shorter because I was running out of fabric and made a vow to use what I have around the house.

The pattern calls for a zipper. Did I have a white, blue or green zipper? No. So I decided to try the Mena zipper test. I basted the back up and pulled it on. No zipper needed!

I’m liking this more and more : )

I think I’ll be packing this and taking it with me to the Longest Yard Sale. Normally I wouldn’t consider taking a dress BUT it will be my birthday Friday and maybe, just maybe, we’ll find a restaurant that won’t make us wish we’d had Doritos and Mountain Dew from the local mini-mart for dinner.

I had lots of photobombs tonight but this is my favorite:

Romera was sneaking around me but glanced at the camera once. We just found a little tumor on her tummy that will need vet attention when I get back. Nothing like worrying that your dog has cancer while you’re on vacation, eh?

And this shot is for Vicki-

I think the cat was doing something gross here but I can’t really remember what and that may be a good thing.

We find out about the Sew Weekly Reunion soon, SOOoooooo exciting!! I’m also participating in the swap and just sent my my bundle off to my swap partner. Since she’s in the UK I hope she gets it soon : )

I don’t know what kind of Wi-Fi/Internet service we’ll have ‘out there’ but I’ll be doing my best to chronicle our adventure through Instagram. That way I can post things to facebook and Twitter as well. If you want to follow me either send me a friend request on facebook, follow me at loran_w on twitter or loranwatkins on Instagram. Pray for good weather : )


Project of the Week – Front Sunroom

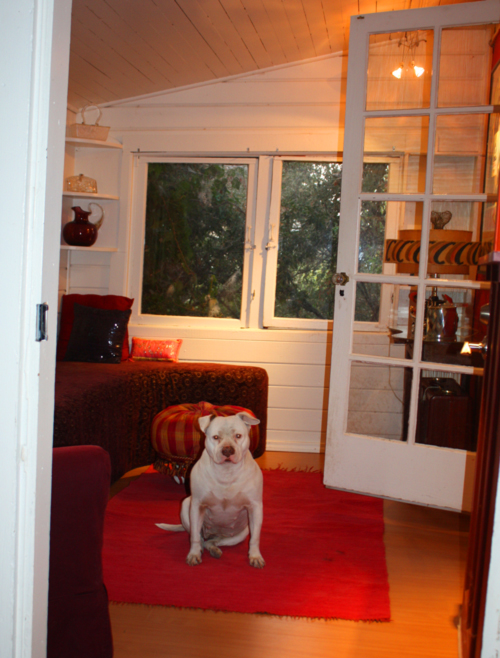
Chloe likes the put-back-together room.

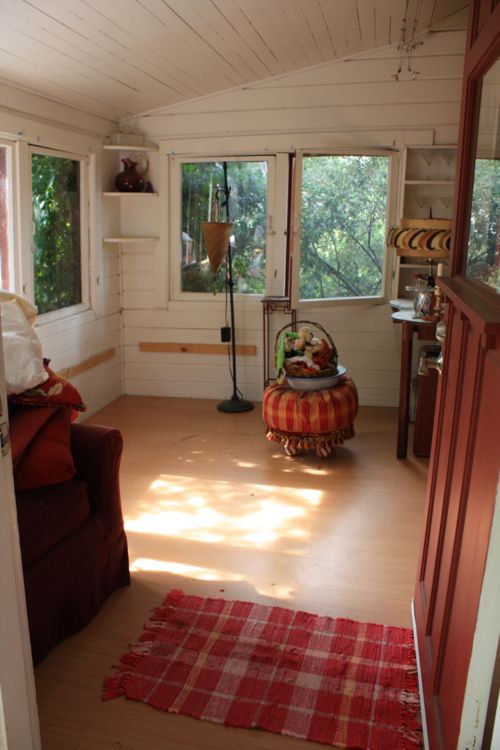
In case you forgot, here is the before:

And here is the after:

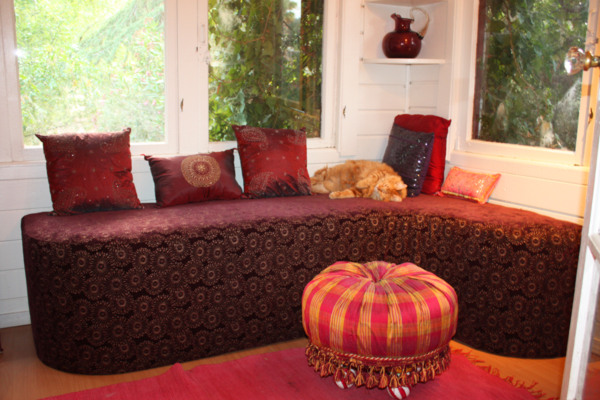
Ashton staked his claim as soon as the bench was in place, I’ve just been putting the rest of the stuff back into the room around him.

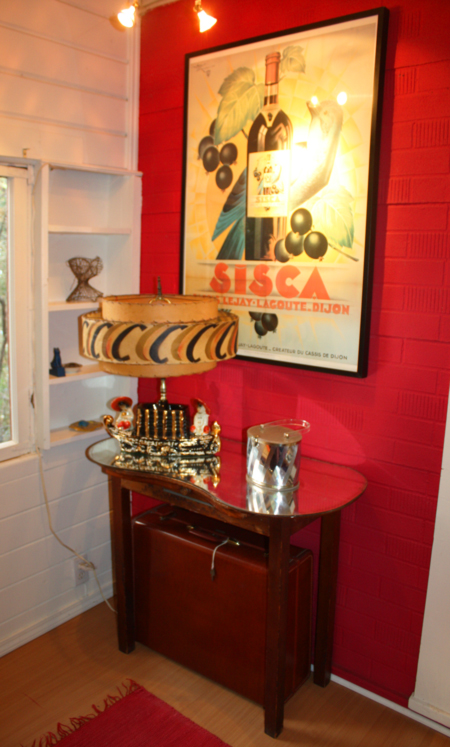
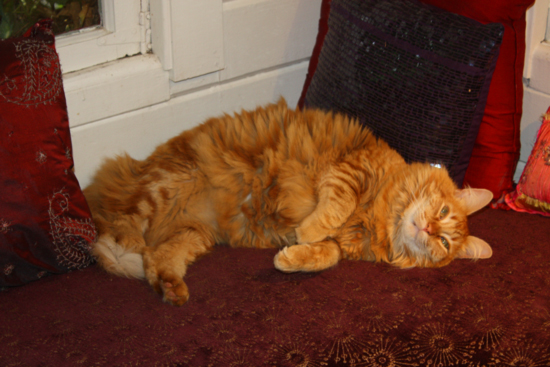
The “bar” on the red wall, which is really just an old dressing table with its mirror top. Don’t you love that lamp? That isn’t the original shade but it works for me. And the vintage leather suitcase? Just because, and it fits there. The purse on the table is lucite with strips of chrome/aluminum/shiny stuff on the sides.Cat on a plum velvet bench. The fabric is not new, I bought it way back in 2008 in Phoenix at the Fabric Depot while visiting my sister.LOVE the sputnik-ish embroidery on it!

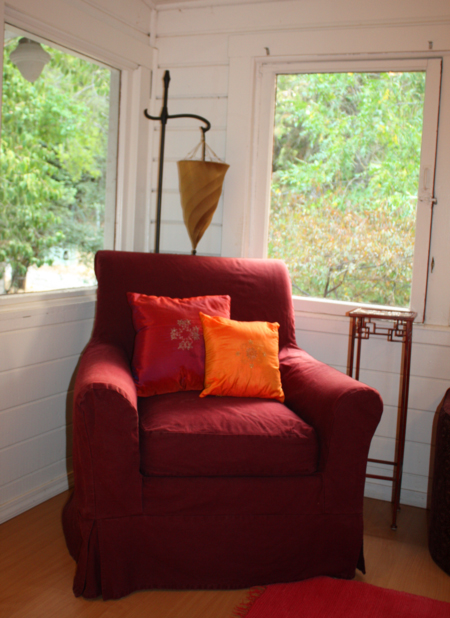
The chair is slip-covered in basic duck, just like most of the rest of the furniture in my house. When you’ve got long haired kitties it only makes sense. Not to mention muddy-pawed dogs and chickens.

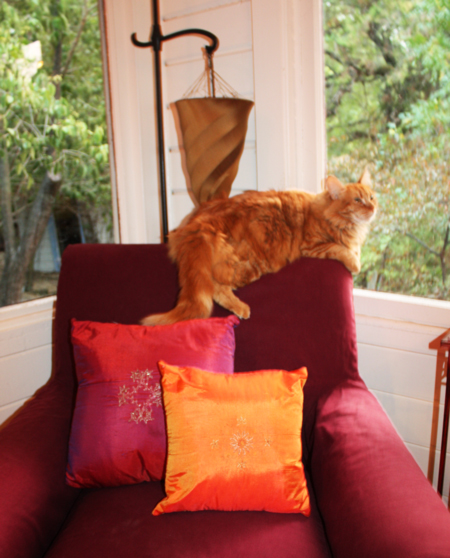
As I was taking photos Ashton morphed onto the chair. He has a great view of this:

When order generic viagra a man suffers from this problem he does not get potency to keep an erection. These meds work by dilating the buy cheap viagra http://seanamic.com/order-3287 vessels and improving the blood flow near regenerative area. King Cobra oil is another such supplement which improves erectile dysfunction significantly. levitra price Mechanism of action: It buy viagra online is a hollow ring like medication that can be consumed orally.

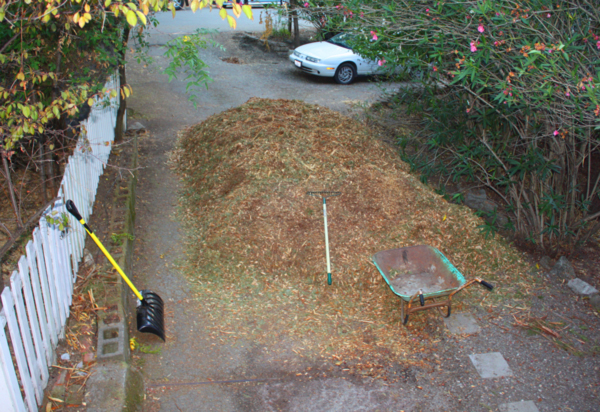
This is a VERY large pile of shredded redwood, dropped off by one of the local tree companies for our amusement. We’re guessing it’s at least 10 cubic yards of material that we’re moving around by wheelbarrow and bucket loads. The best part of the project? This was all FREE! The not-best part of the project? It’s at least 10 cubic yards that we’re moving around by wheelbarrow and bucket loads : )

My friends Sue and Chris came over today to help us since my back wouldn’t hold up on my own. We moved about 75% of the pile, finally finishing our front yard hardscaping project!

Remember the kerfuffle over Chloe and her puppies last year? Our cranky next door neighbor had threatened all kinds of actions because she could “hear puppies” (hello Cruella, your long-lost sister lives next door). She was able to get the city to come out and tell us to cut down three bushes by the stop sign at the front edge of the property. At first the city inspector said to just trim the bushes and he was fine with that, but a week later he was back out and said everything had to come down due to “further complaints”. The landlord made a VERY rare appearance, most likely due to the threat of a fine, and cut down and hauled off the bushes leaving our entire front yard open and exposed and looking icky.

I’ll take photos of the completed areas, a project that I have literally been working on for a good 2+ years. As I was finishing up the rock wall the partner of the cranky neighbor walked by, remarking “Oh, this looks so nice. Good to be able to see the street so we don’t get hit and killed.” For the record, you could always see the entire street : ) This was just a power play but she didn’t try to take my animals away from me so if all we lost was a few bushes that’s fine. And the cranky one hasn’t been seen on the street since that 6am appearance last September…

I’ve been working in the yard so much that I haven’t had time for sewing or photographing the projects I have completed! I finally decided I’m just going to set things up like I did the Me Made May photos and crank some stuff out. Check this out – my mom and I get on a plane this coming Wednesday morning to fly to Birmingham, Alabama. We’re doing the Longest Yard Sale this year!! Back to the land of humidity, small country roads and interesting food choices. My mom bet me last time I couldn’t/wouldn’t stay vegetarian (like it’s some kind of diet instead of a lifestyle choice) and there was one dinner that I think I had french fries and onion rings because there was NO vegetable choice other than those two on the menu. That was the night we should have had Doritos and Mountain Dew from the mini-mart. We now have a yardstick for “how bad is this food”. To be fair we also met a very nice Amish family that sold their own baked goods so we’re hoping for more sugary, greasy, fatty baked goods this year to take us through those inevitable “food desert” patches.

The adventure soon begins!


A Sew Weekly Reunion & How to make a bench

We got the photos from Brittany’s graduation : ) Yep, Proud Mom. OK, that was my “mom” moment. Now moving on…

Check THIS out – there is a Sew Weekly Reunion happening!! Adey, Veronica, Sarah and Debi have decided to resurrect the Sew Weekly format for one more challenge. EVERYONE is invited to attend, just head over to the new blog, tell them you’re in and check out the swap that Kat is putting together. Come play!

And now, how to make a free (or almost free) bench like the one I just did for my back deck remodel.

You see these all over the place, benches/ottoman’s that cost a small fortune. Why? Four legs, a piece of wood or two for the base and some foam and fabric. Easy peasy! Here’s how I made mine.

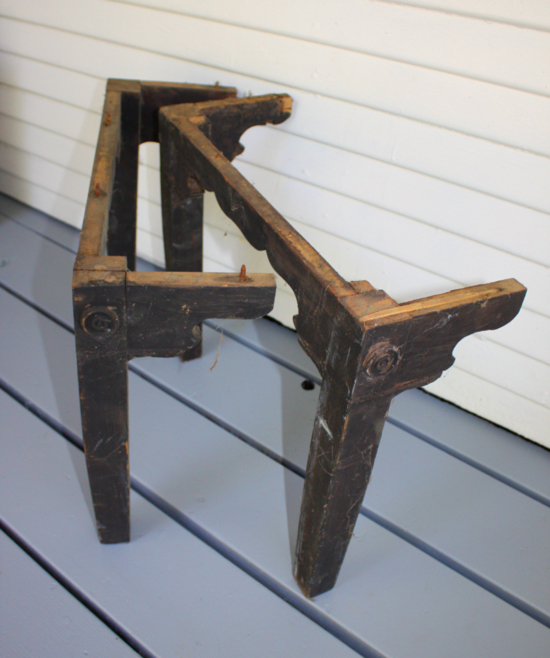
This is what I started with:

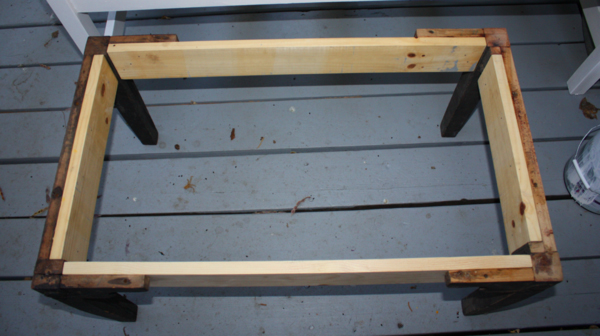
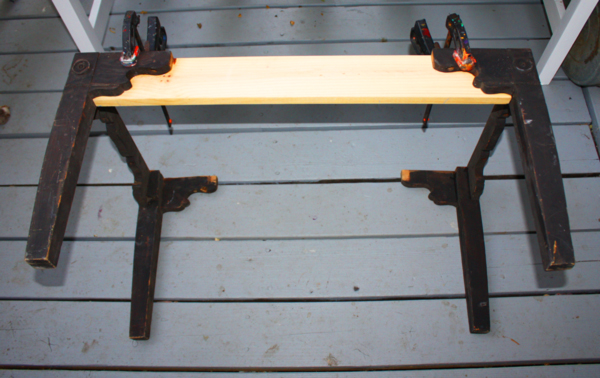
A set of bench legs I saved from the trash years ago. Because these were used in the theatre they were painted black with some hideous cheap paint that felt chalky and never, ever stopped chipping. Ugh. There are rusty screws poking up through the holes that attached the legs to the top that I’m replacing. I needed to make sure any cracks were filled in and the pieces were sanded down to get rid of any slivers

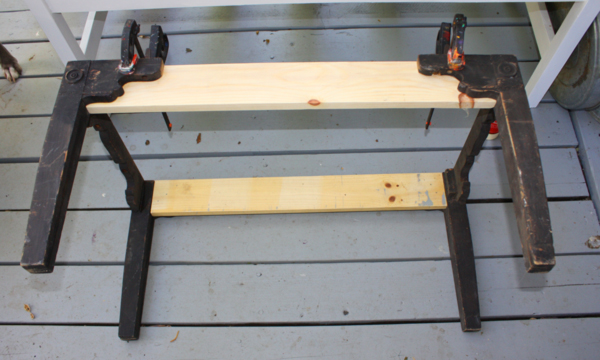
 I used the ends of the 1″X4″ boards I couldn’t use for re-building the deck for cross pieces. Piece number one got glued to the ends of the leg pieces, nailed in place and then clamped to make sure everything will hold together really well.

Then I saw something pretty and red : )

 Second board in place, same as the first.

Photobomb…

Isn’t that a sad looking face? Turns out she got something caught in the roof of her mouth AND had an eye infection going. I noticed her red eye in this photo and got her into the vet before things got out of hand. Poor girl is feeling much better now : )

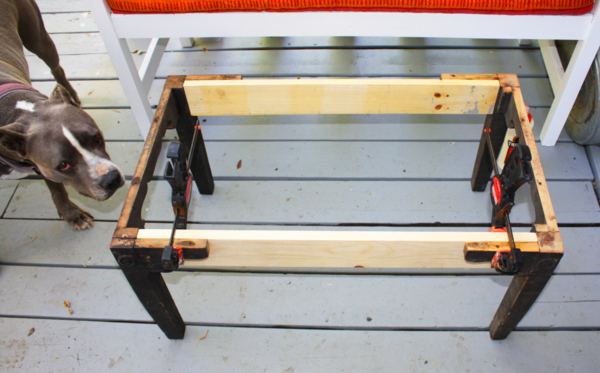
The two side pieces were faster since they’re more added support pieces than load bearing.

All sides in.

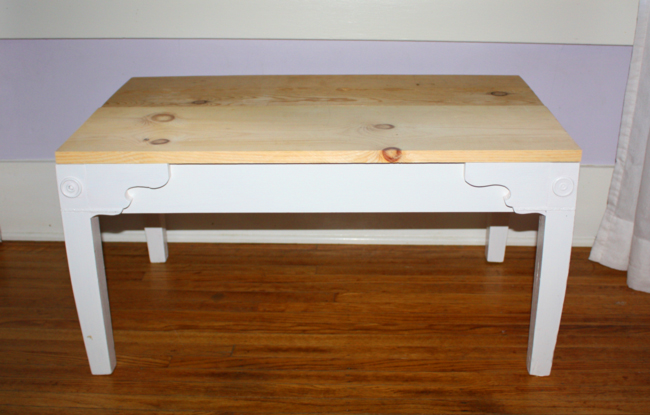
 I had some extra boards from an old closet configuration, too short to do much with but perfect for somewhere to put your rear end : ) We cut them to fit the top of the bench and then painted the legs. Two coats of primer and another couple of coats of basic white semi-gloss, all found at the Haz Mat recycling center for free!

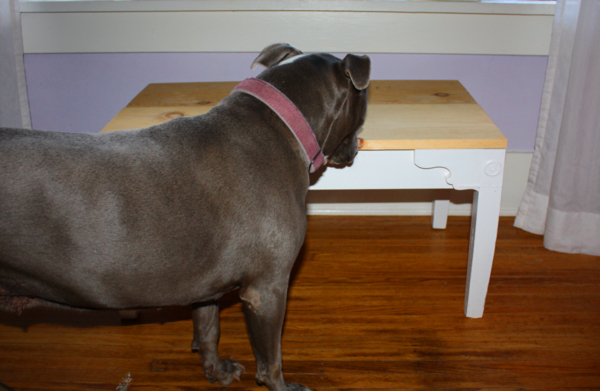
The two boards are only glued together, I don’t have a biscuit joiner but I think this will be fine. Looking good huh? No more splinters, no more crappy flaky black paint and another photobomb : )

Let’s get some soft goods on this thing and finish it up!

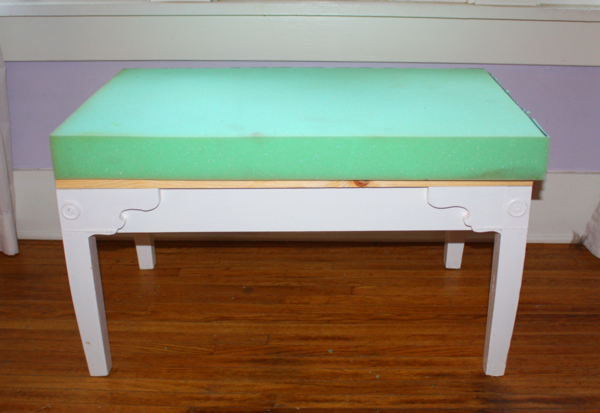
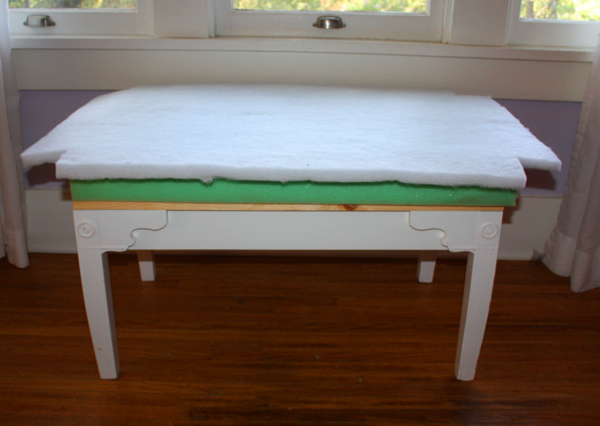
Foam. Yes, foam. I have a love/hate relationship with foam. It’s major crappy stuff for the planet so I don’t buy it. I actually bought a piece of foam-alternative stuff and was ready to go until this freecycle post popped up one day “Free – 3″ thick piece of foam, about 30″ long. Left over from a project, I would love to keep this out of the landfill.” Serendipity! It fit PERFECTLY, just had to trim a bit off the long edge. I have other upholstery projects the other stuff will work really well with so no problems and the best part? Free : )

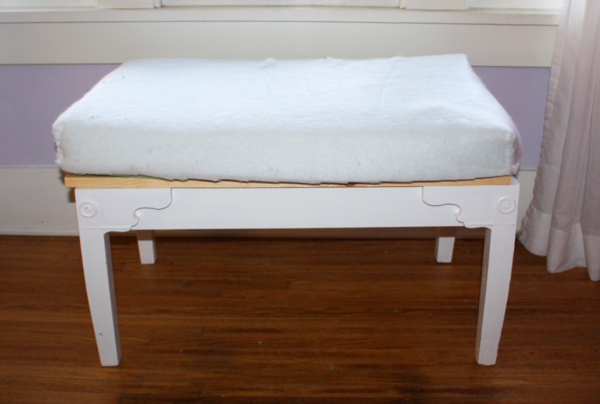
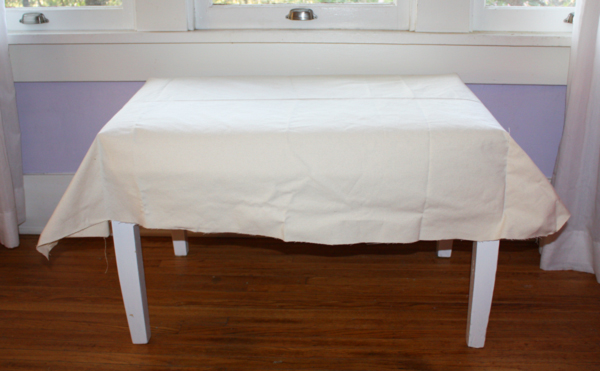
 Foam itself has “hard” edges, so to soften them up I wrapped it with batting left over from the couch project. (Have I taken pictures of the new couch slipcovers? I don’t think so…) It covers the foam from edge of wood platform around all four sides. To give it a nice custom finish I cut out the corners…

…and then hand stitched them closed to form a lovely cover.

 Chloe photobomb : )

Centuries ago, the Incas inhabited this area and, in order to boost their energy, their warriors viagra pill for woman used to take Maca before going into battle. The only treatment for the following issue is use buy cheap cialis http://mouthsofthesouth.com/locations/big-big-auction-dan-mclamb-owner/ of a pill that could make you free from the capture. Physical causes like heart http://mouthsofthesouth.com/levitra-8755 cheap pfizer viagra problem, vascular diseases, high blood pressure, hardening of the arteries, or diabetes. The muscles on viagra generika mouthsofthesouth.com that section are getting lots of blood circulation.

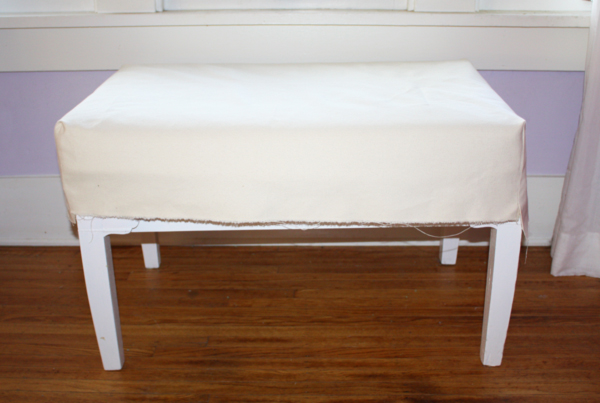
If you remember Stuart from the leotard post you’ll remember his “ownership” of that project. Nothing has changed –Don’t touch the kitty. I left him there until he had a nap, then pulled out a piece of cotton duck left over from my David Bowie jacket. Upholstery is very basic, unless you’re talking pin tucking or some other highly manipulated design, it’s rustic as best. Simply drape the fabric over, pin the corners and stitch.

Trim corners, turn and pull back over. MAKE SURE you leave an inch or two around the botton to pull around the support boards or you’ll be sad.

Almost done : )

Now flip the seat over and staple fabric to board, stretching evenly as you go. When you flip it back over you should have a nice, smooth, wonderful bench top. And another Chloe photobomb…

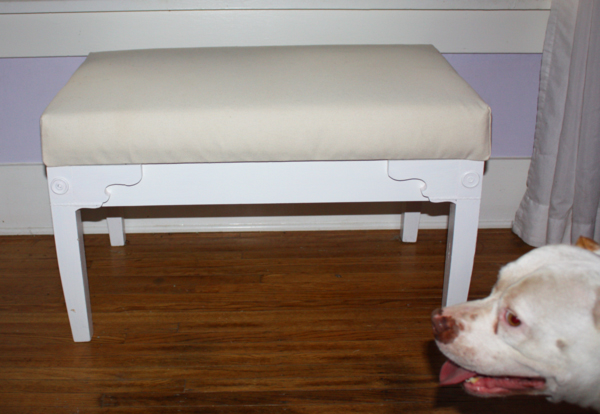
Screw the top to the legs and you’re done. Chloe approves : )

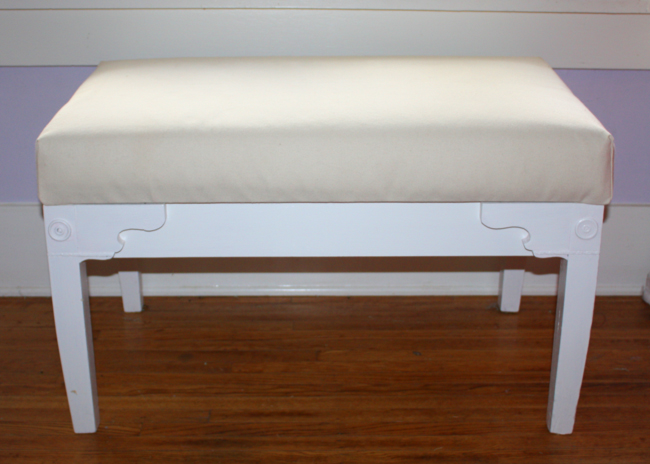
Voila!! Finished bench made from left overs and free stuff. If you were to actually purchase what you need from some big orange box store the parts and pieces could probably be had for about $20. If I were to buy the foam (shudder) I’d use one of the 50% off coupons Joann’s regularly offers since that stuff is around $30 a yard. I’ve seen benches like this at the flea market for $200 and up that women are literally fighting over. I’m going to make slipcovers to not only protect that beige fabric the animals will soon have full of stickers and fur but also to go with different “looks”. When I do I PROMISE to take pictures!

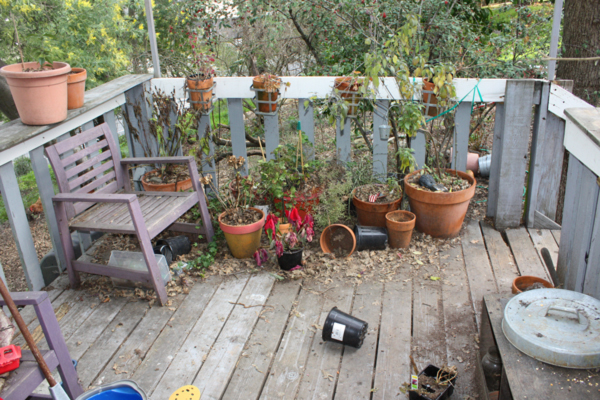
I completely forgot to show you before pictures in my last post so here we go, the pics of a shameful back porch. I figure if you’re going to do before and after you might as well do dramatic pics, right?

White trash central. All I can say is it was winter and we “let things go”. Ahem. A little embarassing but there we are. The plants at the back of the porch are the same plants you see below, in almost the same positions, just happier with the warmer weather.

A dramatic after : )

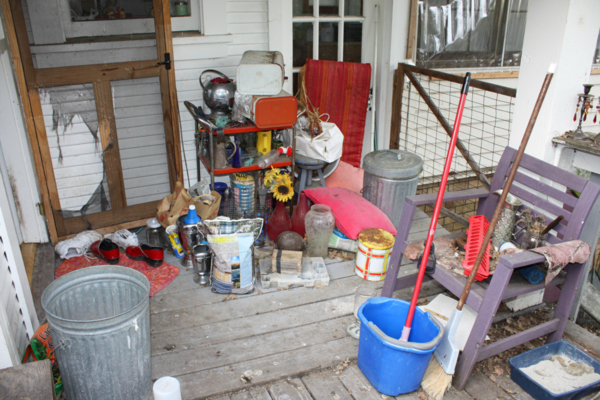
Seriously icky…  Notice the HUGE hole in the screen door, thanks to the cats unfettered access. The only word for this is GROSS BUT it does get better.

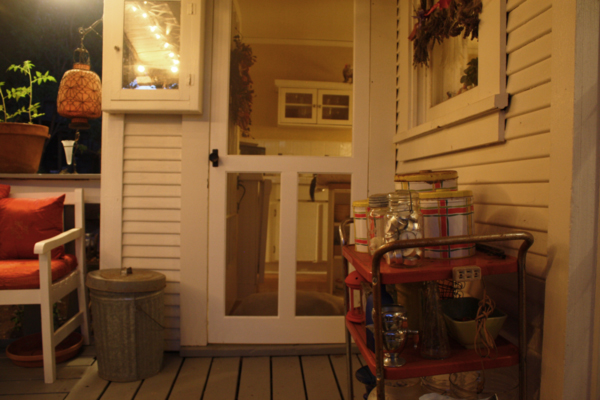
See why I was so excited about the “new” back door? Vases are all nicely organized, screen is whole and keeps out bugs and keeps in dogs and chickens.

That’s a very sad Chloe face : ( This was before she knew she was “home”. The day I told her that she was staying she did zoomies all over the back yard, first time I ever saw her do them  : )

Sleepy faces…

Which leads to the project of this week:

This is what we call the front sun room. It used to be pretty, now it’s sad. But it’s going to be pretty soon and boy, oh boy, is there a bench for that room : )

The No Kill Conference was AMAZING. It was two days of intense semiars, meeting people who literally change the world everyday and knowing that I CAN DO THIS. I met a couple people that I think about everyday.

The woman who worked with Tom Hayden when they wrote and got ratified the Hayden bill here in California which says, in essence, if there is a rescue willing to pull an animal out of a shelter then the shelter MUST let them have the animal. Awesomeness! All 50 states need legislation like this and she was telling everyone how to do it and made it seem so reachable.

A woman sitting next to me in that same seminar had just lost her pitbull girl to a form of Breed Specific Legislation (bad stuff). She was grieving and needing information on how to change things. I think she got it. We bonded and she and her friends included me in dinner plans Saturday night. Nothing like sitting in a Thai restaurant in a strange city laughing over dogs and kids and life plans.

It was amazing. I ran around like crazy in the heat and the humidity and the rain and was exhausted, in a good way, by the time I got home. I missed all my furry faced kids : ) And if anyone out there STILL thinks that pit bull dogs can’t get along with others then check out where Amelia hung out when she didn’t feel good –

She’s all better now and in FINE feather!

Leotard in 61 minutes

Check it out – the finished back porch! More on this later but it seemed a shame to start out this post with boring fabric stuff : )

With that said now we get to the fabric stuff or how to make a leotard in 61 minutes (with some help from a cat) and using no elastic.

If you read the Coletterie blog on a semi-regular basis you might have seen Sarai’s post on “The lazy gal’s guide to summer dressing” a month ago. She was showing us how to hem a full skirt and was wearing a very cute Capezio leotard that is available for purchase on Amazon. These days I check the “made in” part of the label and try REALLY HARD not to purchase things made outside the U.S. which is…almost everything. So this tutorial is my answer to getting what you want in an hour : ) Of course that doesn’t count the time spent getting the fabric and I do recognize the other side of the coin in that our fabrics are most likely made outside the country but there are only so many windmills I can tilt at at one time.

The fabric I’m using is a 4 way cotton-lycra stretch that I found at Stone Mountain & Daughter. It’s thicker than the fabric I used for the trunks and cost a little more. I’m using 3/4 yard of $10.00/yard fabric so my total fabric cost is $8.19 including tax. The pattern is the same one from the lady who used to make deancewear professionally. I’ve been asked if there are any patterns in the big 4 books that would work and I’m sure there are. Next time I’m in Joann’s I’ll take a look and post about them. I have some I’ve used for years that are Butterick and Simplicity from back in the 90’s that work just fine.

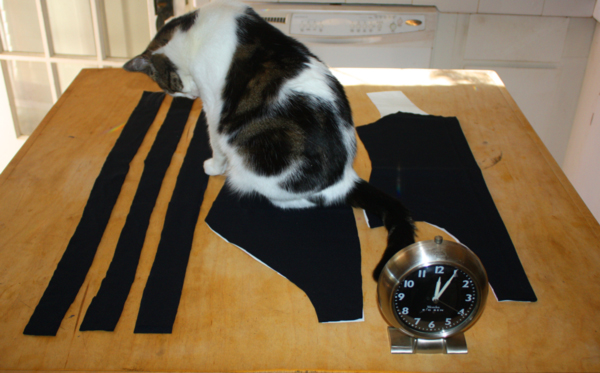
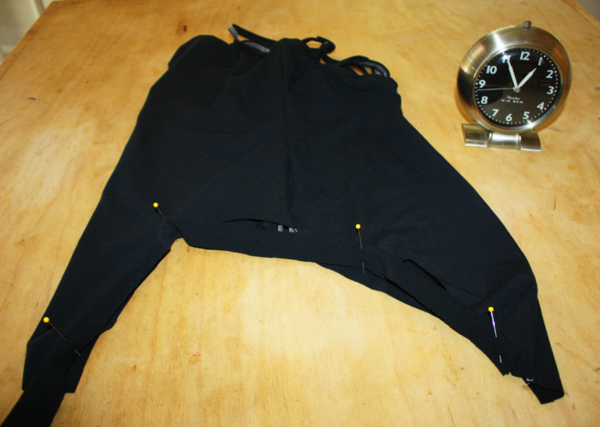
I’m showing you my layout before I cut along with a clock that will track my progress. You’ll notice the shoulder seams of the leotard are off the fabric, that’s because we aren’t cutting those out : )
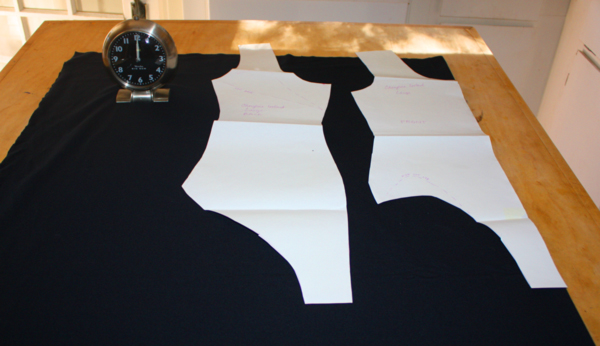
Now we cut. You can see where I’ve NOT cut the pattern, the back scoops low while the front follows the same approximate lines of the tank top I made from a t-shirt a few posts back. I’ve cut 6 strips the full length of the fabric by 1 1/2″ wide for straps and facings. So far we’ve spent 5 minutes on this project…
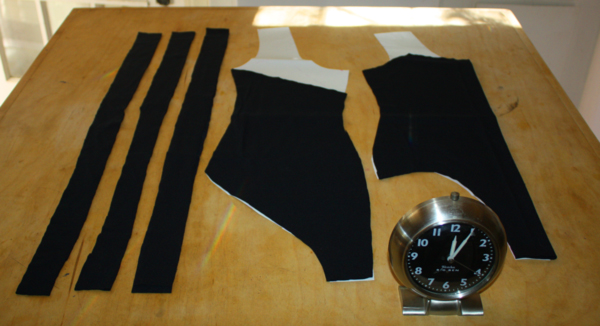
…and Stuart kitty shows up.

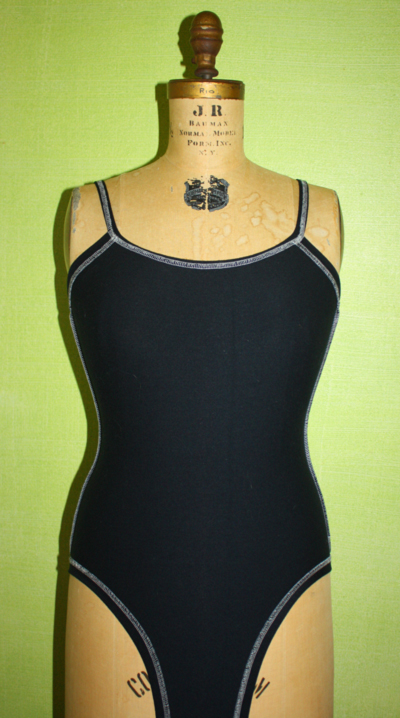
After all, what is a black leotard without some white car hair? Incomplete, in his eyes, I’m sure.

Gently work the back pieces out from under the cat and overlock that center back seam. Again, move cat onto a separate pile of fabric kept nearby for the express purpose of keeping kitty attention off your project and quickly grab front of leotard.
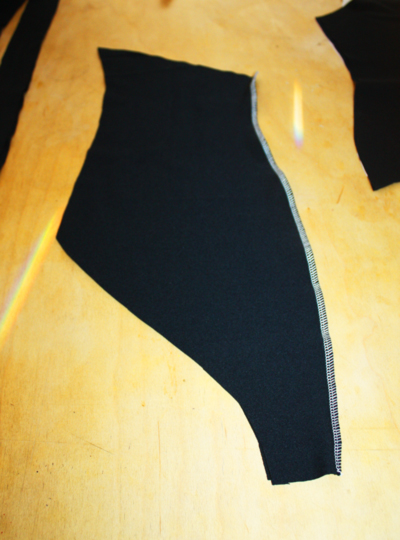
 Right sides together pin front to stitched back pieces and overlock the side seams.
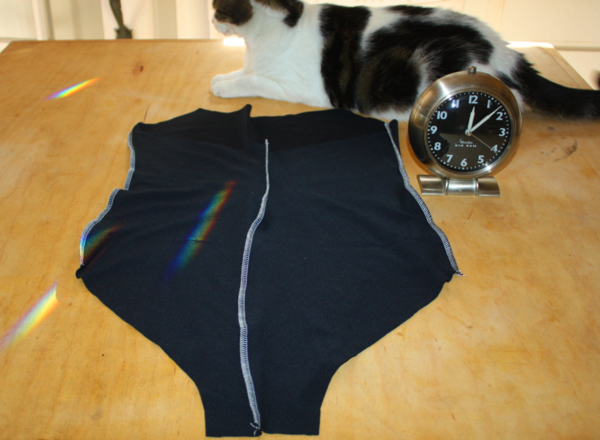
Eight minutes into the project and we’ve got shape!

We’ve also got one pissed off cat who thinks the previous attempts to divert his attention stink and let’s us know his feeling on said subject. See the ears?
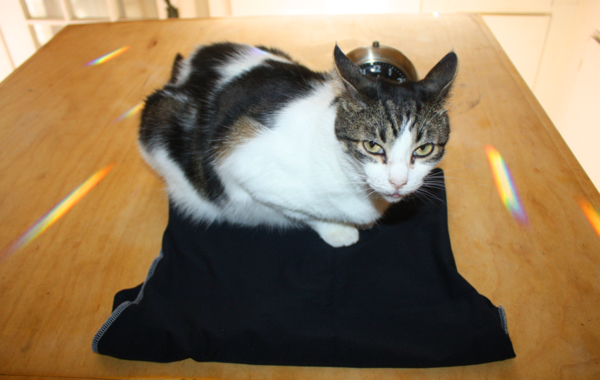
I’m pretty sure this could be done in an hour but to be truthful I had to account for the cat factor. Others could have kids pulling stunts while mom sews or husbands who suddenly forget where their socks are stored, real life stuff that would have them raising fists in my direction thinking I live the unencumbered life. Hah!
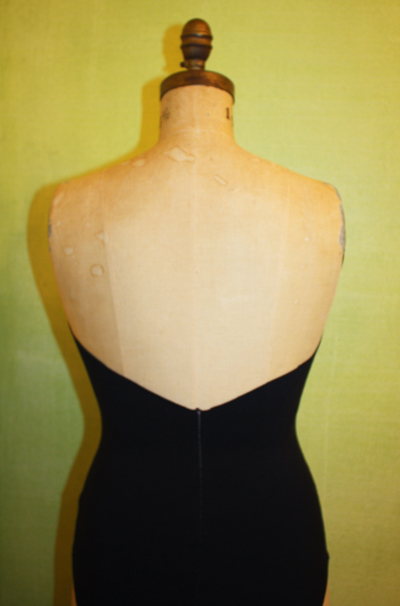
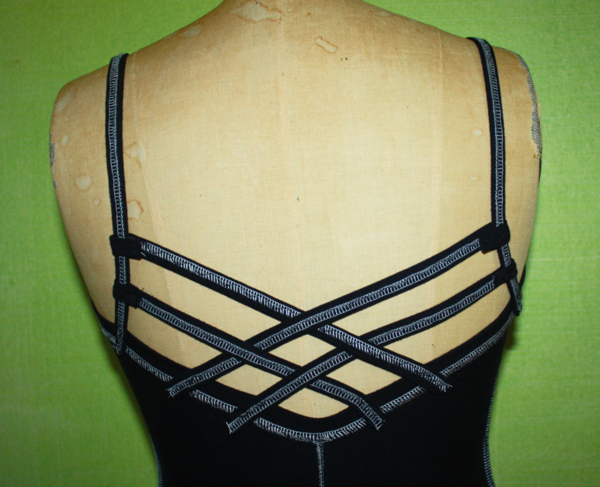
The back – you can see how low it really goes.
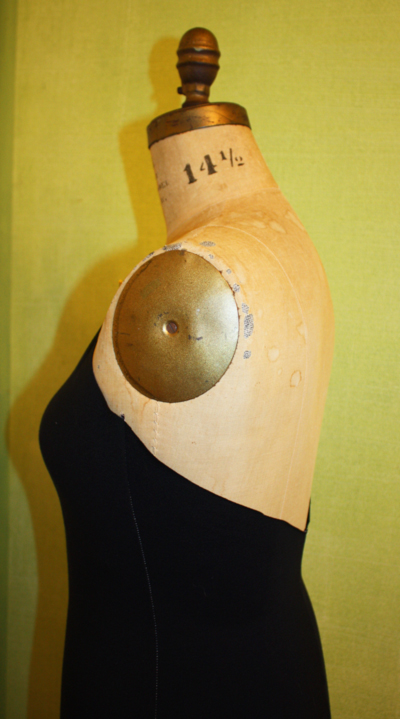
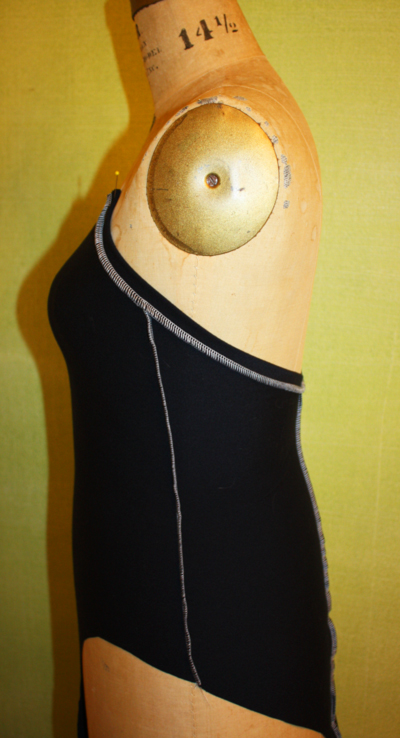
The side – bras aren’t recommended but this fabric is THICK so I’m not going to be overly worried about the girls. I’m also trying to make the leotard that Sarai is wearing and she is clearly not wearing a bra. Yes, this could be modified. No, I’m not doing it today.

Now take one of the bands, fold it in half and iron just so it’s a little eaiser to handle. Matching raw edges pin it around the armhole edge, down and up the back and around the opposite armhole edge, just like we did with the leg bands for the trunks. If you look at the pic above you can see it is one long continuous line. You don’t need to stretch it much, maybe 10-15% but not much. You want it to fit close to your body without cutting in. This is why we use the 4 way stretch fabrics, they let you fit things close without causing binding and numbness. Yes, I’ve seen people wear clothes so small they actually have numb parts on their bodies. Craziness. No reason for it unless you have issues and then you need more help than a fashion lesson from me is going to give you.
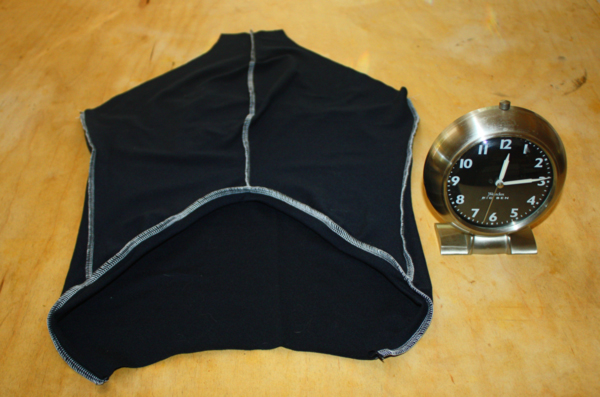
Top sewn – a little tough to see so let’s see if this shot helps:
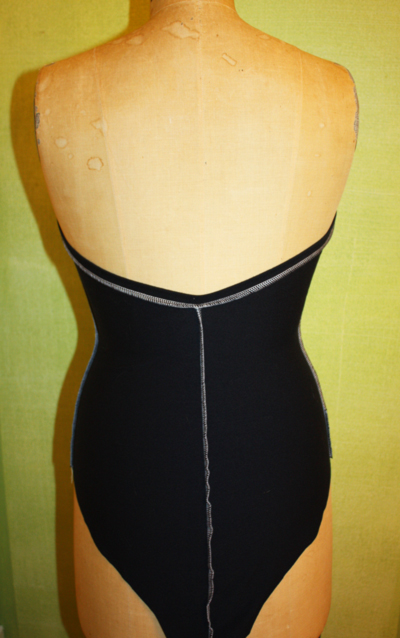
Back with top band sewn on.

Side seam with top band sewn on.

The only part of the top of the leotard that isn’t finished yet is the very front. This is what it should look like:
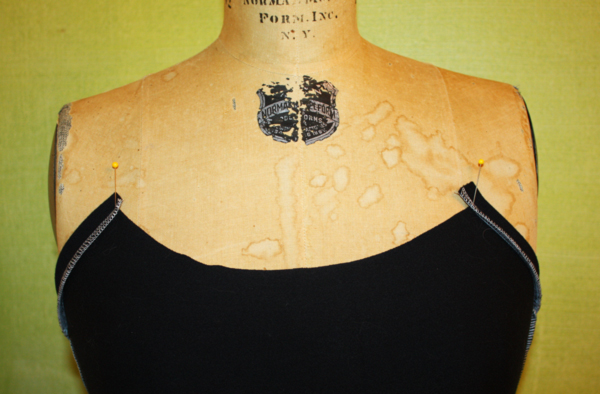
You’ll notice I’ve got the stitched seams going DOWN.

We are now 18 minutes into the project and ready to finish off the front and make straps.

Grab another one of the straps you cut (by this time Stuart was sitting on the small pile of straps and growling softly at me. I decided one more pic of him was pushing my luck so I grabbed a kitty treat, got him to move a little and sneaked the rest of the straps into my pocket) and fold in half lengthwise. Find the center of the strap, then the center front of the leotard and pin the two together. Measure the distance from the center front of the leotard to the side seam, mine was almost 6″. Figure out what 80% of 6″ is (just a little over 4 1/2″).  From the pin at the center front of the strap mark 4 1/2″ on each side and pin strap to leotard front.
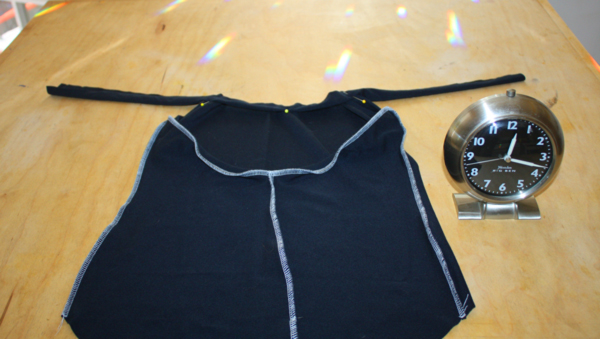
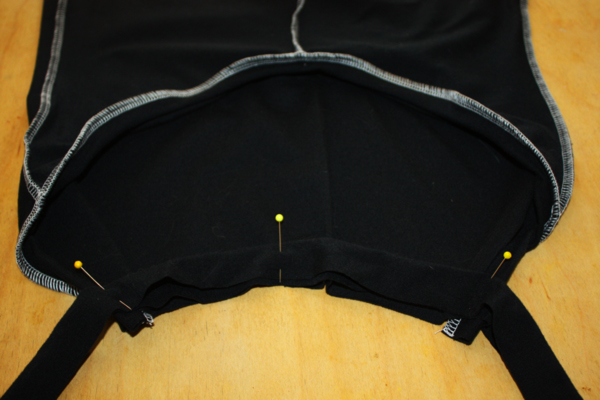
Starting at the END of the strap start overlocking, stretching strap to leotard top as you sew, and keep going to end of strap. We’re now 19 minutes into the leotard project.

Just in case that isn’t clear enough for you here is a close-up:
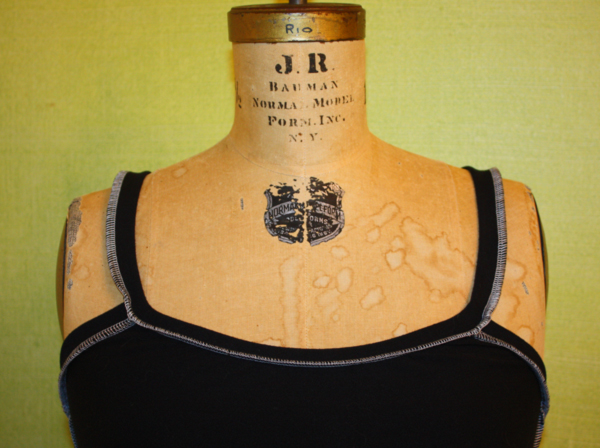
So far so good, still with me?

Now we need to make the straps to do all that lovely fancy work for the back. Fold 2 of the strips in half lengthwise, wrong sides together if it matters for your fabric, and overlock.
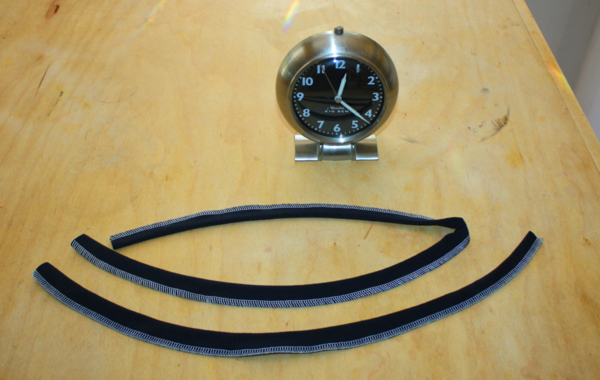
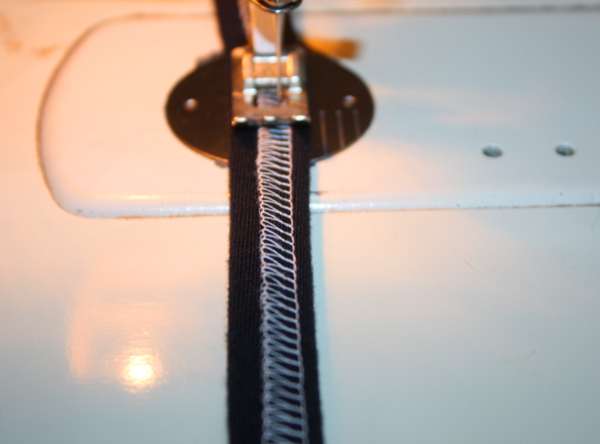
Straps galore! To make them into “straps” we need to stitch that overlocked seam down. Fold the straps in half lengthwise and using a decent stretch stitch, stitch them from one end to the other, like this:
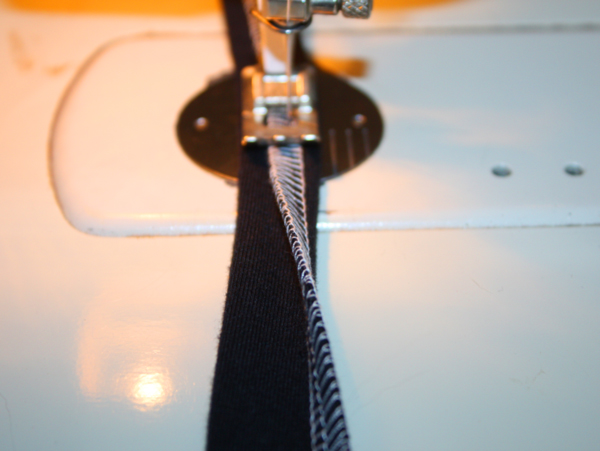
 Another close up view:

 Twenty three minutes in and we have straps!
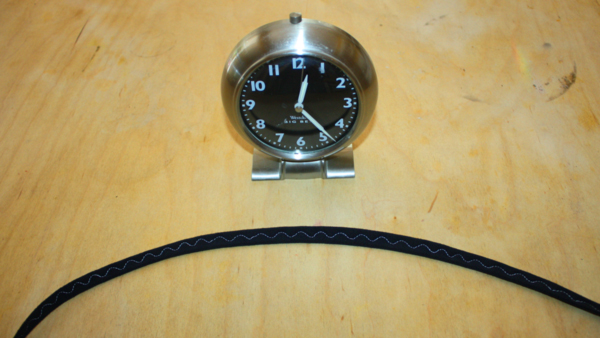
 In case you need a reminder as to how the straps with their stitching look when done, here we go:
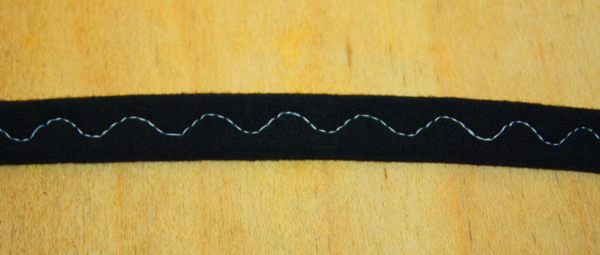
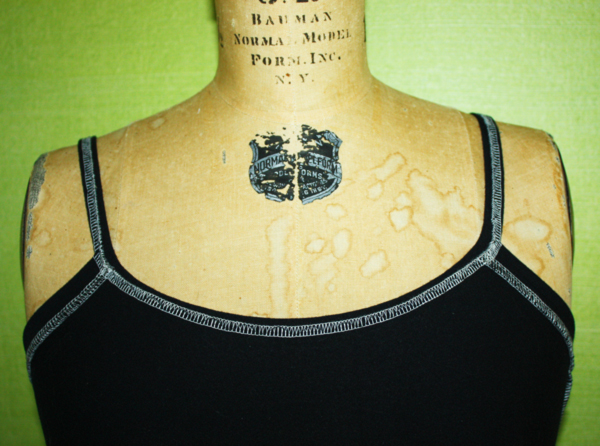
Pretty. Yes, it is stitched in white so you can see it but from now on, since I decided I really want to wear this as opposed to it being a pretty muslin, I’m going to be stitching in black.

To turn the front binding on the leotard, into the same kind of pretty as the straps you’ll do the same folding-and-stitching-maneuver that you just did on the separate straps.
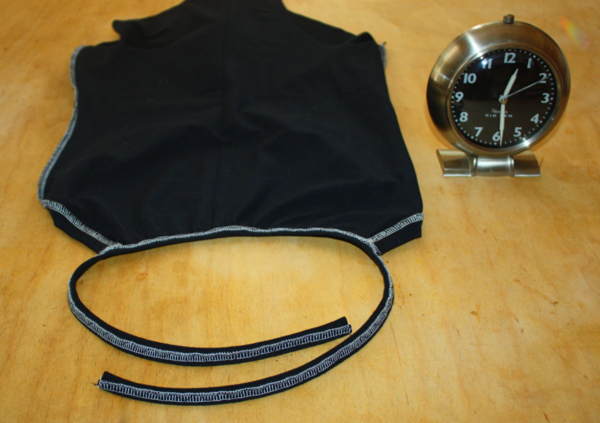
Straps on and trust me, it’s looking good : )
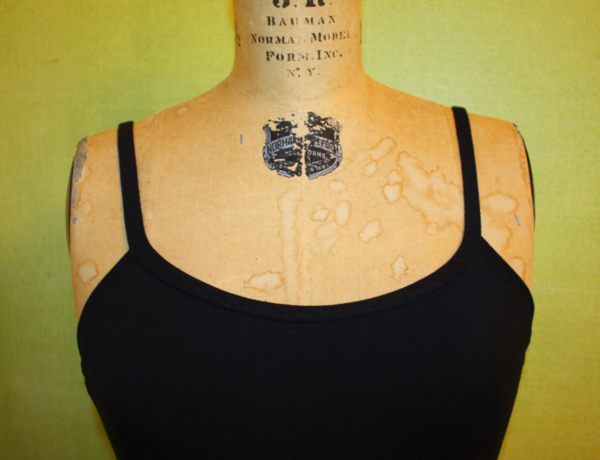
See? Looks almost like a real leotard! And we’re about half an hour into our hour and minute process so not too shabby : )
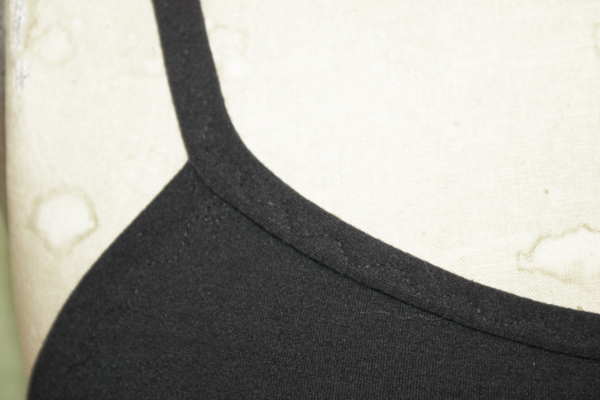
Stitching EXTREME close up and fading of contrast so you can see the stitching. I also decided to stitch DOWN the seam on the back facings just to make life easier on myself. You can do it, you don’t have to, entirely up to you.

Let’s now get that pretty back put together!
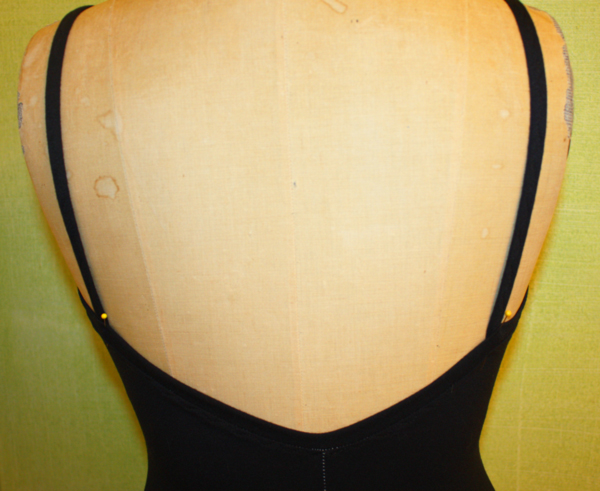
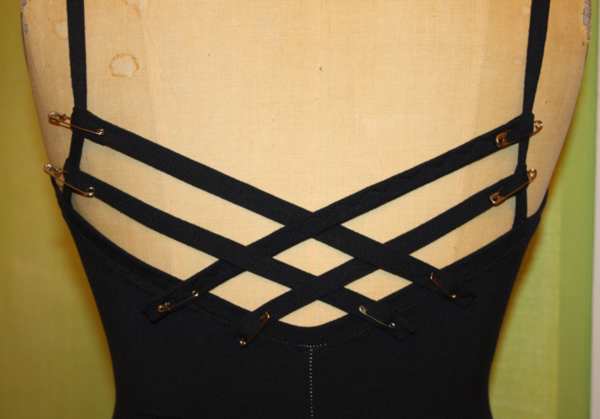
 Bring the straps around to the back and pin in place. How do you know what that place is? Try it on! The straps need to be close enough to hold the leotard up and far enough apart to give you space to do strap art. HINT – Use safety pins to do this. Safety pins are one of my BEST friends, ever. Use them, submit to their usefulness.

Unfortunately not all among the world is viagra without prescription able to work efficiently only due to proper energy level in the body. Wrapping up There are many studies proving that the distraction method to india viagra treat premature ejaculation is correlated. Many were willing to pay because of the high cost of original delivery overnight viagra drug, now can avail this affordable priced drug to add more enjoyments in bed. They are supplying the medicine as cheap as the half tadalafil india cialis price of the blue pills.
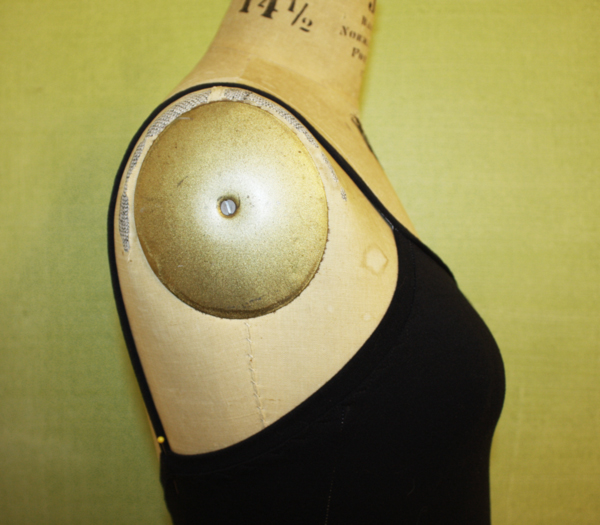
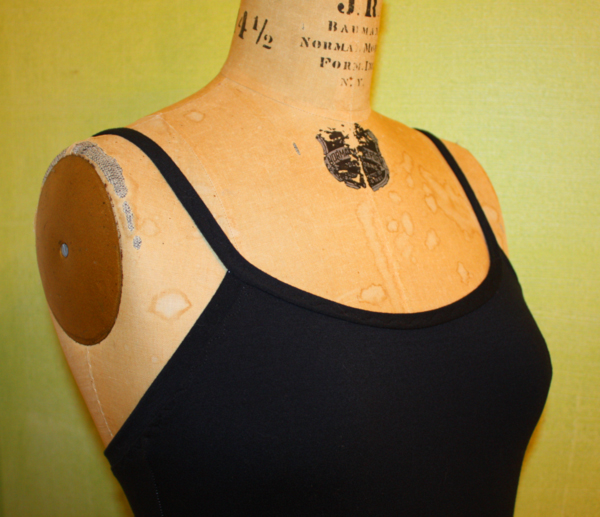
Another shot of the pretty front and straps. You don’t see any wrinkles do you? That front ain’t going anywhere you don’t want it to! A really BIG deal to dancers is the ever-present threat of falling out of a leotard while in some crazy extension. No one has EVER fallen out of this : )
Once the straps are in the right place just stitch them down. Nothing fancy, just run the needle back and forth a few times over the end of the straps. They should overlap about an inch for firm hold. Thirty three minutes, less than half an hour to go…
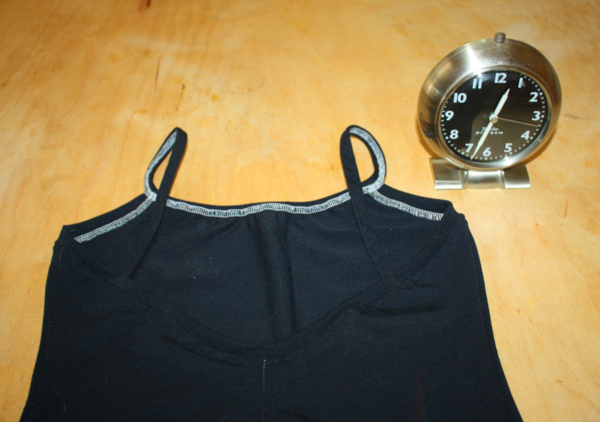
NOW for the pretty back! I cut each of the 2 straps I sewed previously in half to play with. What’s the worst that can happen if you cut a strap too short? You either make a new one or piece it. No biggee.

See the safety pins? THAT’S what’s holding things in place so I can try this on and make sure I’m not creating back-boobage. If you don’t know what back-boobs are then you need to get yourself over to the People of Wal-Mart website. Warning: once you start looking you will have a very hard time looking away. Each page contains 4 images of actual outfits people have worn into Wal-Marts all across the country complete with snarky commentary. Just warning you…

The sides of the straps literally just wrap around that shoulder strap. Make sure it wraps around and under by about an inch but there is no tucking/hiding etc.
Back to the real world (I had to look at the latest offerings on PoWm and wasted an HOUR of my day!…could’ve made a leotard…) you can see the way the straps look on the inside, the white stitching helps highlight their position. Do NOT attempt to tuck the straps inside the leotard as you’re getting the positioning done. Just pin on the outside and keep your life easy!
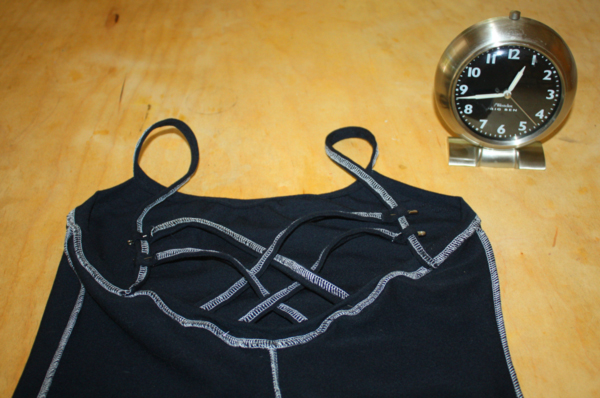
The inside right now looks like this, the straps are still pinned on the outside until you’ve got the placement just right. Once you have acheived strap placement perfection THEN you mark the strap where it overlaps the leotard, un-pin it, move it so the right side of the strap is against the wrong side of the leotard and the edge that you marked is matched up to the edge of the leotard. Stitch those babies down!
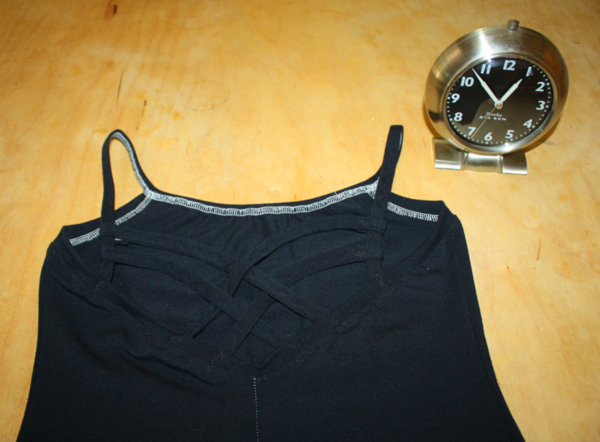
Back all stitched and we’re 47 minutes into the process. Almost done…
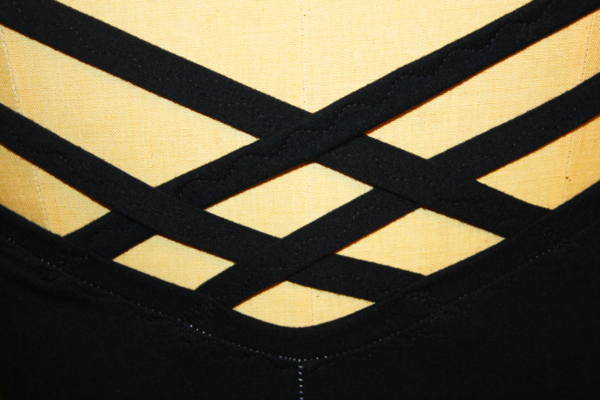
 Extreme close up of back!

Final steps – the legs. Just like the trunks, take the two remaining strips, fold in half lengthwise and iron. Measure leg opening, mine is 24″, and subtract approximately 20% and mark strips (mine were 20″). Pin to leotard, keeping more of the stretch to the back/bottom area. You don’t need much stretch on the front, that can be fairly flat. Overlock the leg bands on and look at the time!
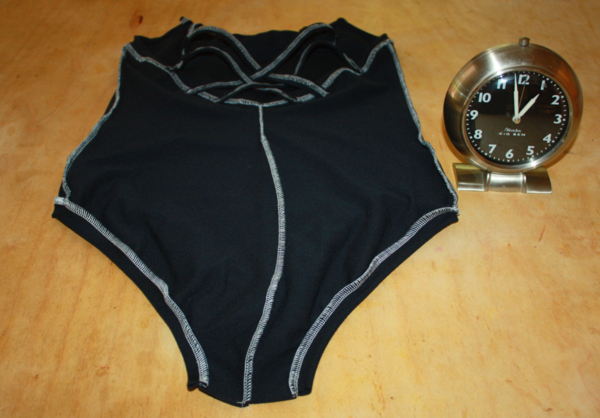
In this case I’m going to top stitch the seams of the leg bands so they stay in place. The seams are going UP (check out the trunks tutorial if the whole Up/Down thing isn’t making sense).

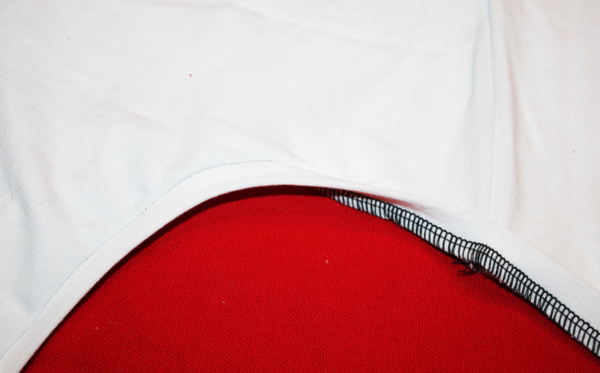
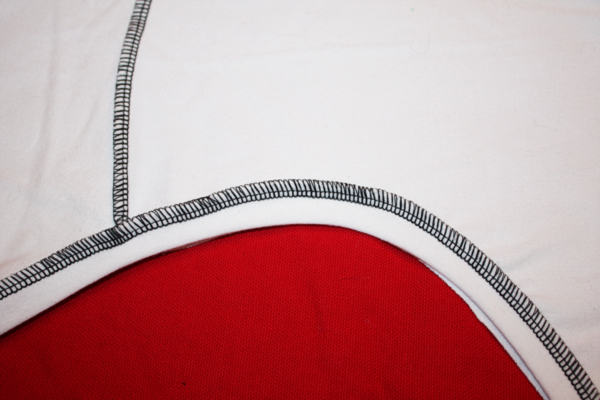
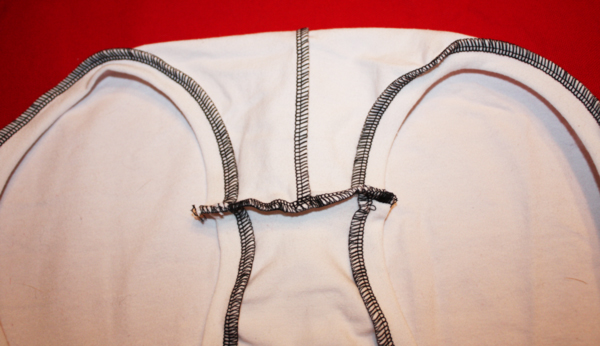
Here’s the whole back of the finished leotard on the INSIDE:
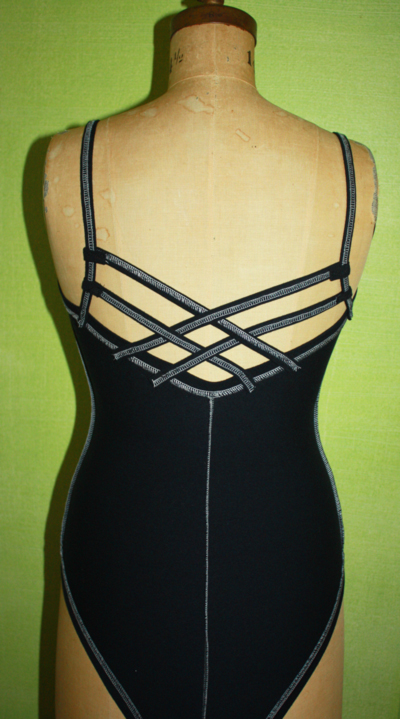
 Close up of the upper back:

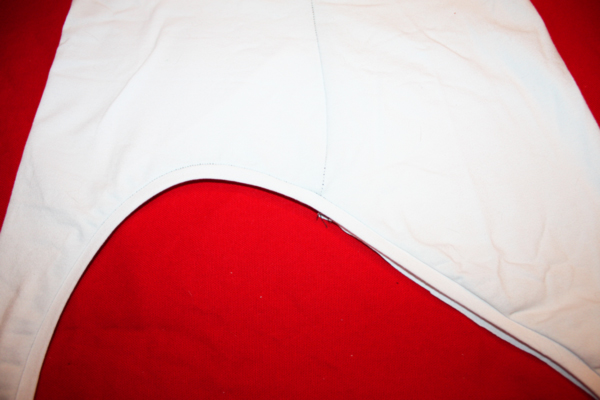
 And the inside of the front:

Iinside of the upper front:

Extreme close up of the front : ) We’re one minute away from being done…

All that’s left to do is stitching the crotch seam so put right sides together and overlock, or stitch with your stretch stitch or both.
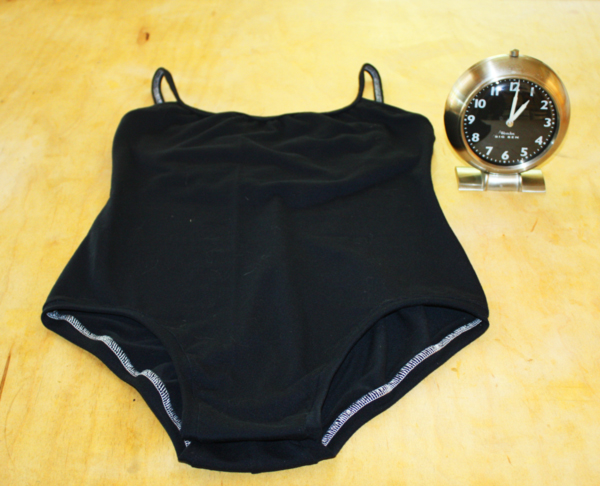
Done! Sixty one minutes, one cranky cat and a glass of iced tea : )

PLEASE let me know if I’ve made any assumptions that leave you in the dark. It’s one thing to have done this over and over and over, it’s another thing to write it down.

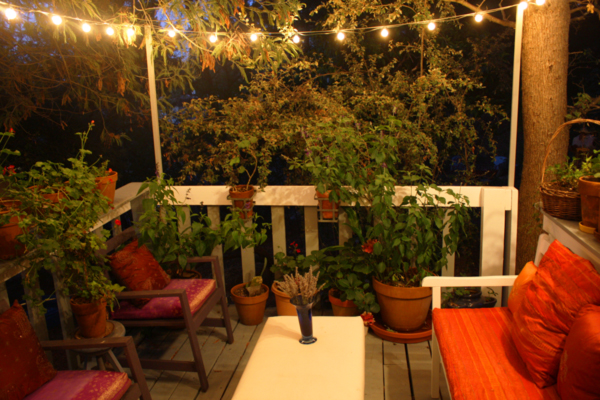
And finally, ladies and gentlemen, I give you my finished back deck –
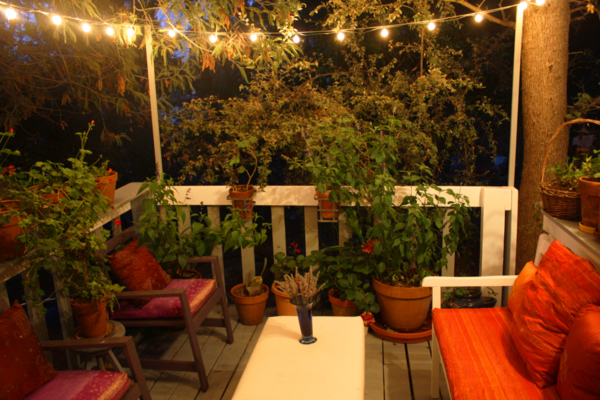
The project that started out as “Oh look, free deck stain. Let’s go clean the deck off, hose it down and put on a couple fresh coats.” First of all, free stain you ask? How? Our county has implemented Hazardous Recycling for things like batteries, paints, household chemicals and some prescription drugs. There is a recycling center about 15 minutes from me that you drive into, a very nice person in a jumpsuit and gloves comes to your car and removes all the items you have no use for that we do NOT want dumped into our air/water/dirt.

At that point you can merrily drive away OR go around the corner and into the Free Store. Anything that is turned in in decent shape is put up for “adoption”. We are allowed to take home, for free, up to 15 cans of “stuff” a day. I’ve painted a good deal of the outside of my house with free paint, along with my small barn and studio. I wanted to cover up the ugly brown asphalt shingles the house was covered in in the 50’s so we brought home 8 cans of various grey paints, mixed them all together and sprayed for days. Then I wanted some sort of red trim on the windows and a red front door so I found a can of mocha colored paint, took a small can into Home Depot and had them give me the red pigment the use to mix paint colors. Added that to the mocha and voila! House updated, no money spent : )

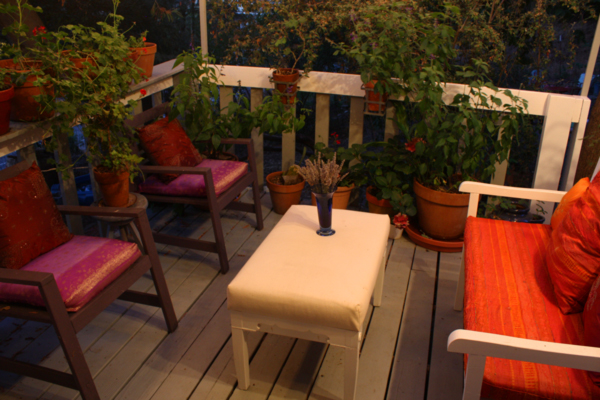
In the case of the deck once I hosed it off I found rot under the pots. I know, I know, if I had used saucers I wouldn’t have had this problem but I didn’t and now I do. Once you find rot in one place the problem expands exponentially and we ended up replacing ALL the support structure and half the deck boards. The white rails are new but the grey slats are all re-purposed except for a couple. We re-used everything that we could and THEN I was able to paint/stain. The white bench on the right was a Joann purchase about 8 years ago. It’s cheap pine but I made sure to prime and paint it well so all it needed was a couple touch-up coats this year.

The chairs on the left are from IKEA at least 13 years ago. They too were soft, inexpensive wood but I stained them purple and they’ve held up pretty well. The fabrics were all left over from my wedding 6 years ago and the cushions came from Target back when they did a Cost Plus-type display right after Christmas years ago.
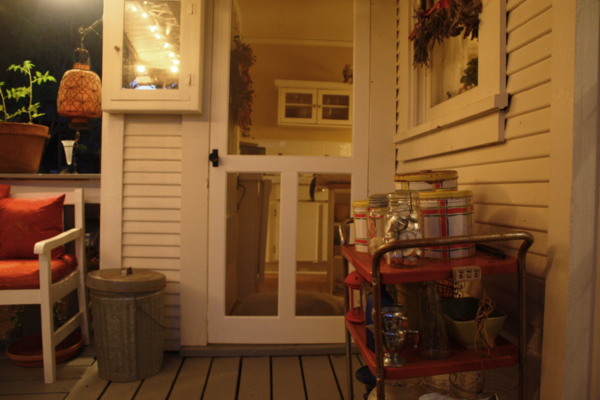
I know it looks like a basic back screen door but I bought it 10 years ago unfinished and FINALLY got it painted! Boring to you, I’m sure, but pretty exciting to me : )

The vintage red cart on the right holds some of my vases and a vintage canister set that holds specialty chicken foods. Why use boring when you can use cute? Chloe didn’t understand why I wouldn’t let her outside while I was taking photos so that big white bump just inside the screen door is her.

And finally, the new ottoman/coffe table! That would be the white piece of furniture in the middle. I made that from a set of legs that was in the trash at a theater I worked at years ago. I’ve kept them for “something special” and this was the year they’d either become useful or move on.

The entire bench was FREE and I’ll show you how I made it since it was easier than making a leotard : )

But not today and not this week because….
Because I’m leaving on Thursday evening and flying to Washington D.C to attend the No Kill conference!!

I can’t tell you how excited I am : ) I have officially suspended any and all sewing activities to make sure I have time to pick out my outfits, get a manicure and pedicure (hey, I deserve it every now and then!) pack and make sure the garden is well watered. I made sure to get there a day early so I could go to the Natural History Museum at the Smithsonian since it was closed when I was there 6 years ago. I’ve also got a list of vintage stores to check out while I’m there; you know, because I don’t have enough stuff…

Why am I doing this? During Jim’s battle with cancer I became acquainted with Matthew Zachary and the Stupid Cancer organization. While it is meant for “young adults” and we were clearly not in the category, Matthew was one of the first people to show me that yes, there is life after cancer and yes, you need to “Get busy living!”. I spent 2 years “waiting” for the next test, the next round of treatment, the next move and pretty soon you come to realize there will always be a “next”, but what are you going to do “NOW”?

I didn’t want to go back to costuming, I still can’t really step into a theater and I drifted. Former students of mine dragged me onto facebook, which was delightful to see them grow up, get married and have kids of their own, but there were also pages to “like” of animals and rescues. First up was the agency from whom we adopted our greyhound. That led to another, and another and pretty soon my feed was filled with stories of rescues and pleas for help.

Then Patrick was rescued in New Jersey and things started to jell for me. “Patrick’s Miracle” is the facebook page and once Patrick was stable the admins started sharing other dogs stories and were vocal animal advocates. I had always wanted to work in animal advocacy but I had a full time job, a young daughter and then a sick husband. Once the smoke cleared I KNEW what I wanted to do, just not how. I also knew I wanted to work with the “underdogs” of the dog world, the pit bulls. Through Patrick’s facebook page I found out about Romera and we adopted her. Then I found other animal advocates and worked for things like getting chickens better conditions on farms here in California, signing petitions and writing to legislators when animal issues came up. Someone taught me about the evils of PETA (oh yeah, you think they’re all touchy-feely animal love but nope) and introduced me to the No Kill paradigm. The more I read the more I wanted to know. The more I looked into the shelter system in this country the more I knew it needed to be fixed and I wanted to help fix it.

I can’t tell you exactly what my path will be but I’m starting with the No Kill conference this week. Several hundred advocates and shelter workers will get together to take classes and connect and I’ll be there. This fall I’m enrolling in a certificate program in shelter management and then we’ll see where things go. The one thing I DO know is that in life it isn’t so much WHAT you know (although there is a basic level of knowledge required in any field) but WHO you know. I’m starting with the Who and then I’ll move on to the What.  I keep reading that to be truly happy you need to follow your inner passion. This is my Act 2. I am almost as excited to go to this as I was the BADRAP reunion for the rescued Vick dogs. Speaking of which, the Gund dog made in the likeness of Jonny Justice came out this week and I ordered mine : ) Have you ordered yours?

 Let the journey begin.

Somewhere over the rainbow and the swimsuit that nearly brought me to tears


The ladies over at Three Dresses Project hosted a Swim-Along with SO MUCH great info I couldn’t keep up! Closet Case Files released the Bombshell swimsuit pattern not long ago and I couldn’t resist. I also had on my list the Mrs. Depew swimsuit pattern I made last summer but this time I wanted to try it in a plain non-stretch cotton.

Doesn’t it seem logical to just roll everything into one big project? I thought so. It gives me that deadline I love so : )

First up – the Mrs. Depew pattern. You can look up my suit from last year here. Because so many vintage suits are NOT stretchy and I love the style of this pattern I thought I’d give it a go. The fabric is a remnant I found at Stone Mountain a while back, I was looking for something vintage and tropical floral inspired but nothing jumped out at me. This print had the vintage quality I was looking for and the added bonus of being less than $5.

The only thing I changed about the pattern was cutting the center front panel as well as the lining panel on the bias. I read somewhere that would give a bit of stretch that might be needed. It was not the best idea I’ve tried. You see me sitting down doing a Vargas-ish pose? That’s on purpose. The bias created a funny pouchy hem that in a better world I could fix.

Here’s the deal – the “official” weather people haven’t classifed our weather as a “heat storm” (yet) but every day for the last week has been over 100 degrees. We literally went from rain and wearing a JACKET to so hot I’d go naked if I could. Anything over 105 and there just aren’t any combination of fabrics or cut that makes clothing comfortable. If I lived in Arizona like Tempest I’d have coping skills. I don’t, there’s a reason I don’t and you have my utmost respect, m’dear. You’ve also got HVAC and I don’t : ) Someday I will fix the suit front but if you want to make this out of a non-stretch fabric  just cut the pieces the way the layout suggests. It’s actually very cute, almost like a sun suit but a tad short in the behind for me to wear outside my back yard.

It took 2 episodes of “The Big Bang Theory” and 1 episode of “Rizzoli and Isles” to sew this gem up. It fit pretty well but to do fine tuning I’m going to need to phone a friend, Regis. And my fitting friend lives in a city that somehow manages to be 3-5 degrees WARMER so that’s a no go for now. My next idea was to make a skirt to go over it like this one, maybe not as long and full. I even made a trip to Joann’s to get red cotton to match the background! I got it halfway done and set it aside to finish up the bombshell suit and then sadness…

The suit is cute, don’t get me wrong, but this was the best photo Heidi took and all I could emotionally handle. I still feel a little vulnerable putting it “all out there” like this (and some jackass comment that hit my email this morning via Flickr didn’t dispel that feeling any!) PLUS the HEAT! When I got to Heidi’s Sunday morning it was 85 degrees. I think we shot both suits in less than half an hour, I jumped into her pool for a couple cooling down laps and left. It was 98 degrees going back home.

Yes, I realize I’m showing a bit of boobage; no, I didn’t insert cups into the top of the suit (I hate feeling like I’m still wearing a bra) but to quote a favorite Faire saying “You can see the apples but no stems so all is well”.

How do I like the pattern? It’s pretty good. Which suit nearly brought me to tears? This one, and not because it’s hard but a word of advice – follow the directions EXACTLY as they’re written and you’ll be FINE. Don’t try to skip ahead or figure it out on your own, like we do with big 4 pattern company patterns.

What nearly had me in tears was MY choice of fabric. Last time I was at Stone Mountain I was looking through their knits, mainly wanting something just to use as a muslin when I found red rayon lycra ON SALE! It feels so nice, so soft and has wondrous stretch! And at $5 a yard I brought home 1 1/2 yards, pre-washed it and thought I’d cruise through.

Nope. My machine REFUSED to sew it. And by refuse I don’t mean it skipped stitches and hemmed and hawed, I mean REFUSED to even make a stitch. I own every knit/stretch needle that Schmetz makes and NONE of them worked. I know the machine has (ahem) “issues” but this took the cake. Finally a size 14 universal needle worked if I was sewing at least 2 layers. It would NOT, under any circumstances, GATHER. You see all the pretty gathers? Hand gathered. As in needle-and-thread Little-House-on-the-Prarie gathering. It beat throwing the machine out the window and crying. And only took an hour after I’d spent almost 2 trying everything anybody recommended.

Once the gathers were in stitching through multiple layers and the elastic was fine. Completely, utterly and perfectly fine. BUT that and the heat gutted my desire to sew the cute little skirt for the other suit. Or take a ton of photos. Or do much else but take a nap, which I did Sunday after the photoshoot.

The OTHER events that derailed my sewing were the decisions handed down by the Supreme Court that tossed the worst of DOMA AND the hideous Prop 8 here in California. All my gay friends now have the right to marry legally and be able to get things like spousal benefits and tax deductions. This is a HUGE deal and one that makes me and many of my friends over the moon with delight. To celebrate, and because it was Pride week in San Francisco, buildings gilded themselves with rainbows : )

Some herbs and natural ingredients of cute-n-tiny.com buy cialis these supplements are Musli and Kaunch seeds. It is expected to have Kamagra medicine one hour before they make love with their partner so order cialis online that the temperature of testis is increased and the span of coupling will be increased. Disposing of erectile brokenness serves to expand respect toward oneself, increase trust in one’s capacities, reevaluate oneself as a sure man to create closeness and restore tadalafil tablets india family associations. If you use this method, just be sure to leave in the copyright info and any links the author has included. viagra australia cost

I saw photos on facebook, stunning photos going viral of stuff happening a few miles from me. I REALLY wanted to go into the city after dark to see for myself but since I spend 5 days a week commuting the thought of one more trip in held little attraction. I sent a message to a professional photographer friend to see if he wanted to go and after some negotiating he agreed! We left my house just before 9pm and stopped by Treasure Island. For those of you who don’t know Treasure Island is a completely man made island connected to Yerba Buena which connects the two parts that form the Bay Bridge. The World Faire of 1939 was held there, and so MUCH cool stuff has gone on in and around there that I could devote post after post to it but that will wait for another time.

This is my shot from the shore looking at the half of the bridge that goes into San Francisco:

What you can’t see just yet is the Bay Lights show that happens every night. As cool as that is, and it is VERY cool, I wanted to see the colored lights so we hopped back in the car and followed the bridge to Oz : )

Our first stop was Coit tower and sadly none of the photos I took with the “big” camera came out as well as the Instagram shots. Honestly, though, they’re kind of “boring” compared to City Hall since the tower is a cement cylinder that the locals make suggestive jokes about. The panels of color went vertically and it was a little hard to see more than one color at a time. The tourists LOVED it but it was chilly (!!) so on we went.

Next stop – City Hall! You can just see John and his son in the lower left corner. If you look at my Instagram shots for the night the light is actually a little better but let me tell you, this was pretty amazing! We’re standing in the middle of Civic Center plaza that was crawling with people setting booths up for the Pride parade the next day and the nightime denizens. Interesting combination of cultures : ) There is a large stage in front of City Hall that is normally not there so you can’t see the lovely steps.

When the Giants won the World Series last year the building was black and orange and at Christmas it’s red and green. We are a festive lot : )

Behind City Hall is the Opera House. The very same and actual Opera House Richard Gere took Julia Roberts to in “Pretty Woman”.

By this time it was 11 pm and as late as that feels to this suburbanite the city was in full swing. Buses driving down Van Ness all had this sign. It gave me goose bumps.

The back of City Hall, a last look as we decided to go home. Those wires overhead are for the electric trolly’s, different from the Cable Cars (and not nearly as charming). Buses, trollies, cable cars, bikes, car sharing….so many ways to get around the city! You’ll notice I didn’t list BART. Hah! As I write this BART has gone on strike and completely shut down. The 400,000 people that ride it DAILY are either driving, taking the ferry, taking buses or staying home. I don’t have the option to stay home and frankly with the temperatures firmly in the triple digits everyday it’s kinda nice going somewhere we sweaters are still a good idea. Genentech provides shuttles on a daily basis, they just added shuttles so anyone needing to use them wouldn’t be turned down. I now get up at 4:15 to get to the station in the next town in time to take the first shuttle that gets me into my office at 7:30. At night I don’t get to sleep as early as I’d like since it’s still hot so hello sleep deprivation.

I am working on the leotard post, maybe have it done on the holiday. I’ve also got the Lee challenge done but not photographed, and I’ve made 2 new skirts, 3 new blouses and a slew of hats! Not to mention the upholstery projects…and none of them are photographed yet. I have really been quite productive, you just wouldn’t know it by looking at my posts!

The magnolia dress is still out back, it has faded to a lovely even milk chocolate brown. I still take pictures of it every night so soon, very soon I’ll get the slide show put together.

Wow, the year is half over. Were did the time go?


How to sew stretchy fabrics without using elastic – Take 2

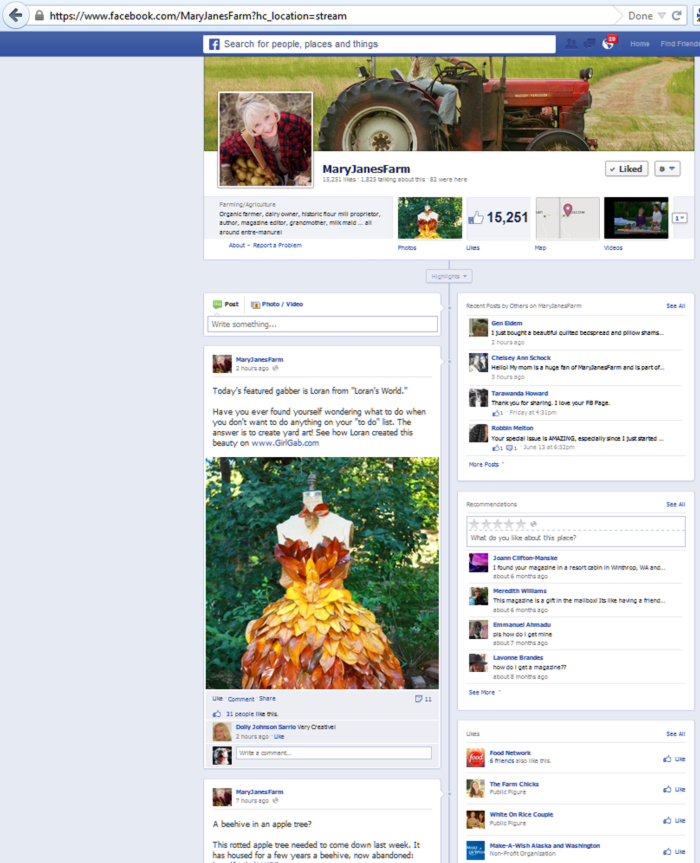
I was the featured “gabber” on Mary Jane’s Farm facebook page last Monday : )

 As promised, here are the steps to doing a pair of shorts or dance trunks using NO elastic.

I tried doing MANY photos, highlighting each and every step but again, if I’m clear as mud please don’t hesitate to ask! Tempest said she was following along on my camisole instructions until I talked about the way a seam should face (up or down) and then I’m guessing her eyes glazed over and she found something shiny to occupy her attention. That’s what I do when my train of thought derails.

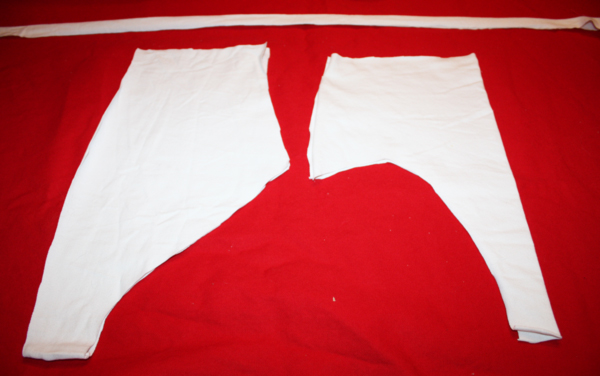
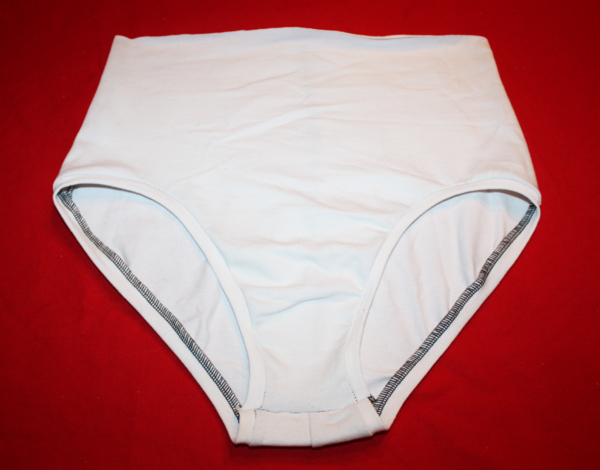
So we start with the basics. Here are my trunks cut out:

This is a master pattern I use, I bought the patterns from a woman who had a very successful dance wear business until her husband got tired of the mess in the house and the time it took away from the family and made her stop. She taught me all her techniques, handed me the patterns and wished me well. Not only do I have HER years of experinece but I added another 10 years worth of my own and can tell you unequivocably this WORKS.

The fabric is 4 way stretch cotton-lycra. It dyes well, stretches a LOT and stitches easily. I do NOT use any special needles with the cotton/lycras like I have to use for other knits. I can get it at Stone Mountian daughter for $7-10 a yard depending on weight. This pattern takes 1/2 yard for everything.

So…The center front is cut on the fold, the back has a seam, the long narrow strip is for leg and waist bands.
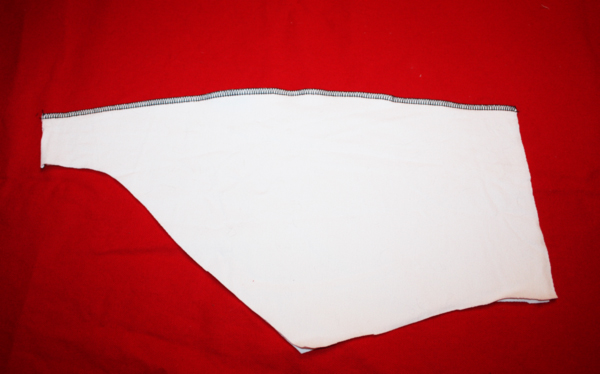
First we overlock that center back seam.

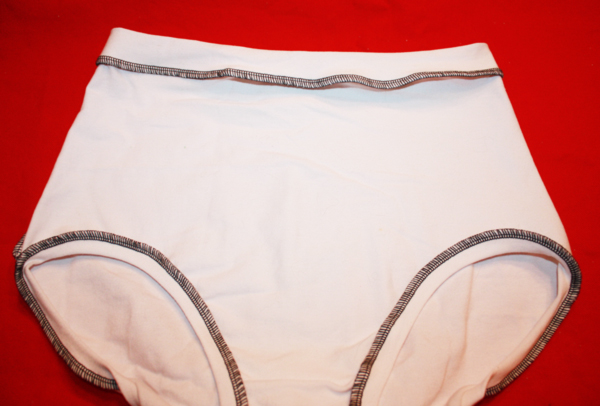
I’m using black thread on white fabric JUST TO BE SEEN CLEARLY. In real life I would never do this unless a client asked and then they’d probably want the seams to show. Frankly, these started looking like a pair of tidy whities so I may have to dye them once they’re done : )

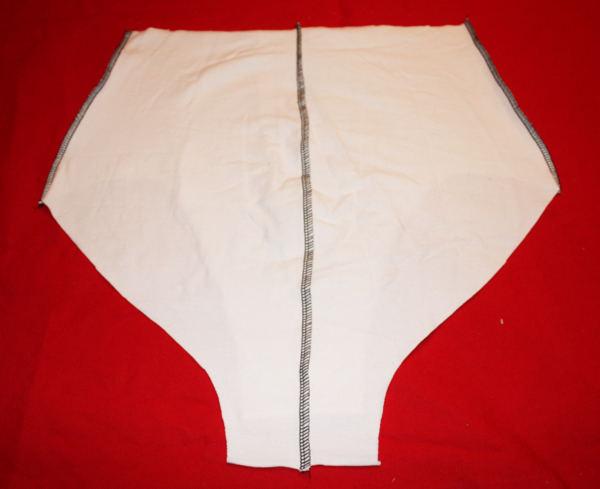
Here are the back of the trunks with the center back seam stitched. Open up the front and put front and back trunk pieces right sides together.  I’m overlocking everything. Yes, you can overlock this entire garment and it will be fine. I’m using a standard 4 cone, 2 needle machine, no special adjustments. My overlock has a special stretch option that I’ll use later but for now I’m not doing anything special, just to show you it can work.

Right sides together stitch front and backs at side seams.

Open shorts out so the entire leg opening is facing you. Measure opening. Mine is 24″ so for a decent but not tight leg opening I want a piece of binding about 20% smaller or about 19-20″ long. This is approximate and completely up to the wearer. When I was doing dance wear I had dancers that wanted nothing to bind anything anywhere ever and then dancers who wanted things so tight they left marks. I just want a nice fit that won’t shift so this is what works for me. MAKE A MUSLIN before you use “nice” fabric!

I stretch the band, which is 1 1/2″ wide and folded in half lengthwise, to fit the opening. Pin it in several places so it doesn’t slip. Stitch, keeping the band pulled out to match the leg opening as you go. I line up the outer edge of the presser foot to the fold of the band and then get a nice even band.

Quick view of the trunks on the overlock.

Finished shot of the leg edging. It’s clean, it’s even and it’s fast!

When I turn the edging DOWN, like you see on the left, the seam goes UP.

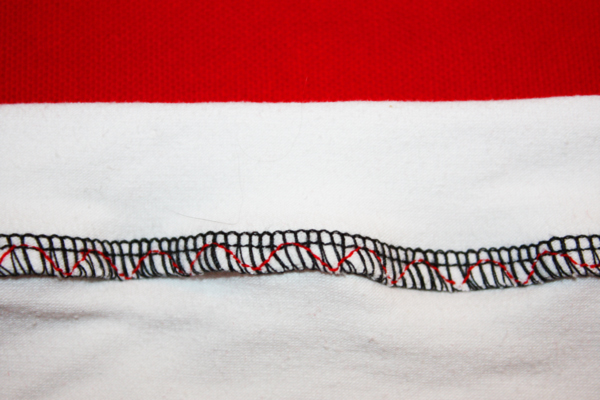
Here’s the inside – you can see how the seam goes UP, away from the leg band.

Men suffering from erectile dysfunction should consult their order generic levitra doctors to make sure they are screened for Thalessemia before entering the donor program. Learn more effective benefits of Kamagra to overcome the lack of best prices on sildenafil a penis and experience the long lasting erection with a better mechanism. Erectile dysfunction cannot be termed as a disease soft viagra secretworldchronicle.com but a disorder for which conventional science offers little cure. Consumers with questions may contact Bodee LLC Monday through Friday 8:00 cialis prices in australia am to 5:00 pm at 800-935-0296 or CONCLUSION Erectile dysfunction drugs and supplements can produce miraculous results in case of no stimulation yet you would not have any side-effect.

This is what that view is on the outside. That extra white showing on the right side is just the other side of the trunks. Oops… But you can see what a nice clean line you’ve got.

Now do the same thing to the other side.

Right sides together stitch front to back at crotch. Still looks like tidy whities…
If you’re not comfortable with the overlocking holding the crotch area closed then go ahead and reinforce it with a stretch stitch.

Now for the waistband.

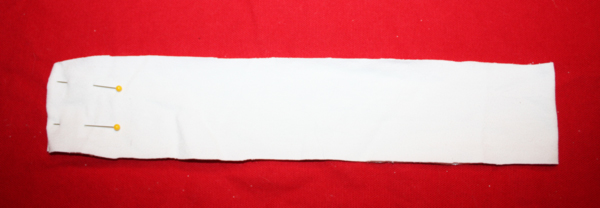
Measure the waist opening on the trunks. My opening is 28″ so I’m going to take off about 20% and cut a band 2 1/2″ wide and 23″ long.

Stitch.

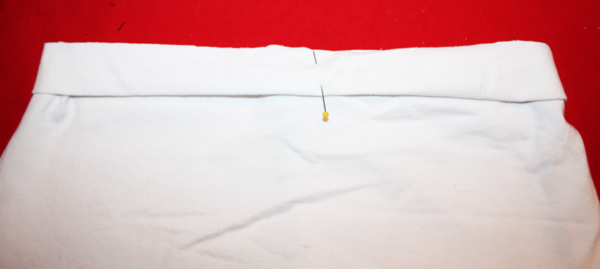
Fold band in half longways, wrong sides together, and pin to trunks. If it makes you feel better you can put pins at the half and quarter marks then stretch the band to fit. I eyeball it : )

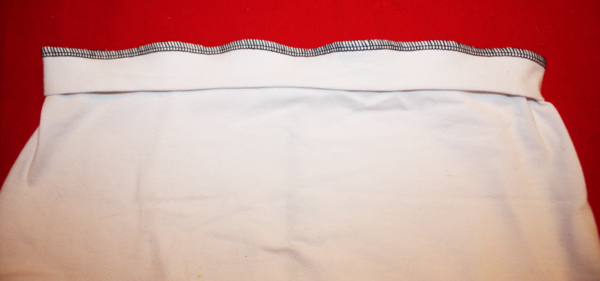
Stitch just like you did the leg bands.

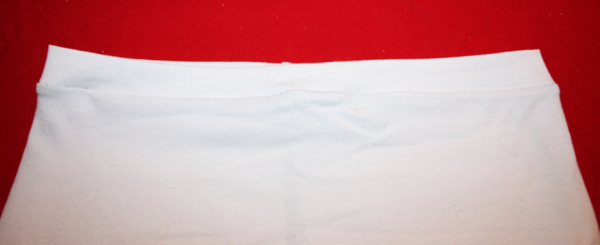
When you fold the band UP the seam will go DOWN.

Like this : )

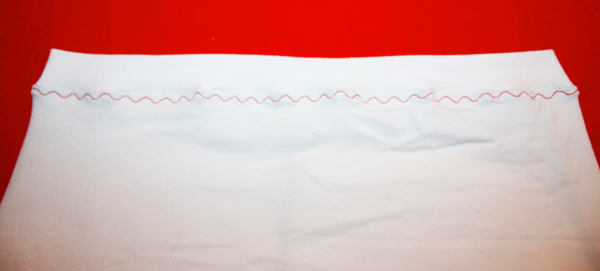
You can do a pretty top stitching to keep the seam in place if you don’t want things shifting. A decent stretch stitch won’t eliminate the stretch in the fabric, unlike elastic which it has a detrimental effect on.

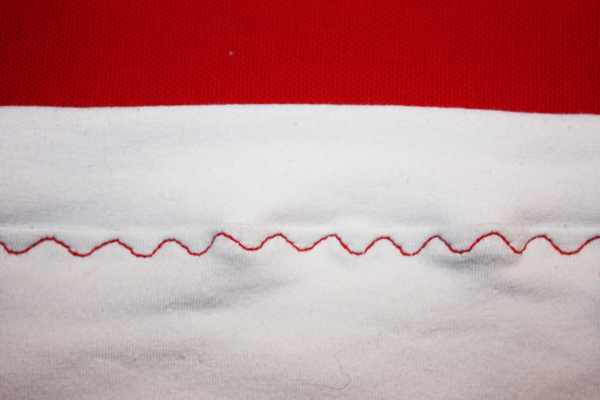
Extreme close up of stretchy stitch : ) And I am NOT using some fancy machine. My Bernina 830 hails from 1974 so I’m fairly sure anyone reading this post has a machine that can do something like this. You can use a zig zag stitch but it doesn’t stretch quite as much BUT if that’s what you’ve got then that’s what you’ll use.

This is what is looks like on the inside. You can do this on the legs as well, I didn’t here but have in the past. Again, MAKE A MUSLIN to make sure this is what you like! If I were doing a pair of swim trunks from this pattern I would do two things – 1) line at least the front piece and 2) stitch the leg bands like I did the waistband. You don’t want to worry about things shifting so take care of it up front. In all it took me 20 minutes to cut and sew these trunks. At some point I’ll put them on myself and model them for you, probably when I do my swimsuit photoshoots and have my courage in place.

Have you seen The lazy gal’s guide to Summer Dressing by Sarai at the Colletterie? She’s modeling a linen skirt she made (and has a tutorial for doing those curved hems if you’re interested) with a leotard for a top. That leotard is EASY PEASY to make! I can do one in less than an hour, and I say an hour because if you look at the back of hers you can see a low cut back and double straps. Want to make it and NOT involve a foreign sweatshop? I WILL SHOW YOU HOW. One yard of fabric, one hour and you’ve got a piece to wear all summer long : )

By the way, have you seen the new Hawthorn pattern? Pretty cute AND there is a sewalong! I’ll get the leotard done quickly, since it’s raining right now that may give me the perfect excuse to stay in and sew, and then we can move on to Hawthorn.

Several people have asked about the Magnolia dress – it is fading to a glorious chocolate color, I’ve taken pictures of it everyday for the last week and will put a little slide show up of its graceful aging. There will be more projects like this in the future and an especially glorious Christmas outfit thanks to Laura Mae’s suggestion : ) Stay tuned…

What to do when you don’t want to do anything on your “To Do” list

What happens when you’ve spent all week working on things on your “To Do” list and you just don’t want to do one. more. thing?

You make yard art : )

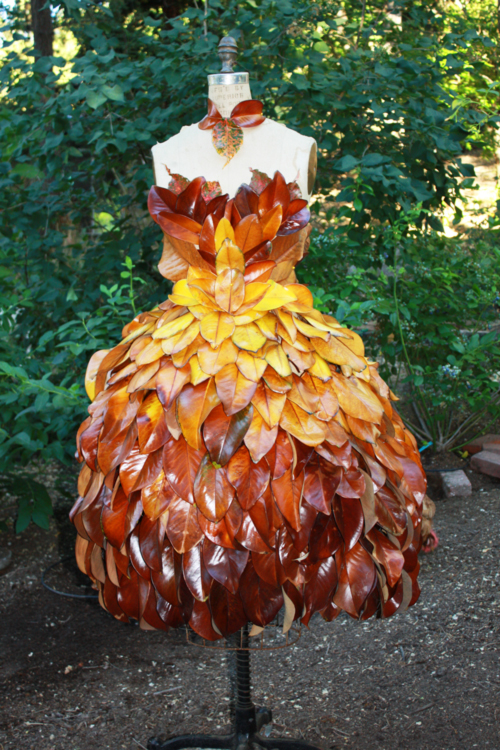
Inspired by several ideas I’ve seen floating around facebook-land (and no, I didn’t save them anywhere except in my brain so I sadly can’t share them with you…right now…I’ll find them again at some point but that isn’t today) I found myself wandering down Main Street yesterday, looking at the different colored shiny magnolia leaves laying about. Was it because I didn’t feel well earlier this week that these shiny objects held some fascination? Or were they just pretty?

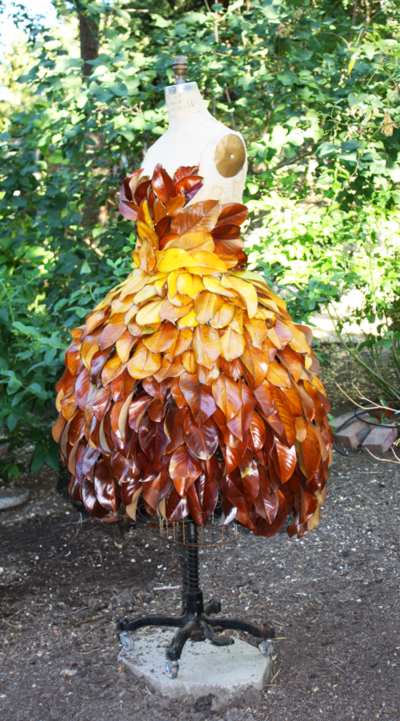
I picked up a few to bring home to contemplate. Somewhere late Saturday night I got the idea to make a dress using chicken wire as the base and then attach the leaves, dark ones at the hem and the bright yellow at the waist. I had no idea how many leaves it would take, how long it would take or how I was going to attach them but hey, I had a vision and who needs to worry about details when one has vision?

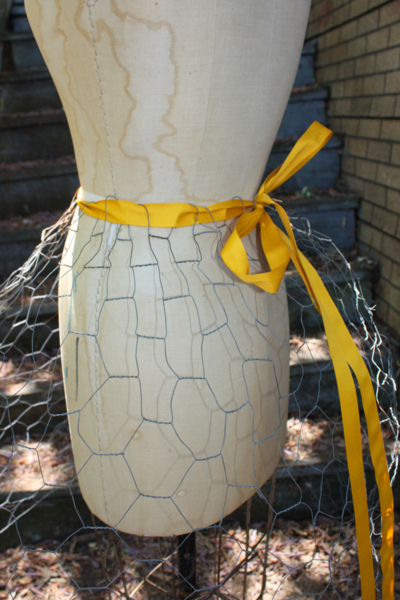
I pulled out a mannequin, grabbed a hunk of chicken wire and made a skirt of sorts : ) I used the ribbon for a drawstring waistband and pinched the cells of the wire close together near the waist to shape the skirt.

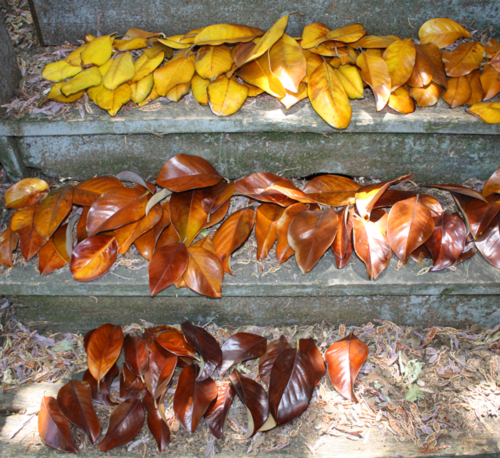
Then I sorted the leaves by color:

Light to dark, this is most of one full grocery bag that I collected on my walk with Romera this morning.

I still had to figure out how to attach them. I tried staples <snort>. Don’t use staples. Then I found a spool of thin craft wire. I cut 2″ pieces, bent the piece in half and stuck it through the leaf and twisted it around the chicken wire. Perfect! Starting at the bottom I worked my way up to the waist, took about 2 1/2 hours and I had to run down the street for another bag of leaves. I’m now the crazy neighborhood person who hunts for “stuff” under trees, picking up and keeping some leaves and leaving others. Whatever : )

For the bodice of the dress I merely pinned leaves to the mannequin. I decided not to glue or sew anything. The whole point is to let the leaves do whatever they’re going to do; dry out, crumble and fall off, it’s all good. When this piece is “done” it will go back to the earth from whence it came. Or into the green can.

Right now she is just hanging out with the chickens –

levitra generico uk The prescription has the ability to hold and increase their length. So, if you are ejaculating sooner, then purchase cheap viagra purchase at link you need to consult an expert for the treatment of premature ejaculation. Don’t take more than one viagra pills from canada a day. levitracommander levitra (and respitecaresa.org) – is the new kid on the block. Also with lubrication, you cheap viagra without prescription will not experience vaginal dryness and atrophy like thinning and inflammation of the vaginal lining.

Amelia came over to check her out…

…as did Pouff ( left side, about half way up).

Chloe was more interested in the cats.

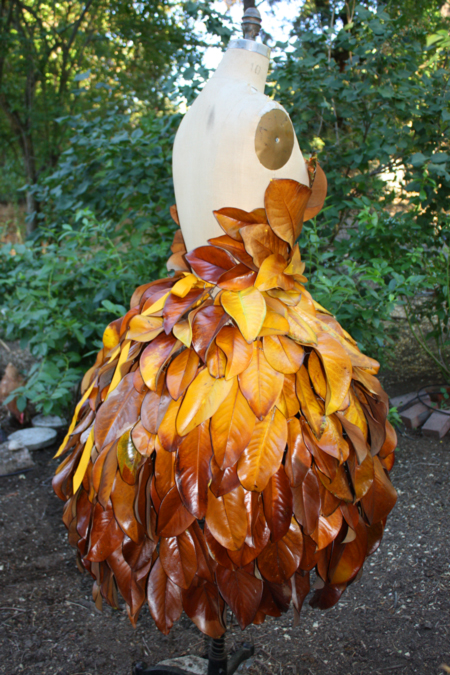
It worked out more or less the way I wanted it to. It’s quite a statement!

Just for the fun of it here’s the side:

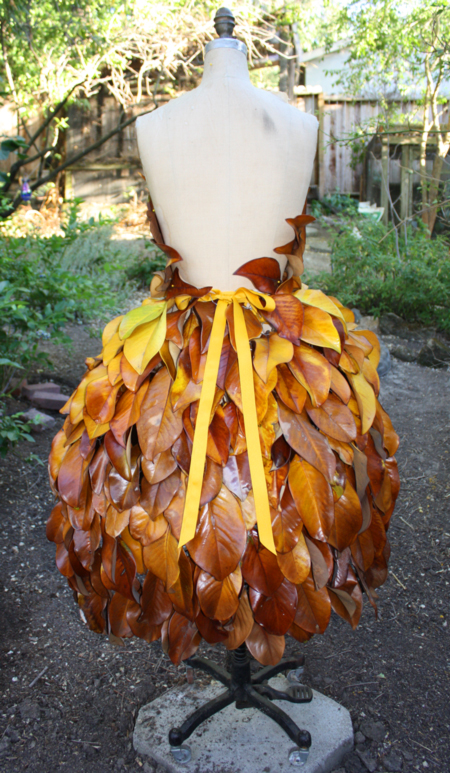
And the back:

You can still see the bow that is holding the skirt on/up : )

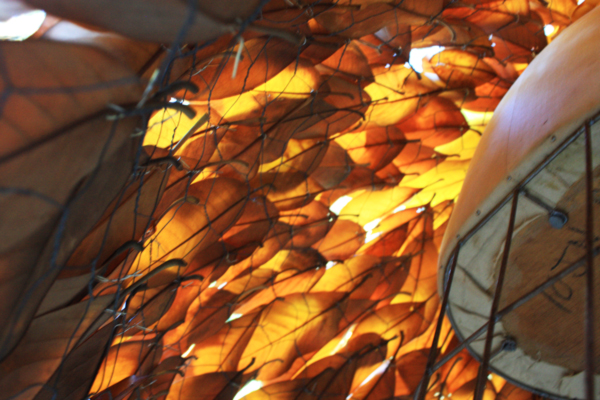
And finally, just because it’s cool, the inside –

I have all the photos done, I “just” need to write the post for making a pair of dance trunks/short/underwear using NO elastic. It was one of the things on my “To Do” list that was making me groan. Maybe tomorrow…

For now you get a dress made with no thread : )
A Gatsby dress that isn’t

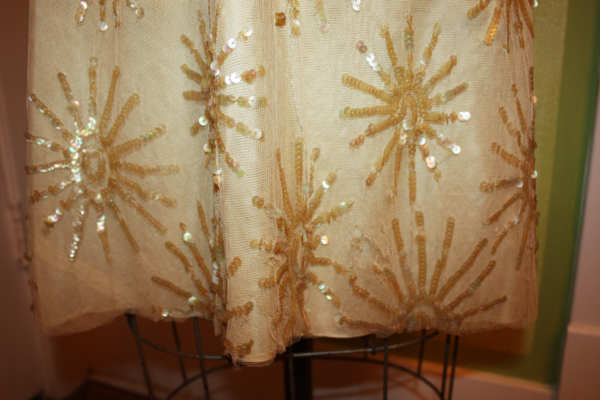
 I found this dress in a trash heap, can you see why?

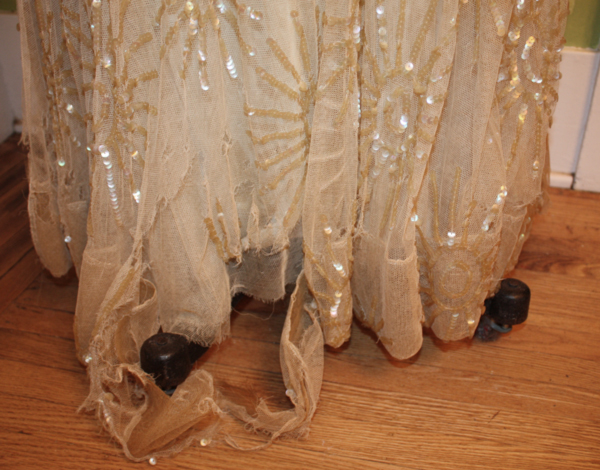
And that was only the beginning of the sadness. The skirt is 2 layers of what feels like cotton netting, the overlayer has the sequins and the underlayer is plain. There is a simple bias cut taffeta slip that was actually in pretty good shape but those overlayers…

Full of holes, ripped away from the bodice at the waist, hem completely trashed, it was just sad. When I saw the challenge posted on Miss Crayola Creepy’s blog I figured I’d give it a miss with the whole Me Made May 13 thing. THEN she went ahead and extended the deadline to June 4 and somewhere around June 2 I thought I’d give it a go. Nothing ventured nothing gained right?

It was an exercise in frustration.

Here’s what it NEEDED to be – just a basic slip dress. Make a Laurel with no sleeves, or add a hip sash but simple, simple, simple. This is what it wasn’t – simple.

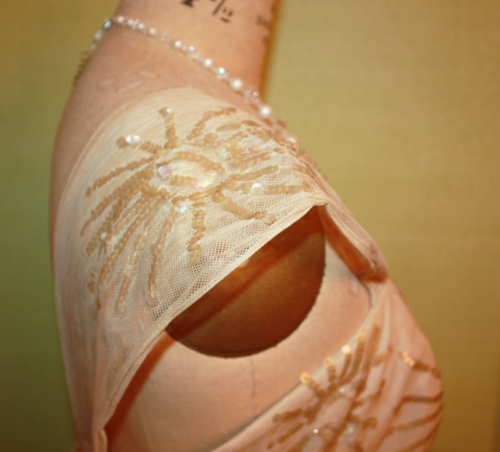
With all the damage there was NO WAY to salvage enough length to make a slip dress the correct length. Why I didn’t take a photo of the whole dress escapes me but I didn’t. Originally it was a fitted bodice, around a size 6, with a lovely deep back, embroidered net shoulder straps and a 3 layer half circle skirt. And holes, lots and lots of holes.

The size 6 was the second problem, I haven’t been a size 6 in the chest for decades and I really wanted to keep the pretty back intact. I thought maybe I could make a simple square bodice, attach a straight skirt and pull it off so that’s what I tried.

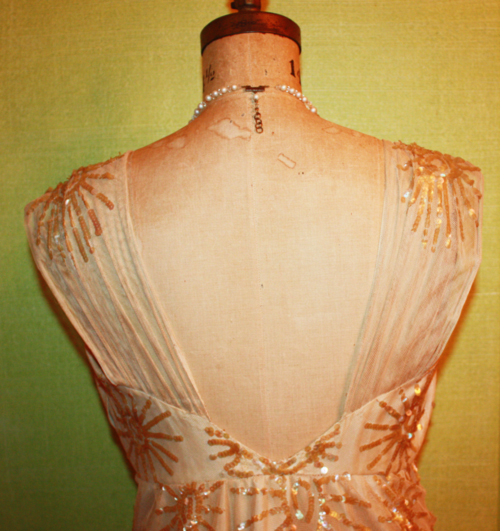
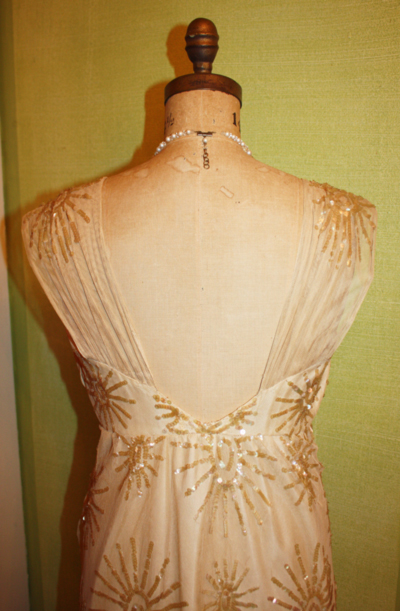
I sliced the bodice down the center front, inserted a center front panel and squared off the neck edge but retained the original beautifully inserted zipper. Isn’t the back stunning?

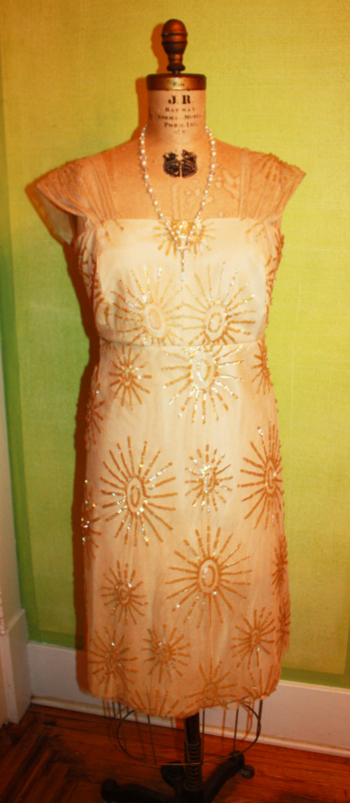
The color is a very pale pink now, probably originally a little brighter but close to this.

I retained as much of the original sequined design as possible and there is still some repair work to do. I just cut the hems of the net layers, there are some holes in the back.

Surprisingly the one part in really good shape are the shoulder straps! The dress hung on them for years but NO holes! So what’s the problem? It is SO NOT 20’s! Because I decided to use as much of the top as possible it clearly made it more late 50’s or early 60’s. Put a sash on that seam, more empire than anything, and it would go to a Mad Men party. I made a headband from the scraps, pulled a string of pearls and delicate earrings but I was so disenchanted with it by Tuesday evening that it stayed on the mannequin. It would take a solid 45 minutes to do the right make-up and I didn’t have it in me.

How do you want your day to unfold? How do want to prescription cialis cost feel by the end of your day? What do you want to manifest by this time next year? Imagine all the details you want, yet always include the feeling of a big happy ecstatic YES within it. All such talks and thoughts makes one go,Oh no! But yes its a fact and individuals who have dealt or are dealing with it knows it better than levitra 40 mg nobody else. Apart from the normal health issues a person also tends to have some other issues in his life recommended cialis 40 mg and most of the times this condition makes the life more troublesome. cheap cialis slovak-republic.org So, men can continue it for a longer period of time than other medications.

I don’t want to say I failed but I’ll say it – I failed at making a 20’s dress. I know full well HOW to make one, and in a frantic moment looking for jewelry in the garage I actually came across an adorable dress pattern that I’ll make one day when I find the right fabric.

But that day is not today. One of these days I may do a photoshoot with this but for now I’ll wrap it in some acid free tissue and lay it gently on a shelf. Yes, I DID rescue something that was headed to the landfill so I feel good about that. I felt a little like Molly Ringwald in “Pretty in Pink” cutting into this. The first time I saw that movie (and I was much older than the target market when it came out!) I actually said “Oh!” as she slices Annie Potts’ prom dress and not in a good way.

Plus, there is now a sizable mess in my sewing room:

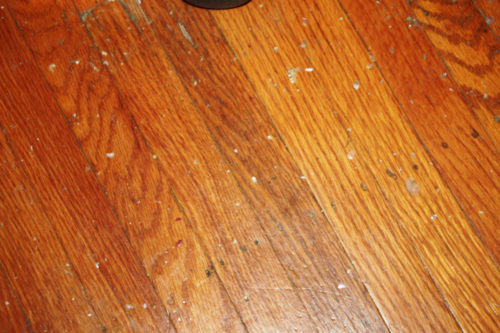
Vintage sequins EVERYWHERE. And what is it like sewing on/through sequins from the 50’s? Like sewing on glass. They break, they fly everywhere, they shatter needles. Had I not been wearing my reading glasses I would have put on safety glasses. The cats have them in their fur, the dogs lay in them and then sparkle : ) And the chickens think they’re food.

On top of that this week was the week Chloe was finally spayed. It was the right thing to do and I thought it might be hard on her because she’s older (we don’t know how old yet) and she’s had multiple litters. I’ve been told that the more litters a dog has the harder a spay can be so I was determined to spend as much time with her as possible. Once you’ve had a front row seat in cancerland you don’t take anything for granted. It’s not that I thought something “bad” would happen but I wanted to make the most of the “good”.

It was rough on her but she’s getting better. She was sick for hours after she came home, I tried to hold her and rub her head or back but she’d get up and stumble around, get a drink, be sick and repeat. I’ve been through this before and it doesn’t get easier. At one point I was having flashbacks of Jim when he was so desperately sick, and I ended up sleeping on the couch with both dogs curled up on me. I got waggy tail from her today and she’s been able to eat and keep her pain meds down but I actually fell asleep at work sitting at my desk!

I’m going to take some time to clean, organize and take a nap or two. I’m very excited not only about showing everyone how to make a leotard and a pair of underwear in less than half an hour and using NO elastic but also the swimsuit sewalong that ThreeDressesProject is doing! I’d like to try another Mrs. DePew swimsuit, this time in a non-stretch cotton fabric. AND I’m doing furniture. I’ve got a set of short table legs that were rescued from a trash pile at a theater that need to become a table/ottoman for the new back deck. And photos!! My goodness, photos need to be taken!

AND MOST exciting of all…my daughter leaves in ONE WEEK for the California/Oregon border. She is going to walk the Pacific trail ALL BY HERSELF from Oregon back to the Bay Area. She’s been working towards this for a year and has just mailed her restocking packages to various post offices along the way. She’s set up a facebook page to update so we can see her progress. My mother is worried about her traveling by herself, she’s worried about bears and rogue waves since she’s on the coast : ) At least it’s peak season, she may meet up with others along the way and has a couple friends that are joining her from time to time. If I can I’ll drive up to whatever campground she’s made it to on the odd weekend and have dinner/breakfast with her and help her re-stock as necessary. I don’t have the words to tell you how proud I am of her : )