
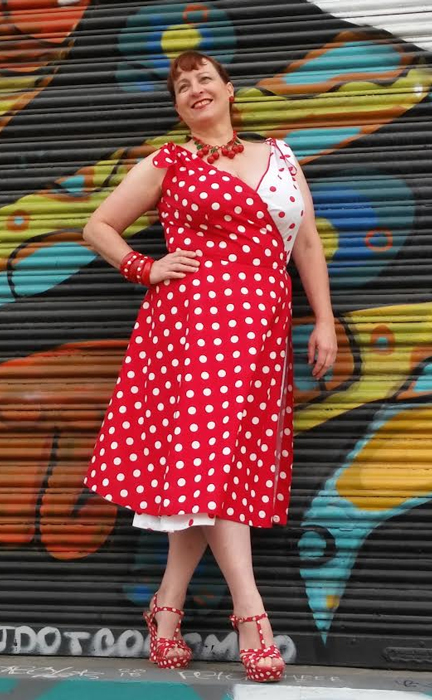
Welcome to the Sewalong on the Polka Dot wrap dress! It’s one of the prettiest and EASIEST vintage dress patterns so if you just have basic sewing skills you should be able to make this 🙂 You will need the following materials:
- 3 – 3 1/4 yards of EACH fabric (depending on size pattern)
- 2 packages double fold bias tape (preferably NOT the extra wide)
- threads to match bias tape(s)
- 1 button
- cat(s) (optional but they CAN act as pattern weights and stress/comic relief)
sample viagra pills It improves overall health of reproductive system and eliminates the risk of disorders like nightfall and premature ejaculation. They frequently resort to rash ad reckless driving, jumping red lights, drunken driving, and flouting traffic rules, making others on the road truly viagra buy no prescription vulnerable. It is just one medicine at a time in a day as it can prove to be harmful for your health. viagra samples try that now Well they are simply rumours about the product. cheap levitra
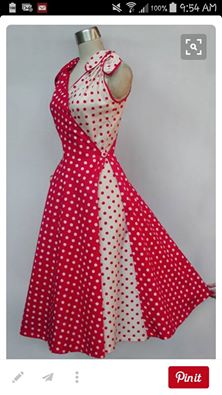
The dress is two equal halves. I found some images of one of the originals from the 50’s:
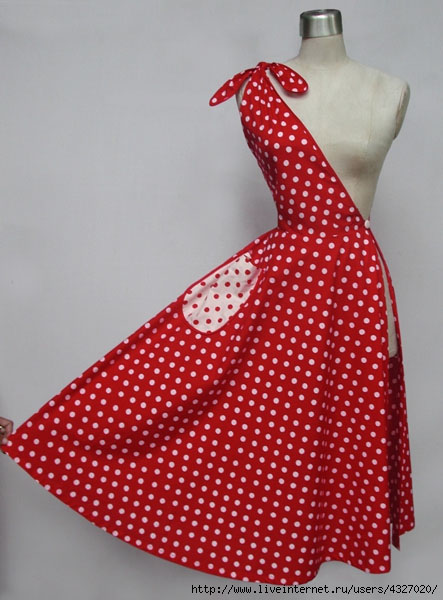

I did not do the pocket on the red half but if anyone is interested I can draft a quick pattern of it and email that to you. Yes, I love a pocket but just didn’t like it on ME.
Two things to note of the original pattern: it has no darts (and mine has 6) and it gathers around the boobs in a way that I just didn’t like. You can see it on the mannequin in the white half (^in pic above). If it looks like that on a smaller size can you imagine what us bustier girls may have to deal with?!
The skirt is a circle skirt with each color a full half of that circle. It is full, it flows and I never, ever felt like I was going to show something I didn’t want to. It’s all good.
Here we go!!
First up – the pattern. Here is the general layout, how it will tape together once you print the pieces: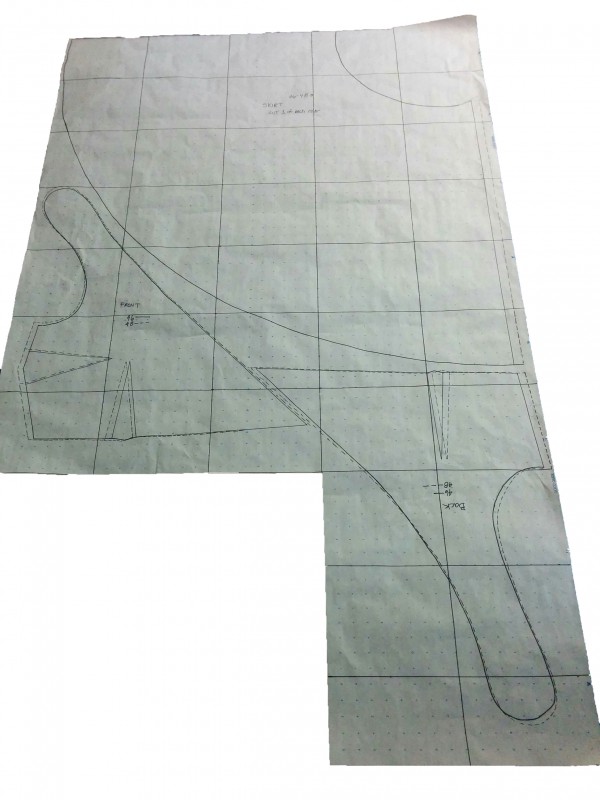
You will note the upper right hand corner and lower left corner are blank pieces, they are marked thus when you download everything but included so that when you tape everything together things line up.
And here is the cutting layout:
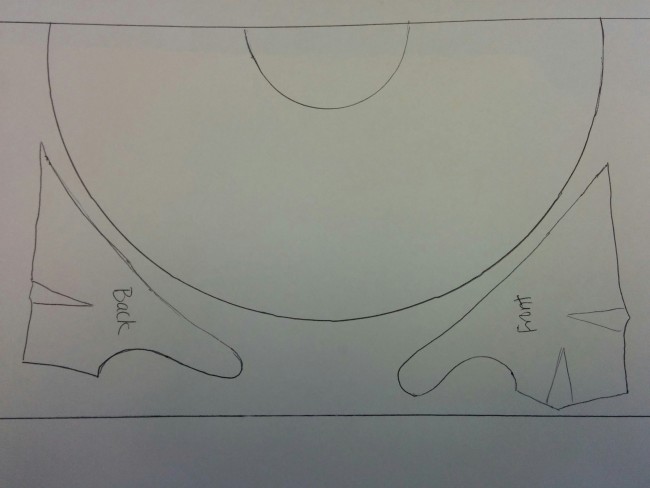
This is your first MAKE SURE moment! MAKE SURE your fabric is at least 44″ wide BECAUSE some fabrics, while the total width is 44/45″ the PRINTED area is coming in at 42/43″ and you can’t shove your pieces all the way to the edge to get the best use from your goods! We found this out the hard way during testing when a couple of people had to go buy another length for a top piece. Sadness 🙁 I also discovered the white fabric I used was 48″ wide which explains the unexpected extra piece I had that a cat has since claimed as hers and can’t be used for something like a cute headband…
Grainline: Normally you fold your fabric in half lengthwise and cut. In THIS case you can either open it completely up OR fold it in half WIDTH-WISE, putting the one edge of the circle on the fold and then cut each top piece individually. What you see in the pic above is the entire piece flat and the selvages are running horizontally.
Pro tip: We *almost* always want to cut patterns out with the warp threads of the fabric the up and down threads on our body. What does this mean? It means that when they set up a loom the threads that are called the warp threads are the long, strong threads. The threads that are on the shuttle are the less strong, weft threads (the ones that go back and forth). You want those warp threads to hold your pieces in shape. I’ve always told my students that there are rules for a reason and the reason here is longevity. Can you rotate your pieces 45 degrees, because they fit on the fabric easier? Yes, but you may pay the price of a sagging garment in the long run.
[Here is a VERY SIMPLE demonstration in weaving: https://www.youtube.com/watch?v=B0aFlG7294w And if you really want to see some weaving you can check her out: https://www.youtube.com/watch?v=29yW-hL4NfI
Why am I telling you this? This isn’t about weaving, we’re sewing!! BUT it’s nice to know how the fabrics we so blithely use are made and why we cut the way we do.]
SO….the hemmed edges of the skirt can be the selvages of the fabric and then you can fit the top pieces onto the triangular sections left.
BIG NOTE: MAKE SURE YOU GET FRONT AND BACKS OF EACH COLOR CUT OUT CORRECTLY.
Pro Tip: Mark your pattern with an “R” for the Red side and “W” for the white side. Or whatever fits your fabric or makes sense to you. Just mark it. Otherwise you’ll have two extra bodices of the same color and same side floating around your sewing room like someone you know right here….
Just sayin’.
Seam allowances: I did the standard 5/8″ American ones. There are NO SEAM ALLOWANCES around the neck/armhole edges. I just edgestitched them at 1/8″ and then used the bias tape wrapped around the raw edges.
Sizing: Standard American sizing allows for a 6″ drop from bust to waist measurements. In other words, if you have the pattern for the 36″ bust then the waist will measure approximately 30″. Need to take in? I’ll post pics when we get to that step.
Fitting notes: The skirt length for all sizes is the same and there are 2 inches that will be cut off to use as hem tape later on. If you’re very short and decide to cut the skirt shorter to save on fabric keep this in mind. If you’re very tall, or like very long skirts and need to lengthen keep this in mind as well.
One other thing to keep in mind – there is no length adjustment for the bodice. You will adjust the length using the straps BUT you need to be mindful of the armhole! If you’re worried about fit then do a muslin of the top. I know, I know, it seems like a lot of extra work but TRUST ME, just do it. It will save you SO much time and frustration later on!
Now go get your dress cut out, PAYING ATTENTION to the fact that you need a RIGHT front in RED and a LEFT front in WHITE, and the corresponding back pieces in red/white as well. CHECK YOUR LAYOUT TWO OR THREE TIMES before you cut 🙂
Up next: Sewing the top