How to sew stretchy fabrics without using elastic – Take 2

I was the featured “gabber” on Mary Jane’s Farm facebook page last Monday : )

 As promised, here are the steps to doing a pair of shorts or dance trunks using NO elastic.

I tried doing MANY photos, highlighting each and every step but again, if I’m clear as mud please don’t hesitate to ask! Tempest said she was following along on my camisole instructions until I talked about the way a seam should face (up or down) and then I’m guessing her eyes glazed over and she found something shiny to occupy her attention. That’s what I do when my train of thought derails.

So we start with the basics. Here are my trunks cut out:
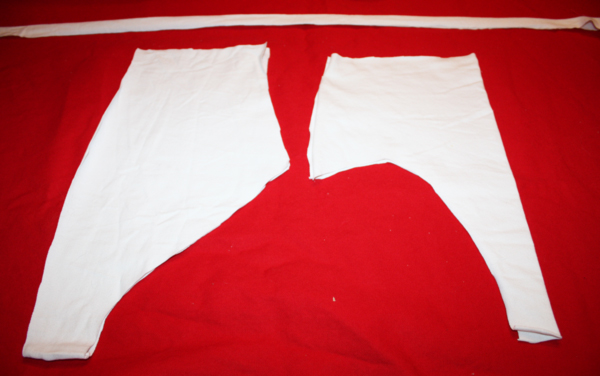
This is a master pattern I use, I bought the patterns from a woman who had a very successful dance wear business until her husband got tired of the mess in the house and the time it took away from the family and made her stop. She taught me all her techniques, handed me the patterns and wished me well. Not only do I have HER years of experinece but I added another 10 years worth of my own and can tell you unequivocably this WORKS.

The fabric is 4 way stretch cotton-lycra. It dyes well, stretches a LOT and stitches easily. I do NOT use any special needles with the cotton/lycras like I have to use for other knits. I can get it at Stone Mountian daughter for $7-10 a yard depending on weight. This pattern takes 1/2 yard for everything.

So…The center front is cut on the fold, the back has a seam, the long narrow strip is for leg and waist bands.
First we overlock that center back seam.
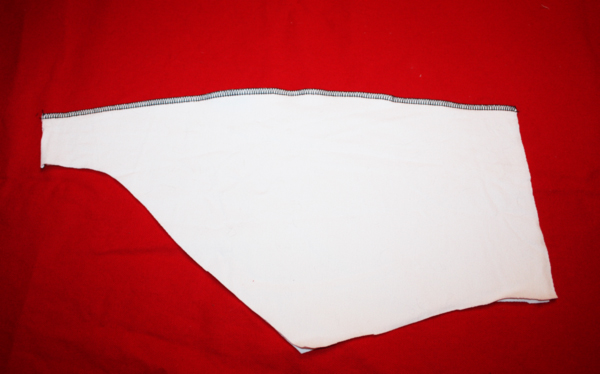
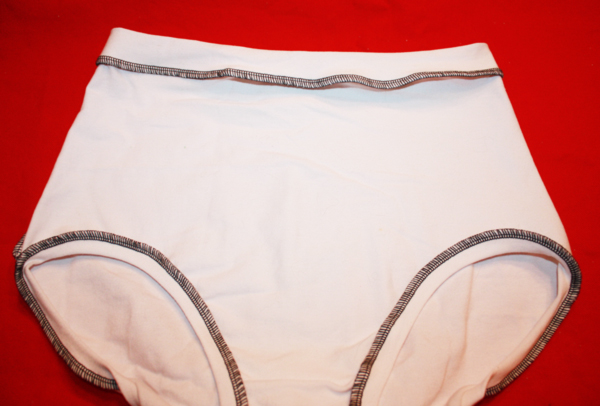
I’m using black thread on white fabric JUST TO BE SEEN CLEARLY. In real life I would never do this unless a client asked and then they’d probably want the seams to show. Frankly, these started looking like a pair of tidy whities so I may have to dye them once they’re done : )
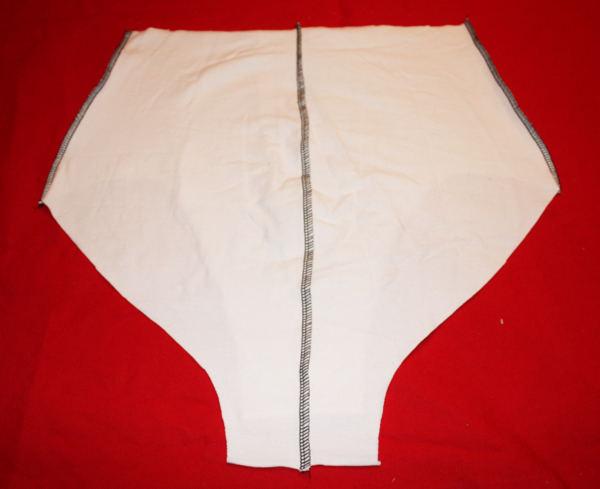
Here are the back of the trunks with the center back seam stitched. Open up the front and put front and back trunk pieces right sides together.  I’m overlocking everything. Yes, you can overlock this entire garment and it will be fine. I’m using a standard 4 cone, 2 needle machine, no special adjustments. My overlock has a special stretch option that I’ll use later but for now I’m not doing anything special, just to show you it can work.
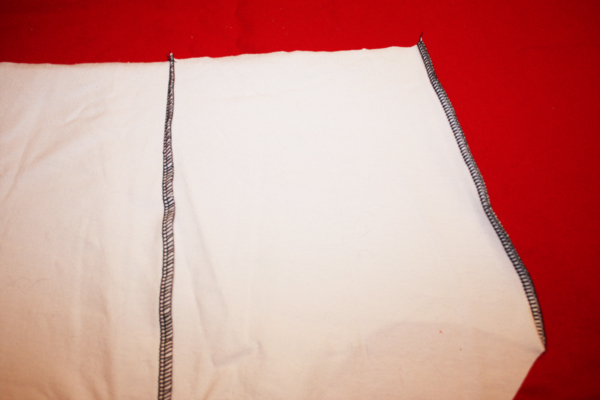
Right sides together stitch front and backs at side seams.
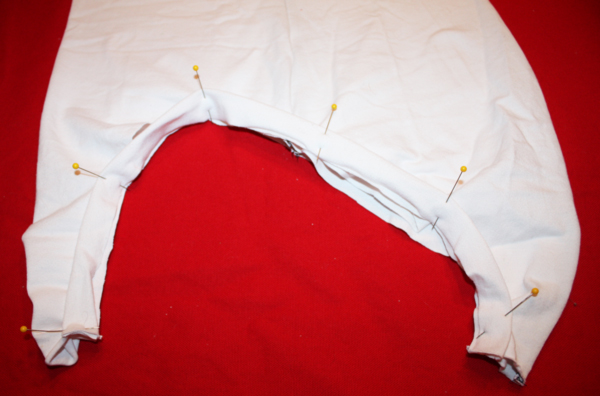
Open shorts out so the entire leg opening is facing you. Measure opening. Mine is 24″ so for a decent but not tight leg opening I want a piece of binding about 20% smaller or about 19-20″ long. This is approximate and completely up to the wearer. When I was doing dance wear I had dancers that wanted nothing to bind anything anywhere ever and then dancers who wanted things so tight they left marks. I just want a nice fit that won’t shift so this is what works for me. MAKE A MUSLIN before you use “nice” fabric!

I stretch the band, which is 1 1/2″ wide and folded in half lengthwise, to fit the opening. Pin it in several places so it doesn’t slip. Stitch, keeping the band pulled out to match the leg opening as you go. I line up the outer edge of the presser foot to the fold of the band and then get a nice even band.
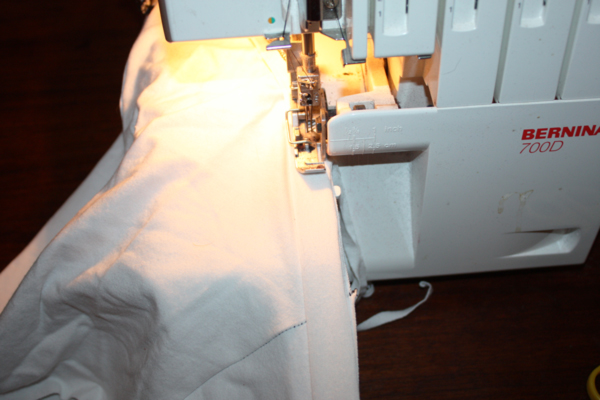
Quick view of the trunks on the overlock.
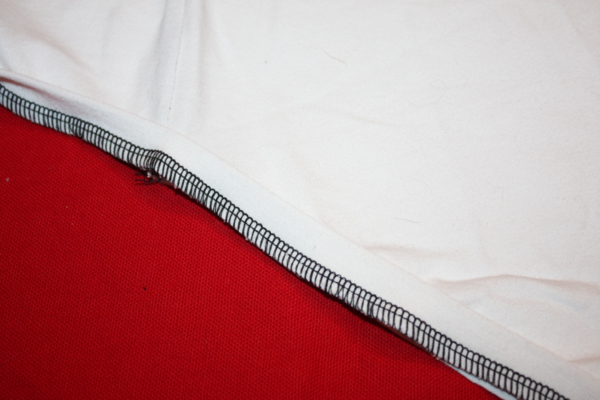
Finished shot of the leg edging. It’s clean, it’s even and it’s fast!
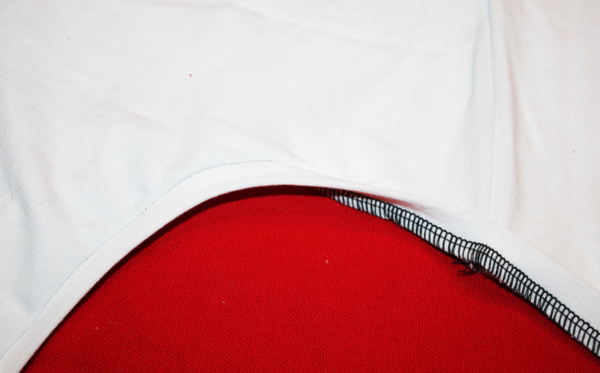
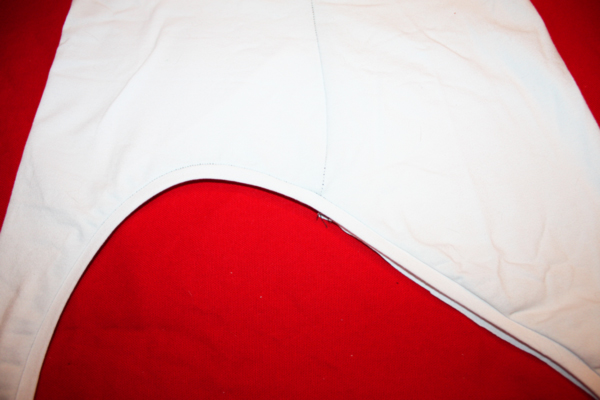
When I turn the edging DOWN, like you see on the left, the seam goes UP.
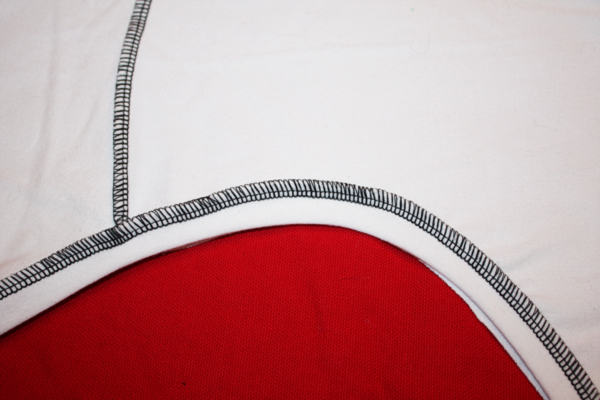
Here’s the inside – you can see how the seam goes UP, away from the leg band.

This is what that view is on the outside. That extra white showing on the right side is just the other side of the trunks. Oops… But you can see what a nice clean line you’ve got.

Now do the same thing to the other side.
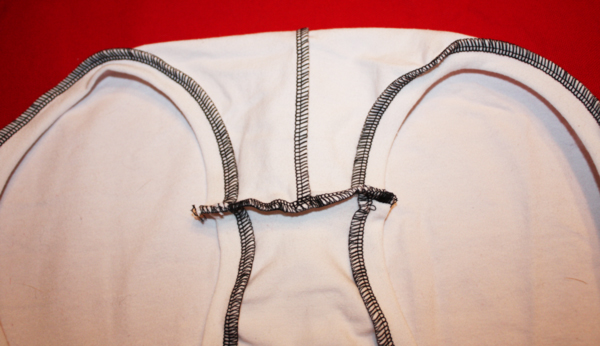
Right sides together stitch front to back at crotch. Still looks like tidy whities…
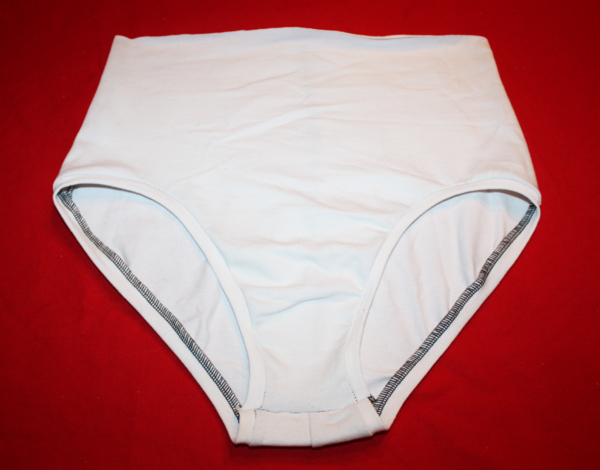
If you’re not comfortable with the overlocking holding the crotch area closed then go ahead and reinforce it with a stretch stitch.

Now for the waistband.
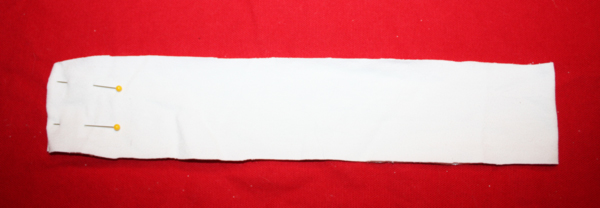
Measure the waist opening on the trunks. My opening is 28″ so I’m going to take off about 20% and cut a band 2 1/2″ wide and 23″ long.
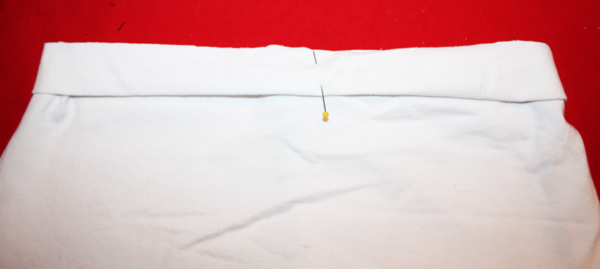
Stitch.

Fold band in half longways, wrong sides together, and pin to trunks. If it makes you feel better you can put pins at the half and quarter marks then stretch the band to fit. I eyeball it : )
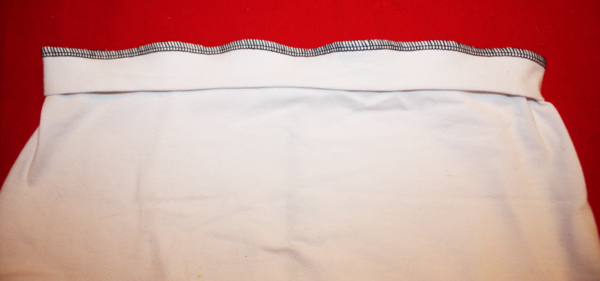
Stitch just like you did the leg bands.
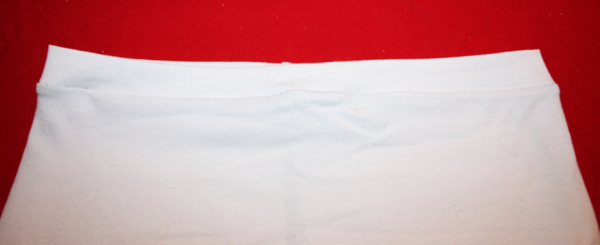
When you fold the band UP the seam will go DOWN.
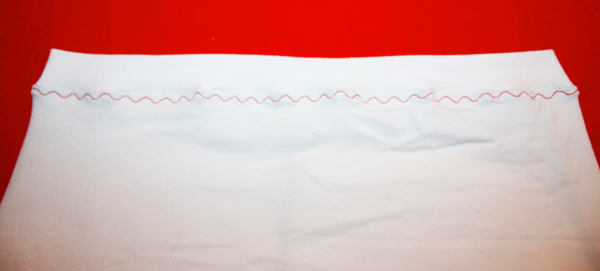
Like this : )

You can do a pretty top stitching to keep the seam in place if you don’t want things shifting. A decent stretch stitch won’t eliminate the stretch in the fabric, unlike elastic which it has a detrimental effect on.
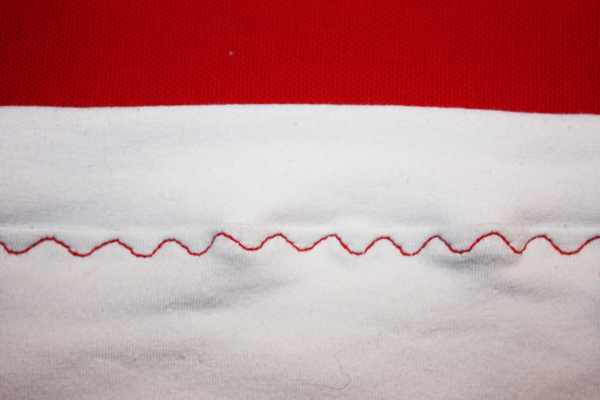
Extreme close up of stretchy stitch : ) And I am NOT using some fancy machine. My Bernina 830 hails from 1974 so I’m fairly sure anyone reading this post has a machine that can do something like this. You can use a zig zag stitch but it doesn’t stretch quite as much BUT if that’s what you’ve got then that’s what you’ll use.
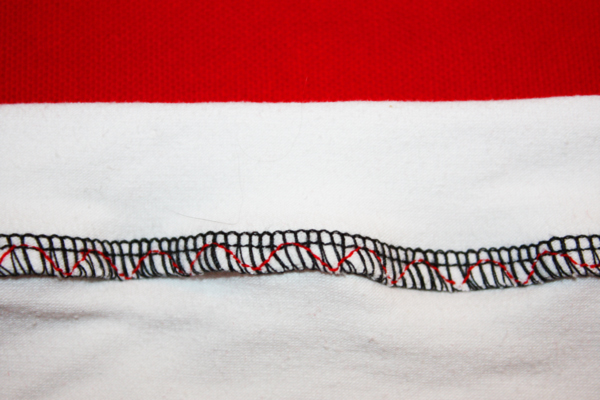
This is what is looks like on the inside. You can do this on the legs as well, I didn’t here but have in the past. Again, MAKE A MUSLIN to make sure this is what you like! If I were doing a pair of swim trunks from this pattern I would do two things – 1) line at least the front piece and 2) stitch the leg bands like I did the waistband. You don’t want to worry about things shifting so take care of it up front. In all it took me 20 minutes to cut and sew these trunks. At some point I’ll put them on myself and model them for you, probably when I do my swimsuit photoshoots and have my courage in place.

Have you seen The lazy gal’s guide to Summer Dressing by Sarai at the Colletterie? She’s modeling a linen skirt she made (and has a tutorial for doing those curved hems if you’re interested) with a leotard for a top. That leotard is EASY PEASY to make! I can do one in less than an hour, and I say an hour because if you look at the back of hers you can see a low cut back and double straps. Want to make it and NOT involve a foreign sweatshop? I WILL SHOW YOU HOW. One yard of fabric, one hour and you’ve got a piece to wear all summer long : )

By the way, have you seen the new Hawthorn pattern? Pretty cute AND there is a sewalong! I’ll get the leotard done quickly, since it’s raining right now that may give me the perfect excuse to stay in and sew, and then we can move on to Hawthorn.

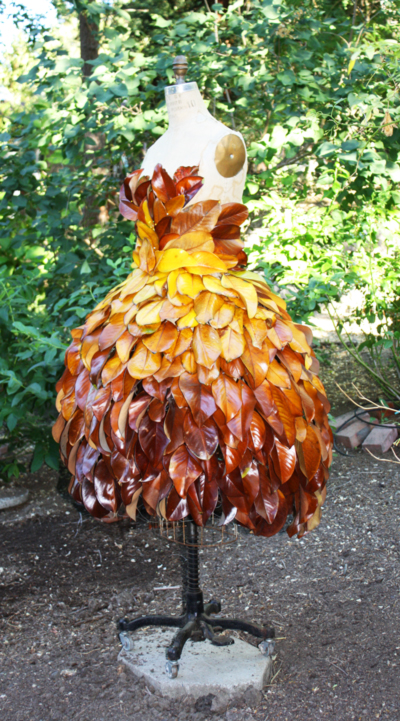
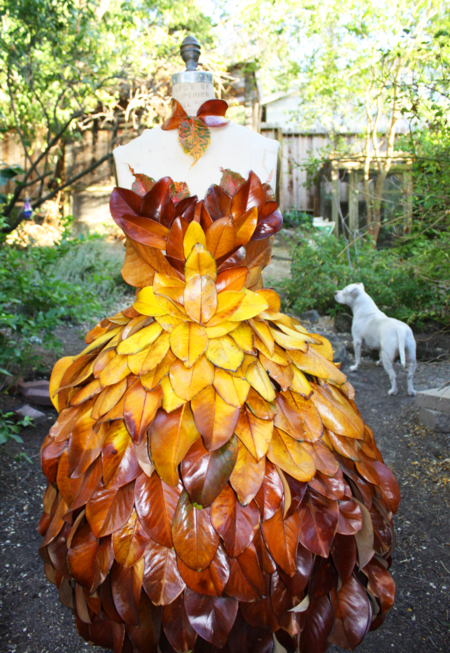
Several people have asked about the Magnolia dress – it is fading to a glorious chocolate color, I’ve taken pictures of it everyday for the last week and will put a little slide show up of its graceful aging. There will be more projects like this in the future and an especially glorious Christmas outfit thanks to Laura Mae’s suggestion : ) Stay tuned…

What to do when you don’t want to do anything on your “To Do” list

What happens when you’ve spent all week working on things on your “To Do” list and you just don’t want to do one. more. thing?

You make yard art : )

Inspired by several ideas I’ve seen floating around facebook-land (and no, I didn’t save them anywhere except in my brain so I sadly can’t share them with you…right now…I’ll find them again at some point but that isn’t today) I found myself wandering down Main Street yesterday, looking at the different colored shiny magnolia leaves laying about. Was it because I didn’t feel well earlier this week that these shiny objects held some fascination? Or were they just pretty?

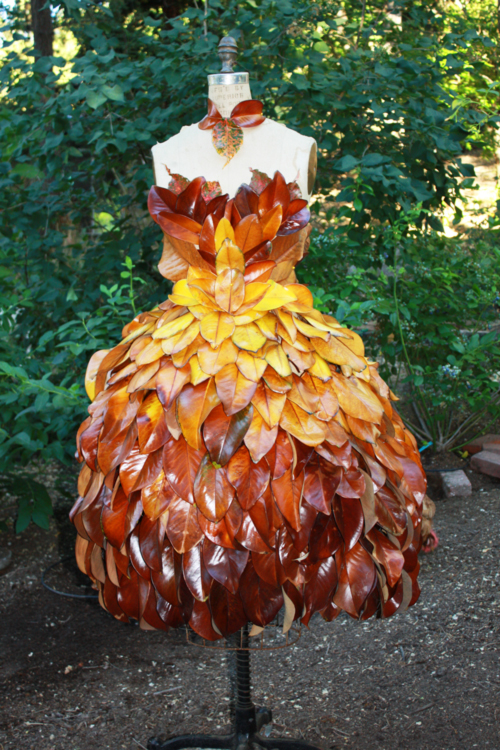
I picked up a few to bring home to contemplate. Somewhere late Saturday night I got the idea to make a dress using chicken wire as the base and then attach the leaves, dark ones at the hem and the bright yellow at the waist. I had no idea how many leaves it would take, how long it would take or how I was going to attach them but hey, I had a vision and who needs to worry about details when one has vision?

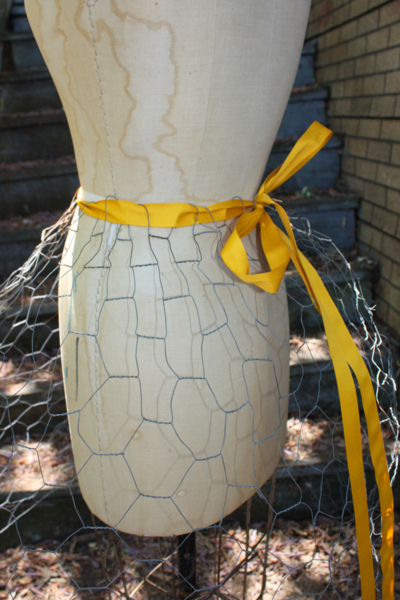
I pulled out a mannequin, grabbed a hunk of chicken wire and made a skirt of sorts : ) I used the ribbon for a drawstring waistband and pinched the cells of the wire close together near the waist to shape the skirt.

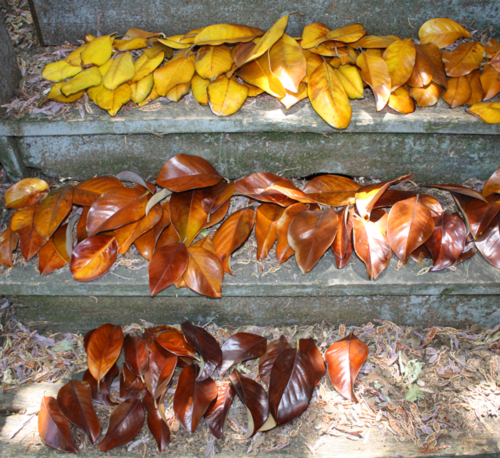
Then I sorted the leaves by color:

Light to dark, this is most of one full grocery bag that I collected on my walk with Romera this morning.

I still had to figure out how to attach them. I tried staples <snort>. Don’t use staples. Then I found a spool of thin craft wire. I cut 2″ pieces, bent the piece in half and stuck it through the leaf and twisted it around the chicken wire. Perfect! Starting at the bottom I worked my way up to the waist, took about 2 1/2 hours and I had to run down the street for another bag of leaves. I’m now the crazy neighborhood person who hunts for “stuff” under trees, picking up and keeping some leaves and leaving others. Whatever : )

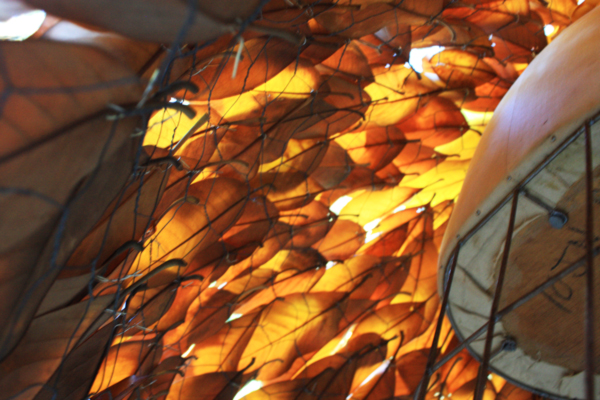
For the bodice of the dress I merely pinned leaves to the mannequin. I decided not to glue or sew anything. The whole point is to let the leaves do whatever they’re going to do; dry out, crumble and fall off, it’s all good. When this piece is “done” it will go back to the earth from whence it came. Or into the green can.

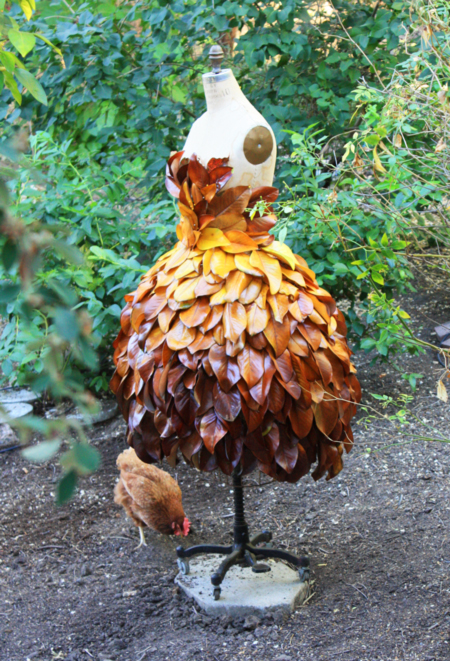
Right now she is just hanging out with the chickens –

Amelia came over to check her out…

…as did Pouff ( left side, about half way up).

Chloe was more interested in the cats.

It worked out more or less the way I wanted it to. It’s quite a statement!

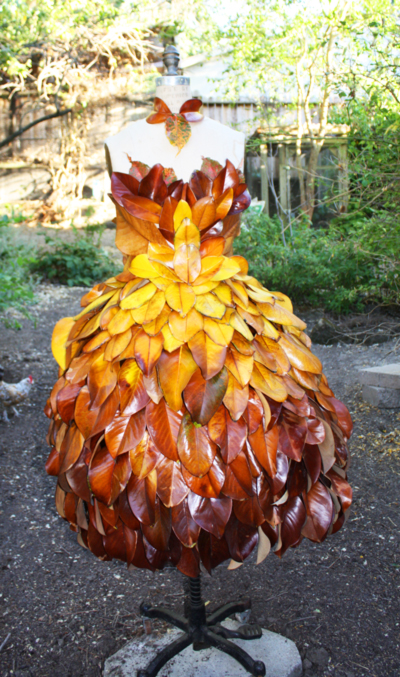
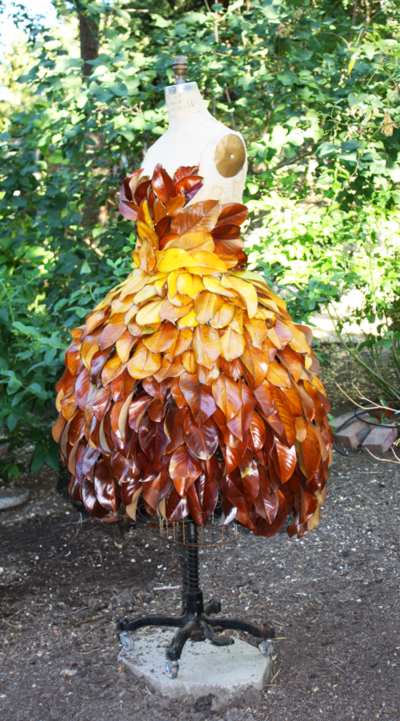
Just for the fun of it here’s the side:

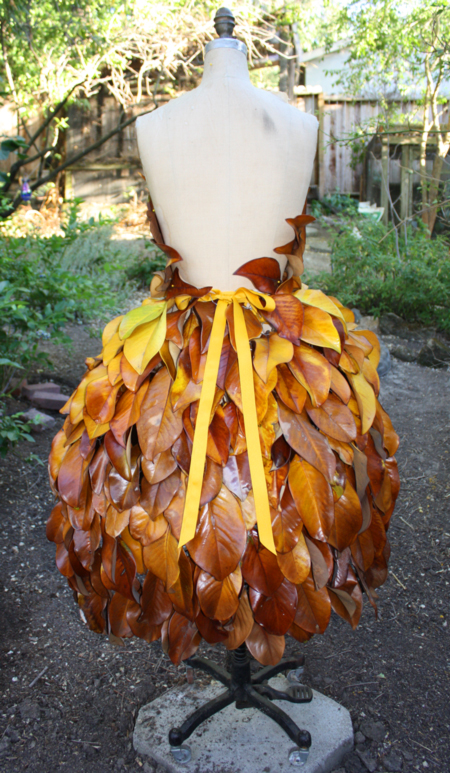
And the back:

You can still see the bow that is holding the skirt on/up : )

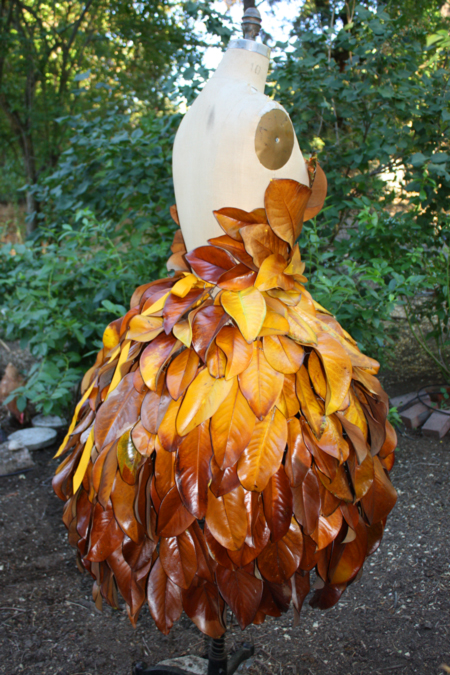
And finally, just because it’s cool, the inside –

I have all the photos done, I “just” need to write the post for making a pair of dance trunks/short/underwear using NO elastic. It was one of the things on my “To Do” list that was making me groan. Maybe tomorrow…

For now you get a dress made with no thread : )

A Gatsby dress that isn’t

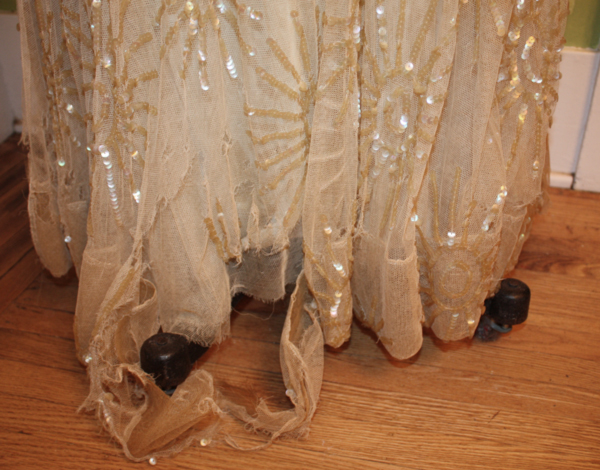
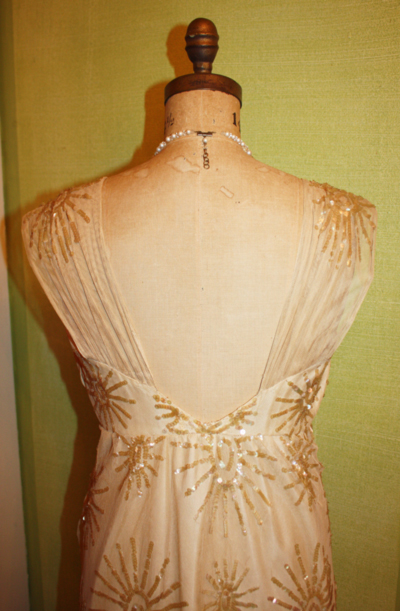
 I found this dress in a trash heap, can you see why?

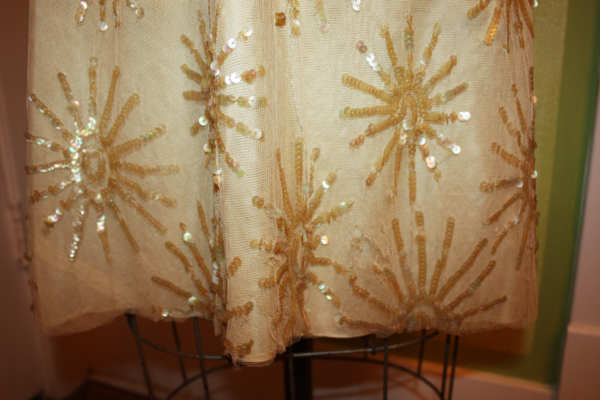
And that was only the beginning of the sadness. The skirt is 2 layers of what feels like cotton netting, the overlayer has the sequins and the underlayer is plain. There is a simple bias cut taffeta slip that was actually in pretty good shape but those overlayers…

Full of holes, ripped away from the bodice at the waist, hem completely trashed, it was just sad. When I saw the challenge posted on Miss Crayola Creepy’s blog I figured I’d give it a miss with the whole Me Made May 13 thing. THEN she went ahead and extended the deadline to June 4 and somewhere around June 2 I thought I’d give it a go. Nothing ventured nothing gained right?

It was an exercise in frustration.

Here’s what it NEEDED to be – just a basic slip dress. Make a Laurel with no sleeves, or add a hip sash but simple, simple, simple. This is what it wasn’t – simple.

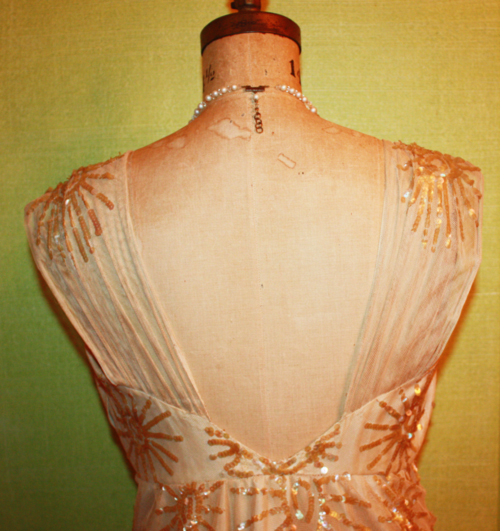
With all the damage there was NO WAY to salvage enough length to make a slip dress the correct length. Why I didn’t take a photo of the whole dress escapes me but I didn’t. Originally it was a fitted bodice, around a size 6, with a lovely deep back, embroidered net shoulder straps and a 3 layer half circle skirt. And holes, lots and lots of holes.

The size 6 was the second problem, I haven’t been a size 6 in the chest for decades and I really wanted to keep the pretty back intact. I thought maybe I could make a simple square bodice, attach a straight skirt and pull it off so that’s what I tried.

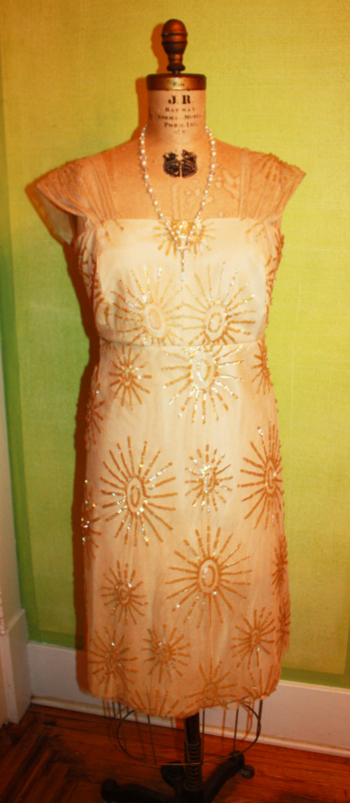
I sliced the bodice down the center front, inserted a center front panel and squared off the neck edge but retained the original beautifully inserted zipper. Isn’t the back stunning?

The color is a very pale pink now, probably originally a little brighter but close to this.

I retained as much of the original sequined design as possible and there is still some repair work to do. I just cut the hems of the net layers, there are some holes in the back.

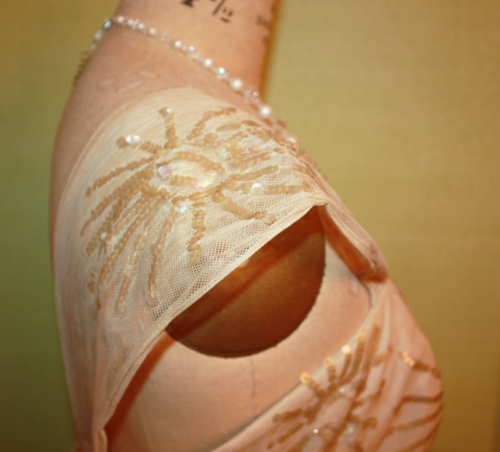
Surprisingly the one part in really good shape are the shoulder straps! The dress hung on them for years but NO holes! So what’s the problem? It is SO NOT 20’s! Because I decided to use as much of the top as possible it clearly made it more late 50’s or early 60’s. Put a sash on that seam, more empire than anything, and it would go to a Mad Men party. I made a headband from the scraps, pulled a string of pearls and delicate earrings but I was so disenchanted with it by Tuesday evening that it stayed on the mannequin. It would take a solid 45 minutes to do the right make-up and I didn’t have it in me.

I don’t want to say I failed but I’ll say it – I failed at making a 20’s dress. I know full well HOW to make one, and in a frantic moment looking for jewelry in the garage I actually came across an adorable dress pattern that I’ll make one day when I find the right fabric.

But that day is not today. One of these days I may do a photoshoot with this but for now I’ll wrap it in some acid free tissue and lay it gently on a shelf. Yes, I DID rescue something that was headed to the landfill so I feel good about that. I felt a little like Molly Ringwald in “Pretty in Pink” cutting into this. The first time I saw that movie (and I was much older than the target market when it came out!) I actually said “Oh!” as she slices Annie Potts’ prom dress and not in a good way.

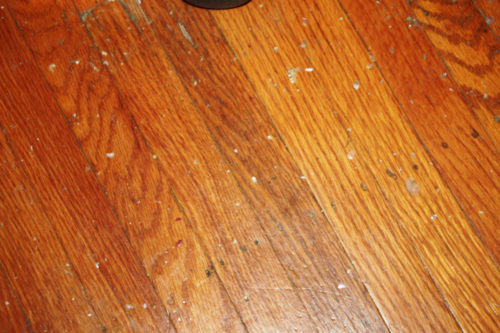
Plus, there is now a sizable mess in my sewing room:

Vintage sequins EVERYWHERE. And what is it like sewing on/through sequins from the 50’s? Like sewing on glass. They break, they fly everywhere, they shatter needles. Had I not been wearing my reading glasses I would have put on safety glasses. The cats have them in their fur, the dogs lay in them and then sparkle : ) And the chickens think they’re food.

On top of that this week was the week Chloe was finally spayed. It was the right thing to do and I thought it might be hard on her because she’s older (we don’t know how old yet) and she’s had multiple litters. I’ve been told that the more litters a dog has the harder a spay can be so I was determined to spend as much time with her as possible. Once you’ve had a front row seat in cancerland you don’t take anything for granted. It’s not that I thought something “bad” would happen but I wanted to make the most of the “good”.

It was rough on her but she’s getting better. She was sick for hours after she came home, I tried to hold her and rub her head or back but she’d get up and stumble around, get a drink, be sick and repeat. I’ve been through this before and it doesn’t get easier. At one point I was having flashbacks of Jim when he was so desperately sick, and I ended up sleeping on the couch with both dogs curled up on me. I got waggy tail from her today and she’s been able to eat and keep her pain meds down but I actually fell asleep at work sitting at my desk!

I’m going to take some time to clean, organize and take a nap or two. I’m very excited not only about showing everyone how to make a leotard and a pair of underwear in less than half an hour and using NO elastic but also the swimsuit sewalong that ThreeDressesProject is doing! I’d like to try another Mrs. DePew swimsuit, this time in a non-stretch cotton fabric. AND I’m doing furniture. I’ve got a set of short table legs that were rescued from a trash pile at a theater that need to become a table/ottoman for the new back deck. And photos!! My goodness, photos need to be taken!

AND MOST exciting of all…my daughter leaves in ONE WEEK for the California/Oregon border. She is going to walk the Pacific trail ALL BY HERSELF from Oregon back to the Bay Area. She’s been working towards this for a year and has just mailed her restocking packages to various post offices along the way. She’s set up a facebook page to update so we can see her progress. My mother is worried about her traveling by herself, she’s worried about bears and rogue waves since she’s on the coast : ) At least it’s peak season, she may meet up with others along the way and has a couple friends that are joining her from time to time. If I can I’ll drive up to whatever campground she’s made it to on the odd weekend and have dinner/breakfast with her and help her re-stock as necessary. I don’t have the words to tell you how proud I am of her : )

A tank top, knit edge finishes and flowers

 Poppies are blooming….

…and blueberries are starting to ripen!

 And the weather finally feels like late spring/summer : )

To that end I’m going to start a short series of ways to work with knits, all started by an inquiry Vicki made on Twitter. “I have the fabric but have yet to tackle swimsuit. Confused about elastic and finishing. Good online ref?”

First up – fabric. I’m going to work with knits of different types to show you what’s possible. I’ve only got the first t-shirt knit project up for this post but it gives you the basics. Next post I’ll use a cotton/lycra knit as well as a 4 way spandex, this should give anyone doing the swimwear challenge plenty of time to experiment!

And why do I do it this way? In a word, elastic sucks. For some uses, like running through casings in a sleeve it’s fine but let me tell you, when you’re making costumes, especially dance wear, that gets worn over and over and over again…like zippers, it’s the first thing to go and a pain in the rear to replace. I made professional dance costumes for years and when a fellow designer showed me this trick it was like the heavens opened up and rainbows came down. I NEVER worried about a leotard again. To this day items I made this way years ago are holding up while items made with the “traditional” elastic method are sad and needing repair. Keep in mind that elastic and chlorine aren’t the best of friends so what do you think is going to be the first thing that gives out in your carefully crafted swimsuit?

Let’s start with your basic t-shirt, the kind that you might get from your place of employment to commemorate some event, or you find a cool design at a thrift store but it would fit Shaquille O’Neill. Regardless of the design they are usually crew necks and I am NOT a crew neck fan! I feel choked and cloaked and that is NOT good. There is nothing worse than a wrinkled shirt at an event. Thankfully as made evident by sites like productspy.co.uk/best-steam-generator-iron-reviews, it’s now easy to own a mobile steamer on the go. The t-shirts I’m using are a standard knit, they stretch one way; around. Nothing fancy : )

To start – Lay t-shirt on table. Put cats outside. I want to make a simple camisole so I pulled out a knit camisole I have that I know fits and just laid it on top, cutting around the edges adding 1/2″. Most knit camisoles I have have some lycra in them so they have more stretch to them than the average t-shirt but adding that 1/2″ seems to work. (The t-shirt I started out with is a Men’s Large.)

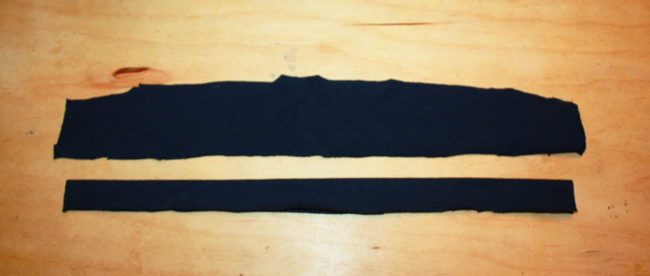
You can see what I’ve cut off as well as the shape of the new shirt. Don’t get scissor shy! When in doubt you can cut larger and take in. Do NOT throw out the scraps yet!!

Next cut off the t-shirt hems, making sure you have at least a 1″ strip. Set aside but don’t lose : ) Now cut the underarm sleeve seams open and lay the sleeves flat. Cut off and toss hem, then cut 2 pieces of fabric approximately 2″ wide by 14″ long. You may not be able to get more than one piece out of each sleeve. Once you have your two pieces NOW throw the scraps out.

Top piece is the ‘raw’ piece.

Now fold your strips in half lengthwise and iron. Yes, iron. It just helps. Once you’ve tamed the inevitable curl trim your pieces to 3/4″ to 1″ wide. You don’t need to be EXACT in the width, it can be adjusted as you sew to some degree. I made mine 3/4″ wide.

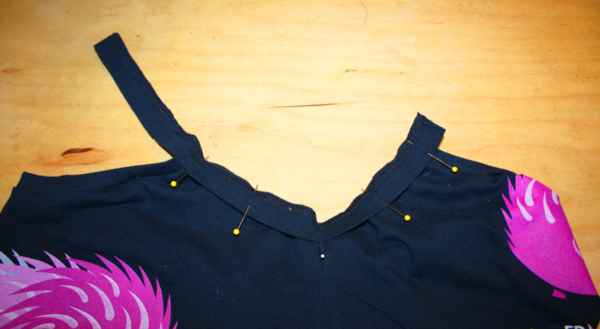
Each of these pieces is going to finish the neck edges of your shirt. Measure your neck edge from armhole to armhole, my neck edge was 12″. On your strips that you have nicely ironed place a pin 1″ or so from one end. Measure 10″ and place another pin. (The IMPORTANT thing to note here is you want approximately 20% less on the trim piece, a 5:4 ratio.) If you can’t eyeball things then put a pin in the middle. Put a pin in the middle of the front of your shirt neck edge, match your strips’ middle pin and pin strip to shirt. GENTLY stretching the strip, match the end pin to the end of the neck line and pin in place. You are taking 10″ of fabric and pinning it to a 12″ neck edge, the middle pin just helps you distribute the fabric evenly. Carefully stretch the strip and pin it to the neckline, try not to stretch the shirt itself.

Am I clear as mud? It didn’t occur to me while taking photos that it might be nice to see the neck edge pinned. There are some examples of what I am talking about on DoYouSew.com that you can use a reference for this step. I PROMISE I’ll photograph that in the next post! In the meantime, we sew.

I’m using my overlock. Do you HAVE to use an overlock? No, but it goes MUCH faster. You can do this with a stretch stitch on your machine or even a zig-zag stitch but trust me, if you don’t have an overlock you should seriously consider it : )

Starting at one end I just put the presser foot down and zipped the edging on, took less than 30 seconds and we have this –

NO, it is NOT the same shirt as the above photo! I completely constructed that first shirt before I saw Vicki’s tweet and it occurred to me that someone might want to see my process. That’s ok, I like this one too : )

I had to really adjust the camera settings to get the details here, sorry. I didn’t even think about dark shirts when I started this… Hopefully you CAN see the slight gathering of the neck edge, that is a good thing : ) Because when you put it on a curvy person it hugs to their body, not falls away from it –

You can also see that the strip is longer than the neckline, that gives you something to hang onto. I start at the end of the strip and sew right off the other edge.

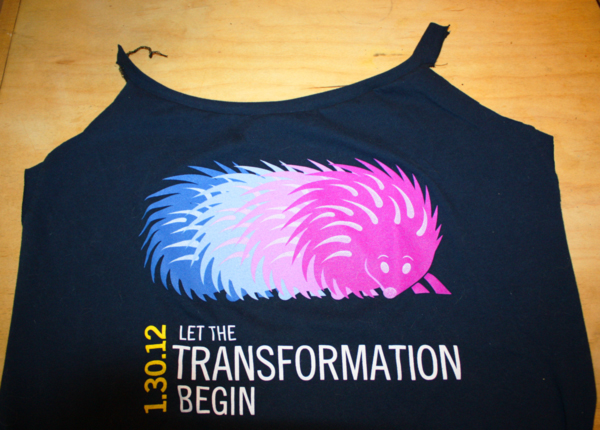
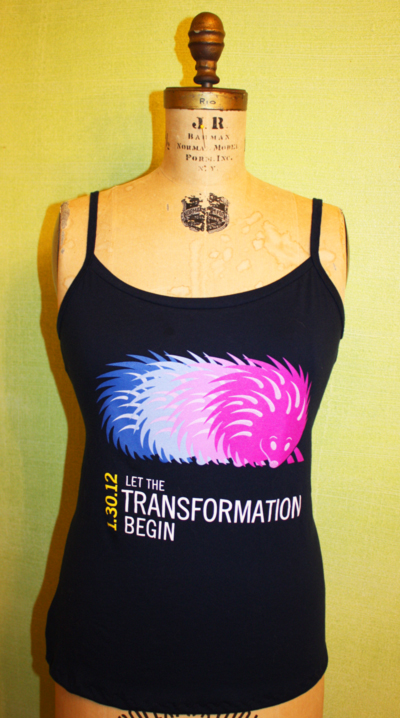
Now I trim those edges off : )  Aren’t the hedgehogs cute? I think so. I’m wearing this shirt the next time I see my doctor who keeps telling me that basal cell skin cancer is “no big deal”. Harrumph.


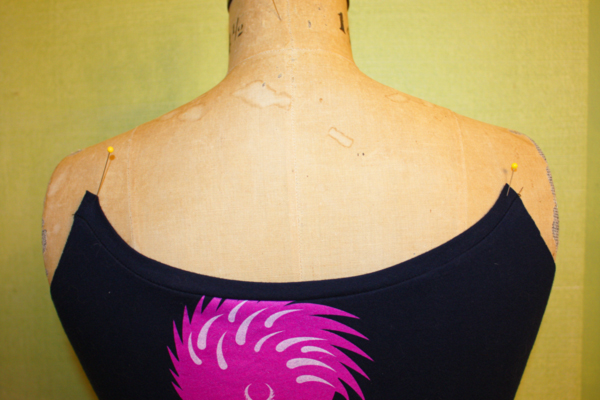
Just for giggles this is the back.

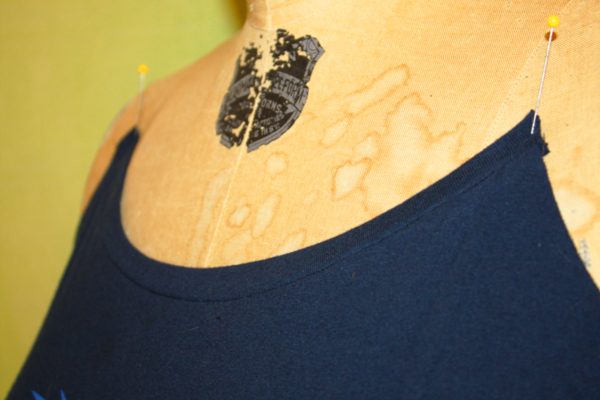
Another view of the neck edge. When you turn the strip up so it looks all pretty on the outside the seam will go DOWN. You can top stitch this if you want. I didn’t do so on mine.

Overlock the side seams together. You can overlock them together before you put the front and back neck edging pieces on, some people like to handle knits one layer at a time.

Now for the arm edgings and straps –

Same technique as the neck edges. Find the two pieces you cut off the hem and make sure they are 1″ wide. No folding required, that’s why we’re using the hems : ) The arm openings on my shirt just happen to be 12″ so put a pin 1″ from one end, another pin 10″ from that one and pin to each end of armhole (for lack of a better term we’ll just call it the armhole).  My underarm seam is in about the middle so I put a pin in the edging at midway point between the two pins, pinned everything to the shirt and put another couple pins in place to distribute the shirt fabric evenly. Starting at one end of the strip overlock everything together. Yes, you’ll be going over the hem stitching but that’s fine. Overlock down the strip, the strip to the shirt and go right off the edge.

Here comes the only tricky part. Unlike the neck edges that you turned the fabric UP and had the seam go DOWN you’re going to turn the fabric UP and have the seam go UP the same way. Make SURE your edging is wider than your seam! Otherwise 1) your edging is too small or 2) your seam is too wide. You can always re-stitch the seam, cutting it down so it’s even or shorter than the finished edge.

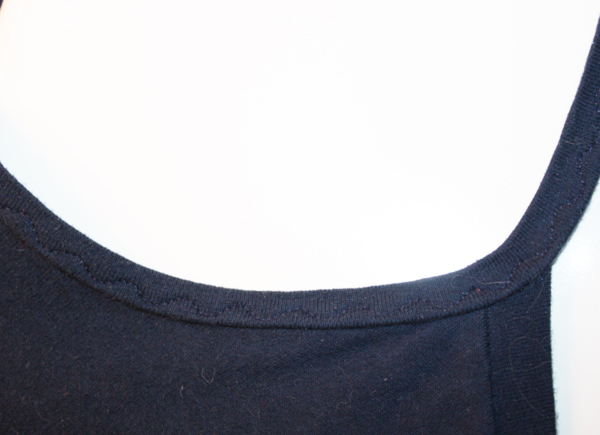
You can iron this if you like because NEXT you’re going to use some cute stitch, stretch or not, to stitch all those layers together from one end to the other. I’ve used a regular zig-zag and a fancier stretch stitch, both work.

You can see my “fancy” stitch here –

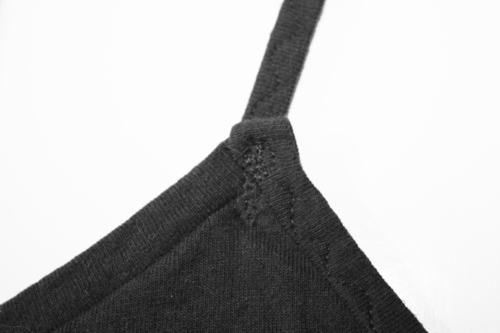
Then, just like the pic shows, you’re going to pin the back strap down to the back, turning the tag end under and sewing through all the layers. My straps are about 9″ from front neck edge to back neck edge. Pin your straps with safety pins and try the shirt on. Once you’ve got it the right length stitch through all layers.

And you’re done. Unless you don’t like raw hems. Overlock the hem, turn under an inch and stitch. NOW you’re done : )

  I have to say that I’ve learned several things taking pics for this post – to that end I’m going to do a second post VERY soon using the same technique for finishing off legs for a swimsuit! This time, however, I’ll just make a sample garment and use highly contrasting threads : )

It literally took me half an hour to make this shirt:

And now a BONUS!

Wonder what goes on behind the scenes? Here’s an example:

During most of my photoshoots the dogs are milling around. In this one Chloe (the white one) is looking down at the yard next to me. Romera is right here  (grey head),      ^ looking up at squirrels in the tree.

In this shot her nose is about 1″ from the bottom edge of the photo, here .

Now you can see her ears standing up/out and more of her face….

And here you can see her move RIGHT in the middle, totally focused on the squirrels! This all took place in about 6 seconds. Meanwhile the camera is clicking away and I’m posing, trying to get a decent shot in about 40.

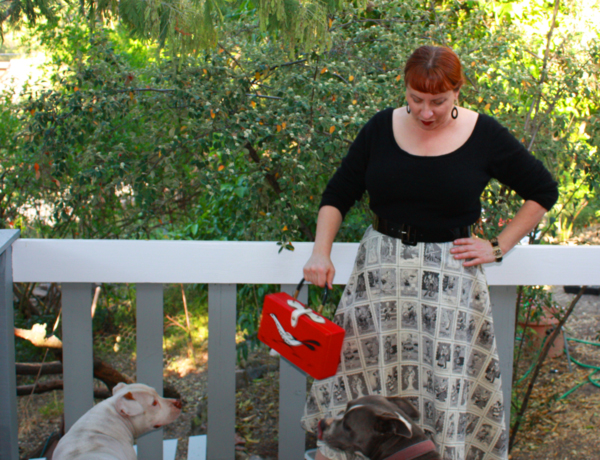
And here they’re just chasing and playing, right on top of my feet. I think Romera was trying to gnaw on the wooden purse while stepping on me : )

Modeling is tough work.

Up next – I take a dress I found in the trash and attempt to make it into something Gatsby-ish. Hint – it doesn’t work out so well and we’re all covered in vintage sequin bits.

MeMadeMay13 Week 5 and Done!

I only made 3 new items this week but boy am I tired!

First up, Monday:

Memorial Day : )

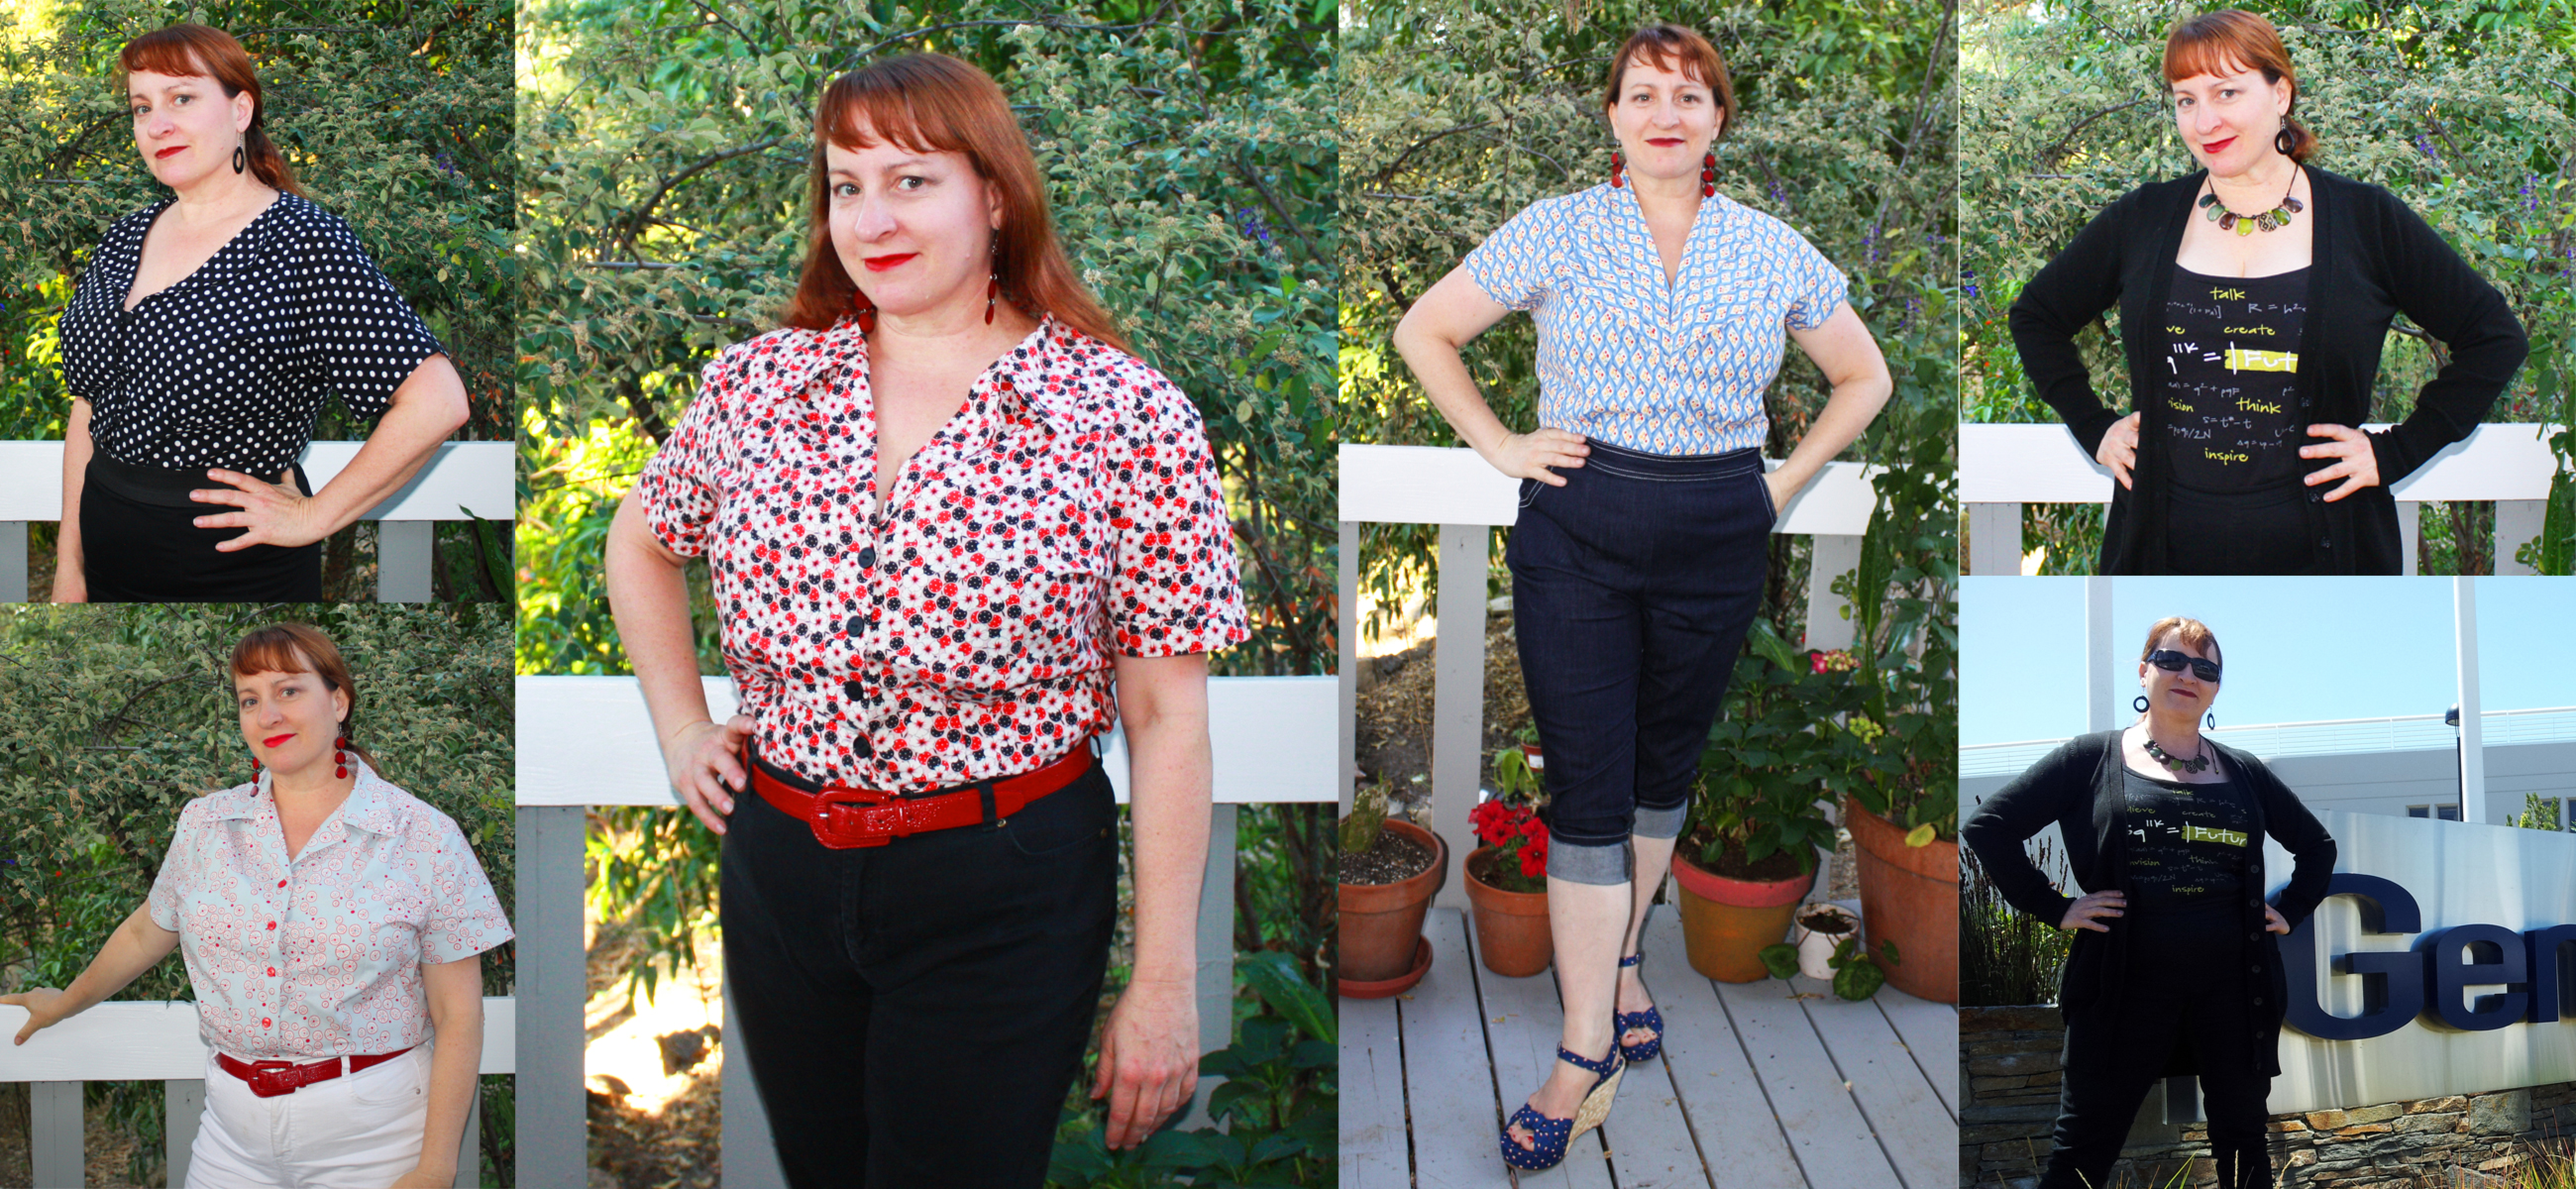
We didn’t do anything picnic-y, it was just a nice day to work in the yard, walk the dogs and finish up my Gertie pants muslin. The pants are Gertie’s pattern Butterick 5895 and they are easy-peasy! What I’m wearing is actually my “muslin” since I found some stretch denim at Discount Fabrics for $2.98 per yard because it had mud on it. Mud washed right out so for less than $5 I got to try the pattern out.

I would STRONGLY recommend making a muslin of these pants. They are high waisted and while I took off almost an inch before I put the waistband on I’m tempted to take off at least another half inch. I also cut a size 18 expecting to take them in a little and ended up taking them in a LOT (like an inch out of each side seam), most likely due to the stretch in my fabric. In the future I’ll cut a 16, fit them and use the flat-tummy underpockets like I did with my Gina pants.

I wasn’t going to do anything fancy to them but ended up top-stitching them in white. The pockets are a little on the small side, a casualty of the fitting process, but still functional. Wouldn’t these be cute with RED top stitching?

The shirt is from the Collar challenge last year. Again, wouldn’t it be cute in white with red top stitching? Yes it would : )

On to Tuesday:

Love my cotton blouses but this is why I have to plan ahead and iron the night before. This also means sneaking into the sewing room so Stuart doesn’t catch on and claim the ironing board as his.

This shirt was part of the shirt challenge last year. It’s one of my favorites : ) Paired with black jeans it made that 50-80 degree day transition easily. I think I keep making these shirts because if I have a lot then I won’t wear out my very favorites. Or at least that’s my justification and I’m sticking to it : )

Wednesday —

Ok, ok, I know what I said about a lot of these shirts but this is NOT the same pattern as the one above! Yes, it has gathers that seem to go into a yoke but this pattern has the back of the shirt incorporate the yoke so there are no separate pieces. Originally they used darts in the front and back but I turned them into pleats like the other shirt. I stitched the buttonholes a little closer than the pattern called for, they wanted 3″ spacing between each but I prefer 2 1/2″. It does NOT have the 3 little darts in each sleeve head that I love so : ( One of my resolutions this year was to incorporate more red/turquoise into my wardrobe and this shirt does that.

*I’d just like to add here that all photos are taken at the END of my day. I’ve been wearing the outfits you’ve seen for 12 hours, have biked three miles in them and already walked the dog…twice. I can see that my white jeans are a tad dirty, ah well : ) I DID brush my hair and reapply my lipstick but that’s it.*

Which brings us to Thursday –

Thursday was a little chilly, once again there were two sweaters along with my cute tank top. You’ll also notice in my collage I’ve got two photos of Thursday’s outfit:

This is for Vicki, who just found out I’m one of “them”. Yes, I work at Genentech in South San Francisco. This is the sign on our end of campus and the tank top I’m wearing is one of the many company shirts that are given out. This one was to commemorate a big think-tank-like project they did last year. I liked the graphics on it but the only style they ever order are crew neck shirts. I’m not a crew neck shirt fan at all, I’ll slice and dice them every time!

This particular one I cut down, used the scraps for the edging and straps and it took me about half an hour mostly on the serger. I used a technique I use whenever I do underwear, dance leotards and swimsuits, which is NO elastic! Vicki was asking on Twitter earlier about how to use elastic in swimwear so in the next day or two I’ll write up a whole separate post on how I do this. I’ll use another shirt as an example and do a step-by-step set of photos so you can see EXACTLY how to do this and how easy it is.

Really : )

So I took a free cotton t-shirt, made it totally girly and cute and paired it with a 12 dollar pair of pants and long cardigan I bought at H&M years ago.

And finally…the end of the week and the end of the month…

92 degrees. Feel the heat : )

The shirt was one of the first UFO’s I finished last year, it has a nifty underbust corset that matches but it’s in the closet today. The skirt is one I’ve worn before, it’s my one seam, 4 dart, wide elastic for a waistband skirt. I have 2 more ready to stitch up on my sewing table, one in plum, the other in red. I didn’t get to them this month : (

But realistically I DID wear at least one piece of clothing I made at least 5 days a week this month. Took some planning, took some stealth but I did it! One day I may not have to think about it so much but this was definitely a good challenge. Again, the challenge to get photos of everything proved to be the stumbling block but I worked through it.

Phew!

This weekend is the final weekend for me to get thing planted in the garden. We’re heading into the nineties temperature wise which means the tomatos and squash will be growing like crazy. It also means the blueberries will be ripening : ) My poppy plants are coming to the end of their blooms, now we wait for those seed pods to mature.

I’ve also got new sets of cushions for the outdoor furniture almost done, a bench to make using all recycled parts including the upholstery (lots of pictures I PROMISE so you can make your own!) AND the deck. is. DONE. Hallelujah! It even has evening mood lighting : ) It feels like I’m making so little progress on my 52 things to do in 52 weeks but not for lack of trying. Maybe I can clear a few things off my list this weekend…
And cupcakes. I think we need cupcakes soon.