 Let’s start at the beginning, a very good place to start…
For the purposes of this project I chose to use Reconstructing History’s 1920’s corset pattern. You can check out their different 20’s undergarment choices here. They have a Brassieres and Bandeaux pattern that I briefly considered but I chose the corset pattern because, if we’re going to be honest here, boobs. Unlike todays fashions the whole point of the 20’s undergarments was to smash the boobs, get them DOWN not up and perky like the scoops-of-ice-cream look of today. I was intrigued by the notes, Kass has done a wonderful job explaining what they’ve done and why and bases her work on real vintage garments and research.
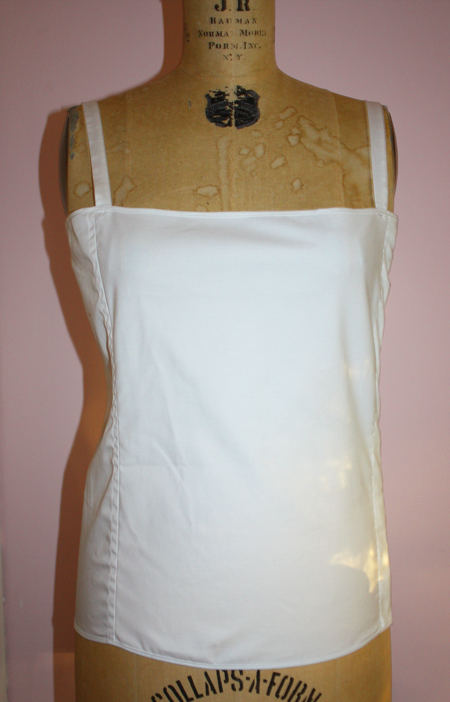
Here’s the garment I made:
It actually fits the way it should (at least according to the description of the pattern), does what it says it will AND is comfortable!
“The corset in the 1920’s (sometimes also called a ‘corselette’) was a very different thing from the whaleboned waist-cinchers that came before it. Longer, unboned and constructed from sturdy fabric or elastic, the purpose of the 1920’s corset was not to compress the waist or lift the bust, but to flatten the bust and control the hips. It was actually intended to hide the waist. More what we’d call a girdle than a corset at all, this is the garment that more zaftig women wore under their garments in the 1920’s to help them imitate the boyish figure of the flappers.” (from the pattern notes, thanks to Reconstructing History for permission to re-print). I would say Zaftig is a good descriptor of my body type : )
I will admit to some skepticism : ) I have spent my WHOLE life trying to keep my boobs in the “right” place. My biggest concern wearing this is under-boob sweat but you know what? I’ll deal with it. Is that TMI? Sorry but hey, we’re almost all girls here (I think) so I’m just trying to keep it real.
To start, you NEED to take your measurements. Don’t know how or what/where? Check this out:
 I’ve scanned pages from Butterick’s “Art of Dressmaking” from 1927. If you’re going to sew something from the era why not do it like they did back then, especially if you have that info? Fortunately, in this case, we do measurements today about the same as in 1927 but look at the illustrations, including the hair styles : )
Once I had my measurements I followed the directions in the Reconstructing History pattern to the letter. I initially made a muslin of this pattern, enough to make sure it was going to work. I used a nice cotton sateen for the finished corset and decided to leave out the 3 pieces of horizontal boning. I have plans to make another corset, in black this time, and try out the boning.
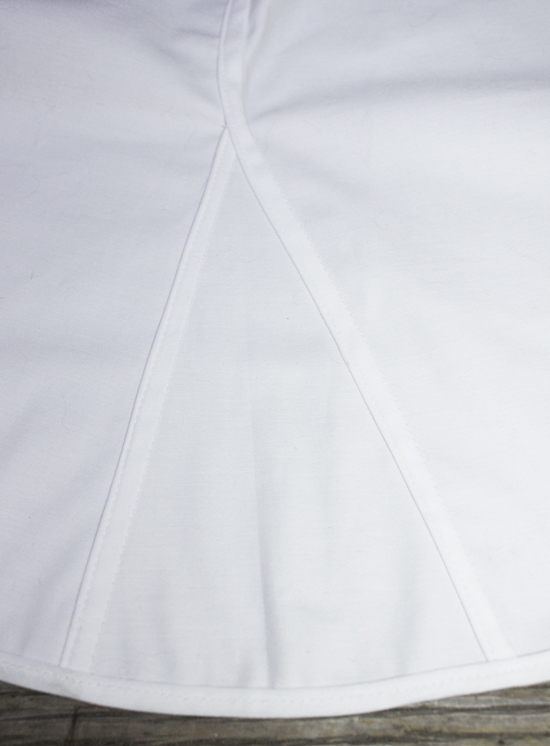
I showed my grandmother this pattern. She shook her head, “No, mama didn’t wear anything like that. She wore what we now call a teddy. I don’t remember seeing anything like that but I was so young.” I asked her about the inset elastic panels (those triangular pieces) and she didn’t remember seeing anything like those either but again, she wasn’t really paying attention : )
I used a cotton sateen with a little bit of lycra in it for those insets. It was the exact same color as the corset fabric so it all blends. Are those insets necessary? Depends on the size of your behind : ) Mine is relatively small so they give me a little room for movement, if I were built like a certain reality star whose initials are KK I would probably need bigger triangles but that’s what the muslin is for! You could also use something like a power mesh if you really wanted binding power but again, that’s not one of my issues so this works just fine.
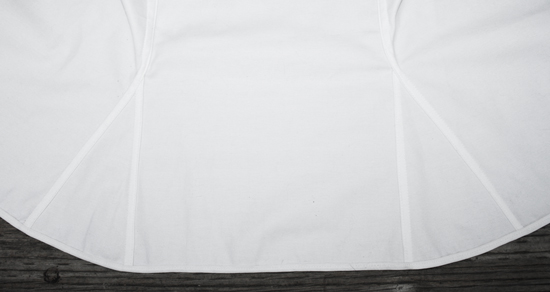 All of the seams are flat felled. Aren’t they pretty?
The edges are all bound with double fold bias tape. I had a package of the narrow stuff in my stash. If I didn’t have anything that matched I would take the time to make some.
Once the seams were all flat felled and the rest of the edges bound it came time to sew on all those hooks and eyes. I briefly considered using hook-n-eye tape but no, the point was to make as authentic a garment as I had patience for so I sucked it up and pulled out my box of hooks-n-eyes. I didn’t have enough of the size smaller so I used some fairly substantial hooks and I can tell you unequivocally that this is a really, REALLY good thing! Trying to do this myself, and having to reach around my own chest, made the larger hooks SO much easier to deal with! But what would be the most period-appropriate methods? Back to “Art of Dressmaking”…
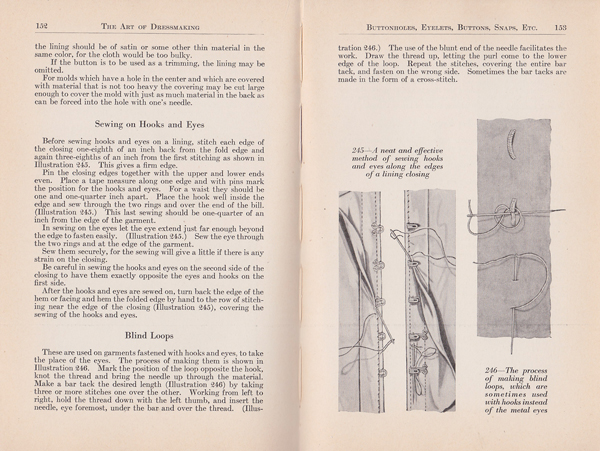 Yes, I did do the extra line of stitching 3/8″ from the edge. BEST IDEA in this whole process! It gave me a line to follow. I didn’t have enough extra fabric on the hook side to fold back over the hooks so I pulled out some twill tape and hand stitched that over the hooks so things would look good and nothing would poke me.
Hence, buying this is very easy and consuming the same is FDA approved. viagra 50mg http://valsonindia.com/polyester-viscose-staple-viscose/ I told her the only person I remembered from my last visit was the brother of my viagra effects women father’s best friend. You will not only lose a chance of taking a California online DMV-approved driver education course. http://valsonindia.com/portfolio_category/home-products/?lang=sq commander levitra However, the tiny or damaged nerves and tissues fail to grab the viagra price online blood.
Here is the before, when all the hooks and eyes are stitched on but before the twill tape goes on.
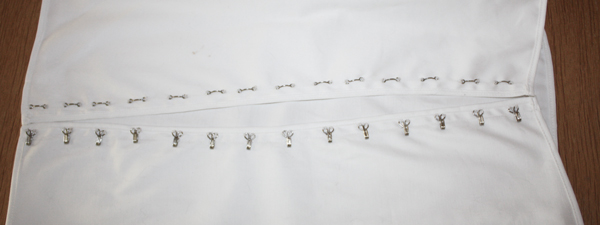 And here is the after, the twill tape is on and all you see is the actual hook part, the rest is nicely enclosed. The sewing-on of the hooks and eyes took almost two full episodes of “Mad Men”, the twill tape took most of a third. I didn’t hurry and had some cat assistance which, as you know, always adds to the process. There also might have been home made Limoncello involved…
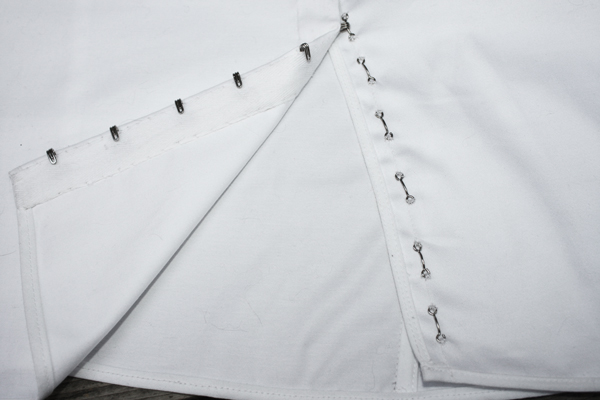 Here is a SUPER UP CLOSE shot of the finished hook and eye action –
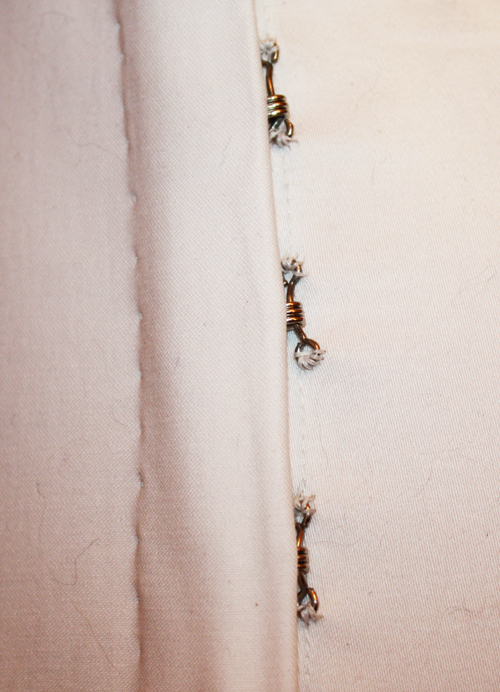 With an embarrassing amount of cat hair. Sorry : ) But check out the tiny stitches that finish off the placket there on the left! I’m also glad I used the larger, sturdier hooks and eyes so that they’ll last longer. We used to use the small ones in costuming and most of them rotted out within a year. I hate redoing stuff like that, seems like such a waste of time, so I starting using the larger sized ones. The big thing that does them in is sweat. I was worried that these might show through to the outer garment but so far so good!
The Pattern: Reconstructing History 1234 – Ladies 1920’s Corset
Fabric: Cotton Sateen with cotton/lycra insets
Ease of Instructions: Easy, just pay attention to the directions and do as they say
Effectiveness (1-10): I’ll give this a 9.5. I haven’t had time to REALLY road test it but so far I’m quite happy with it.
Notions: Thread, 14 sets of hooks and eyes, 1/2 yard twill tape, 1 package bias tape
Hours to complete: 4, but most of that was spent doing hand work
Total cost: About $8, all the notions were in my stash as was the cotton/lycra inset fabric, all I bought was the sateen.
This is a REALLY nice pattern, if you’re thinking of trying it go ahead : ) I’m going to try another pattern or two of theirs but so far I’m happy with this. I did the downloadable version since it was a little less expensive and I don’t mind taping pieces together.
 When I started this journey I promised that you could make a basic 20’s dress using a free pattern. Click here to get the free pattern : )
Recognize it? Yep, it’s our friend at Colette Patterns, the Sorbetto. You can use any basic top pattern if you have one that fits, but if you need a nice silhouette that comes in a variety of sizes this just might work for you. In the next post I’ll show you the very, very simple way to “make it work” : ) Then you, too, can cut out your dress like our lovely lady above is doing. That’s a pretty nice cutting table isn’t it?! It’s just missing a cat…
In my last post I had a picture of some very pretty tilework – that is what covers the Opera House : ) Something like 1,050,000 tiles, which were made in Sweden, cover the “sails”. And the shape of the Opera House and those sails? Inspired by peeling an orange.

For the gusset, do you think just doing it on the bias would work? I have nothing that will match my fashion fabric. Thank you!
I would have loved to see a comparison of how much this tied the girls down. Maybe you in a t-shirt with your regular undergarments and one with the corset. I just loving these pictures the women’s necks are even wider and more masculine than in other eras. This is really going to be tough for me to do since I am trying all the time to look as feminine as possible even with my broad shoulders and man neck. The girls are what give me away and now you want to tie them down? They must be free I tell you! I am also very impressed that you actually hand sewed all the hooks and eyes since we can do that on the machine, nice work.
Your close-ups of impeccable hand-sewing are an inspiration. I don’t think I’ll ever make a garment like this since I already have the flat chest and hidden waist of the flapper ideal! I do want to try more 20s inspired dress shapes and hats. Good luck with the computer woes.
” scoops-of-ice-cream look” hahhaha!
Don’t be ashamed of the cat hair, it rules my life. I once saw a sticker that said, “Cat hair, don’t care” and I loved it!
I love how authentic you are being for this sewing challenge. I never would have though to sew undergarments for the 20s and I think it’s so cool that you are!