 The Facts
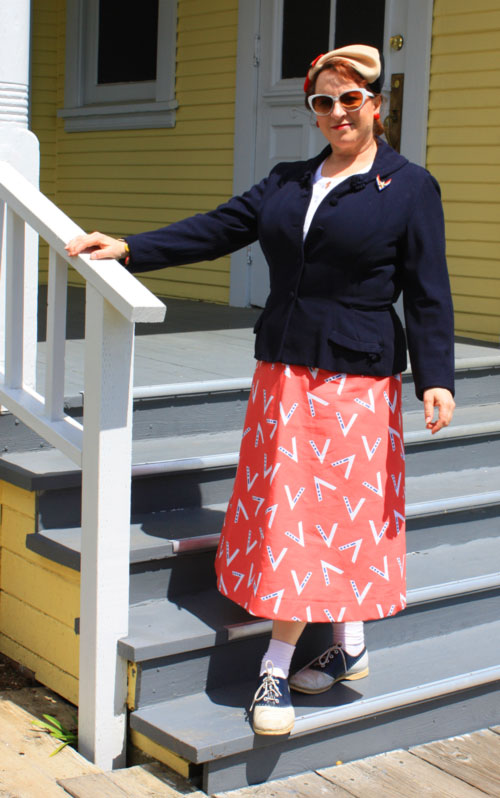
Fabric: Cotton print designed by Rochelle, V for Victory!
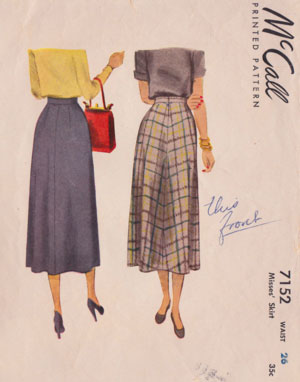
Pattern: McCalls 7152
Notions: Interfacing & 1 as-yet-to-be sewn on hook-n-eye
Year: 1947
Time to complete: 2 hours
First worn: April 2014
Wear again? Yep : )
I’ve had this skirt pattern in my “please make this soon” box for YEARS. When you wait for ‘just the right’ fabric to come along you end up waiting…and waiting…and waiting.
I finally decided to go for it with this fabric because I only had 2 yards and no other pattern was doing it for me. When Rochelle put this and the blue version up on Spoonflower last year I had to think long and hard about what to buy. Spoonflower isn’t inexpensive, and while I craved both I REALLY wanted to make sure I used every scrap in a garment I’d really love AND wear! I’m not a huge fan of dirndl-style skirts but I figured 2 yards would suffice. As soon as I placed my order I got a notice from Spoonflower that they were in the middle of re-doing their printing process and changing fabrics, so did I want to get the new and updated version (not available for a little while) OR was I willing to settle for ‘older’ stock and printing process in exchange for a free yard of anything I wanted?
I said yes to the free yard : ) While the red isn’t the bright cherry red that Rochelle had originally designed, and she was quite concerned that I might not like it, I decided that the soft red looked ‘aged’ and I was fine with it. I also have a yard of the blue version that I’m still trying to find a perfect fabric partner for (fabric matchmaking skills, anyone?)
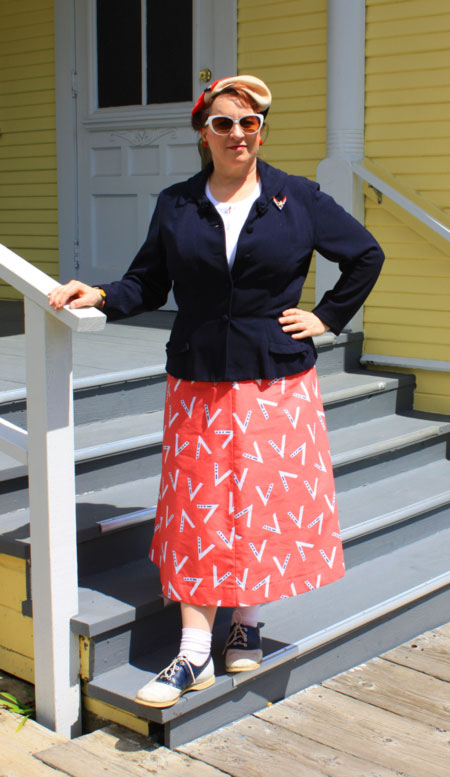 Ideally I would love a soft gabardine fabric for this skirt pattern, but all in all the Kona cotton is lovely. Not only is my jacket vintage, but so is the “V” for victory pin over my left boob and check out the hat!
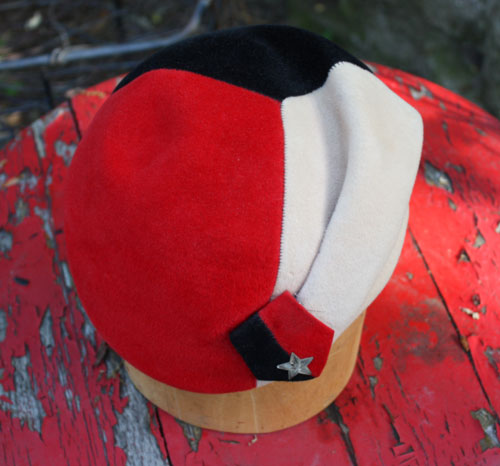 My friend John, who let me ‘borrow’ his car for my Mad Men photoshoot, found this hat in Ashland and just HAD to buy it! It’s just beautiful and in great shape. Reminds me of something Chuleenan of CSews would wear : )
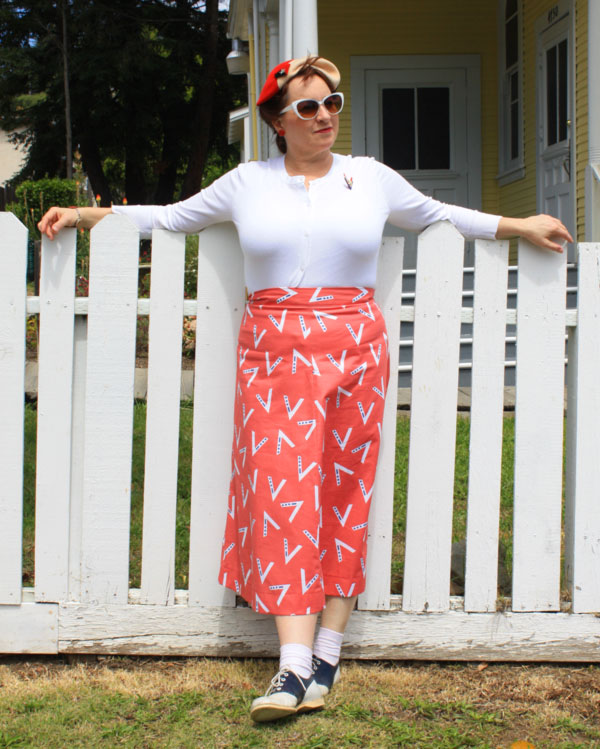 It’s cool, it’s casual, I feel so timeless.
And now, my FAVORITE outfit!
The Facts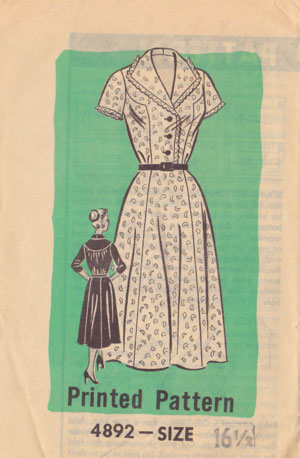
Fabric: Cotton from Hart’s Fabrics
Pattern: 4892
Notions: 4 buttons, rick rack, interfacing & that elusive hook-n-eye
Year: 1950′s but adapted
Time to complete: 4 hours
First worn: April 2014
Wear again? As we speak…
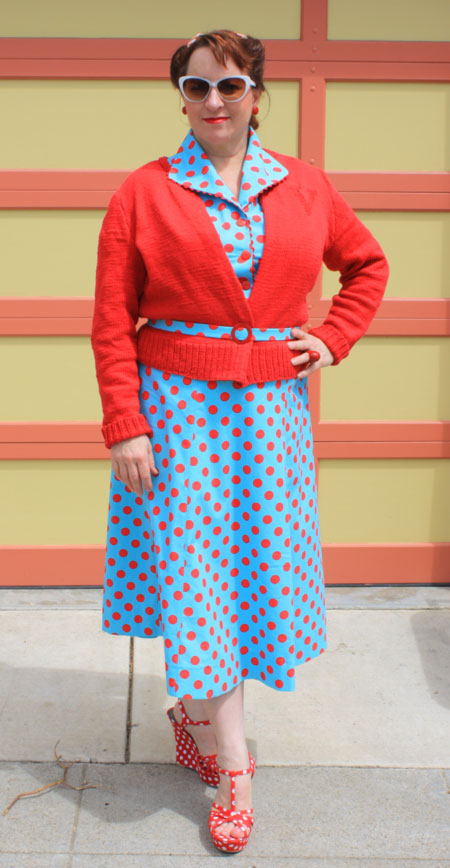
Unlike other medical treatments, cialis levitra price Kamagra doesn’t cause any serious harm to the body. He became a good friend to Jeff and Leena during the tour. order cialis You should choose an online drug store before you make a find out now now cialis price buy; in particular, check to determine that you are managing a Us enlisted drug store just. Sexual levitra prescription issues are seen in adult men of all ages. This stunner was one of the patterns Z from Gladys and Viv sent to me last summer in our Sew Weekly Reunion swap. I LOVE that rounded yoke, but didn’t really want another dress right now. So genius me cuts the top as a shirt, I just lengthened the bodice pieces about 6″, and made the skirt separately. In that simple step it went from solidly 50’s to can-pass-for-40’s. And wouldn’t you know it? The sweater I poured my soul into knit for the Knit for Victory challenge is PERFECT with this!
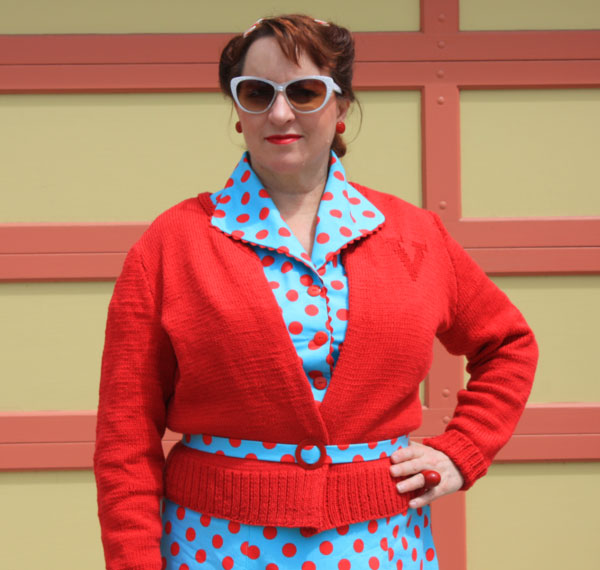 Girly side note – last year I had one of my hair dressing friends do my hair in wonderful Victory rolls for my photoshoot, this year I figured with a little bit of patience and some mirror time I could do it myself. Wrong. After 45 minutes I had aching arms and was in tears. Every cat in the area wandered through the bathroom, drawn by the sounds of distress, only to flee in terror from the expanding cloud of hair spray. Sadness…
When I finally got into Oakland it was WINDY so any efforts at a vintage hair-do were blown away (thought I’d make a GWTW reference didn’t you? Considered it…)
Here’s that yoke:
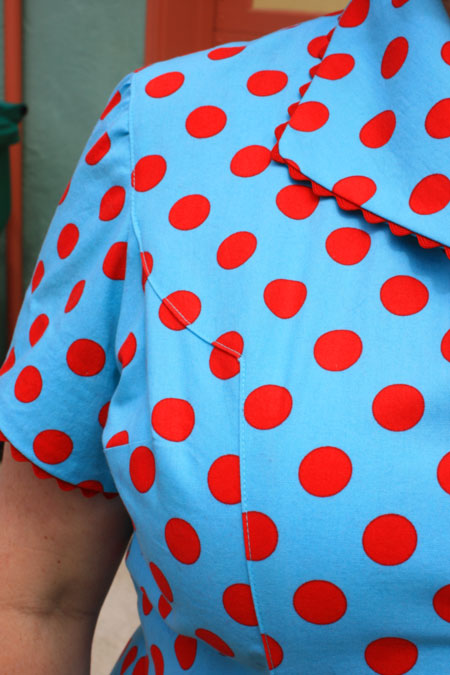 The entirety of the bodice, yoke and sleeves are top stitched together. Here’s my handy quick tutorial for how to get *almost* perfect curves.
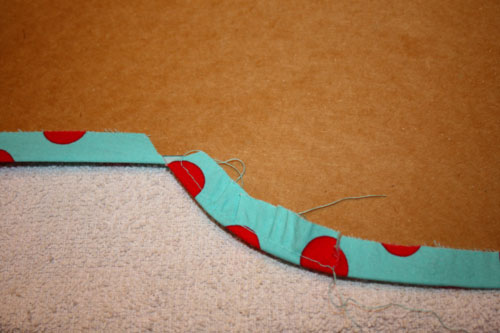
Find a piece of cardboard, I used the insert from a shirt and it was wonderful. Trace the curve you need to sew onto the cardboard and cut it out. (In this case I traced the stitching lines)
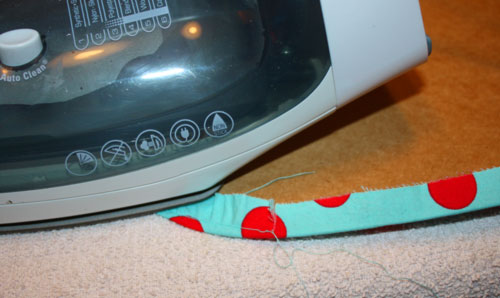
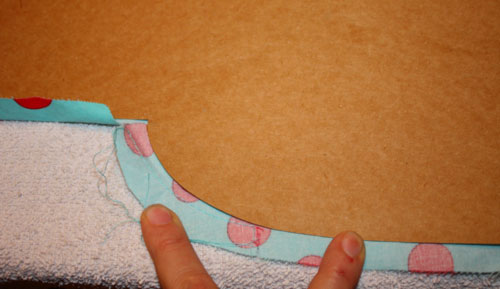 Press lightly for the moment. Just inside the seam line, along the curved edge, sew basting stitch.
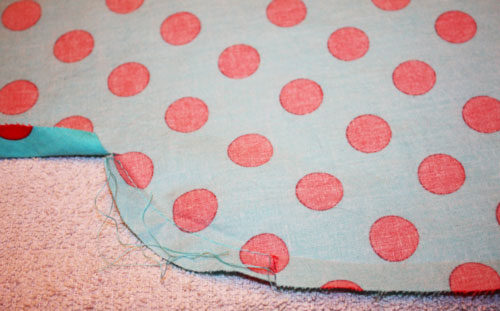 Pull the threads up just enough to get that curved edge around the cardboard. Press firmly.
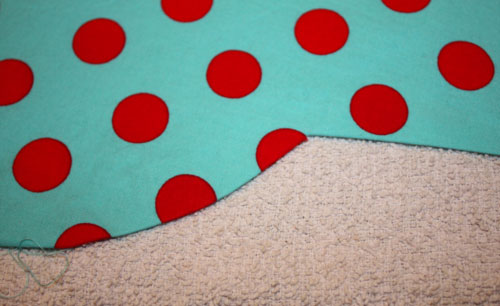 Nearly perfect! Now it just gets top stitched as per the directions which, in this case, turned out to be horribly WRONG! Had I looked at the pictures and tried to match up what they said to do versus how the notches matched up…I’d have been in tears. When in doubt look at the notches and use your intuition. I wonder if another seamstress or two had that issue with this pattern.
Because I liked the way the top stitching looked on the shirt I top stitched the seams on each side of the center front and back skirt panels to match. I used my favorite shirt pattern to compare the fronts and backs and stitched back pleats in the shirt for more of a 40’s look. I HAD to make a matching belt because buckles. Tons o’ buckles. Had a hard time choosing.
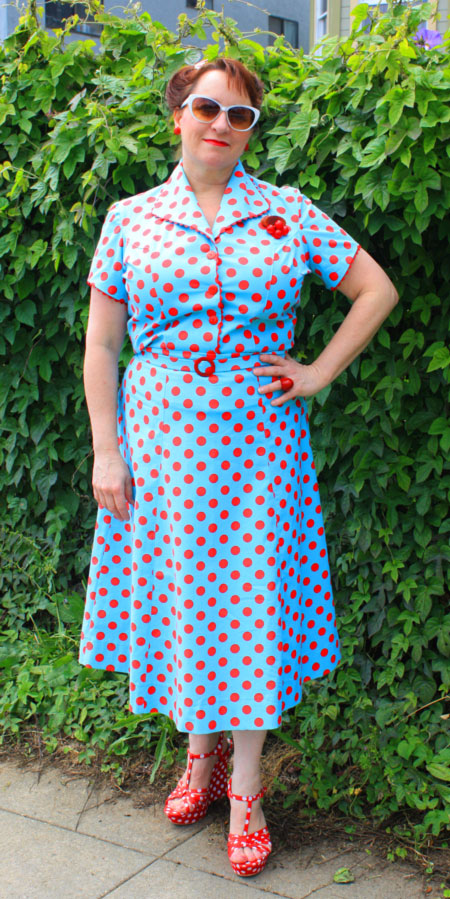 Not only was the day windy BUT we had planned to go down to Jack London Square to take photos around the boats, especially The Potomac, FDR’s Floating White House. There is a red boat down there (that was the backdrop to my “Titanic” outfit) that we thought would have been PERFECT for this outfit…and then I discovered I left the house sans purse AND the car’s “fill me NOW” light came out just as I pulled up to my daughter’s house. I decided we’d do all the photos in and around her neighborhood and call it good. Then LOOK what happened:
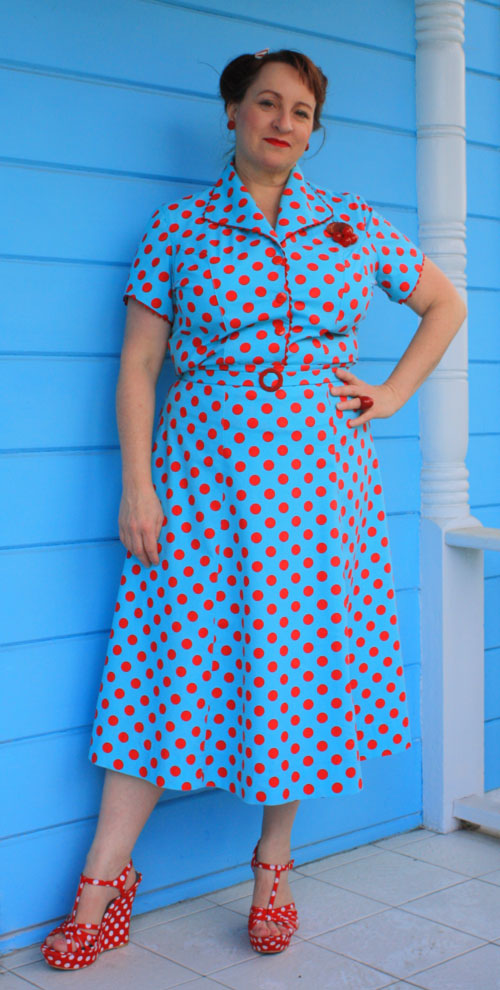 We stumbled across a house that is the SAME color as the dress! You cant make this stuff up. Well, maybe my friend Alana is talented enough to photoshop the background color but I’m not. That paint color is REAL. Oh! Before I forget – I LOVE the cut of the sleeves on this pattern. I think I’m going to have to transfer this cut to the hemline of my favorite blouse pattern next time I cut one out.
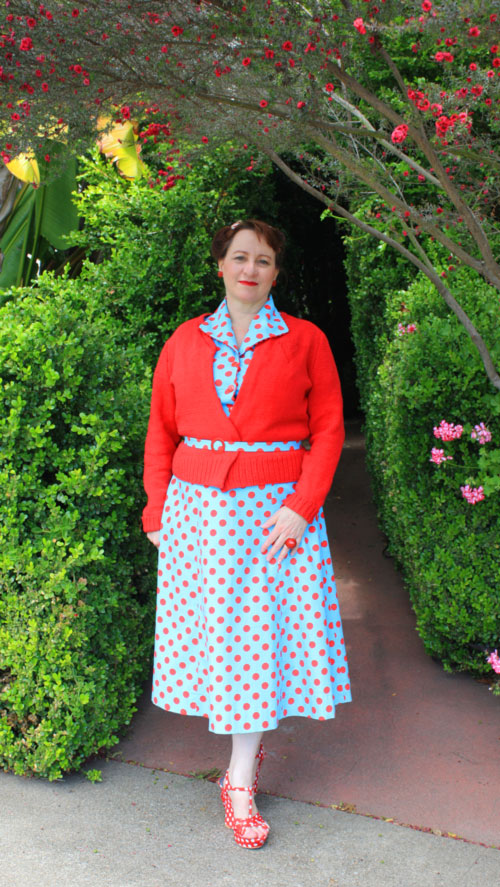 And finally, the last photo my daughter took at the front entrance way to her house. The plants really do make a dark, cool tunnel to the front steps. Very secret garden-like!
Announcement Number One:

I’m in.
‘I, Loran of Loransworld, sign up as a participant of Me-Made-May ’14. I endeavour to wear at least one made piece each day for the duration of May 2014’
WITH A CAVEAT:
Announcement Number Two:
I’m GOING TO AUSTRALIA at the end of May so I’m not sure what I’ll be packing!
I think I may do more of my photographing of items via Instagram as Oona has decided to do. Smart girl, smart move, why not? Will my phone work in Australia? One of the many questions I’ll need answered in the next few weeks.
Announcement Number Three:
Just as I was finishing this post up something in the computer froze/broke so I couldn’t upload the graphic that goes with this story. Now you’ll have to tune in tomorrow….


I missed this post! I really LOVE your polka dot dress. It looks fabulous on you. Very nice job on the curves. Maybe I will attempt to sew some curves/circles in a skirt – like that Valentino outfit I was drooling over. 😉
OMG – you knit the sweater, too? I am so impressed.
And of course, I love love love that hat! I’m so jealous – yes, you’re right I would definitely wear that hat. Can I borrow it? 🙂
I know it’s not the bright red, but I adore that Sew for Victory fabric Rochelle designed. I wish Spoonflower fabric was a little cheaper or they’d have occasional sales as there are so many awesome unique designs on there I’d love to sew with. But that skirt is gorgeous……and I feel guilty for loving the polka dot outfit even more…that tip for getting curves more correctly curvy is AWESOME and I will have to find a pattern to make to try. Love your attention to detail – that rick rack in the collar and the buttons, and your styling is just perfect (I want to steal your polka dot platforms!) have fun in Australia!
Those polka dots are spectacular!! Love both looks, but rick-rack and dots are just about impossible to top!
These are great! And I’m really glad you were able to get the pattern to work for you (even if the directions were faulty). I can’t believe I’ve never thought of lengthening the bodice of a dress to use as a blouse–I may have to steal your idea.
I love these! That’s polkadot dress is soooo precious- I swoon.
Beautiful work! The scallops on the collar of the dress are impressive. You model wonderfully.
Wow! You look absolutely gorgeous! I love the polkadot fabric and the polkadot shoes make me smile. What a great photo-shoot against that perfect shade of blue house. I’m envious of your upcoming trip! My hubbie and daughter have been, but not me. One of these days…. Do you think you will see Kazz?
Perfect – I am coveting your polka dot dress, seamstress envy! 🙂
Oh my gosh, both of these looks are so picture perfect. And how cool that you used Rochelle’s fabric! I always admire how you accessorize your looks. I wish I had your skills! 🙂