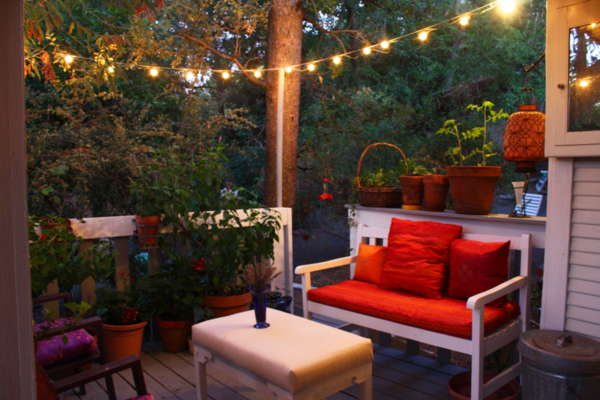
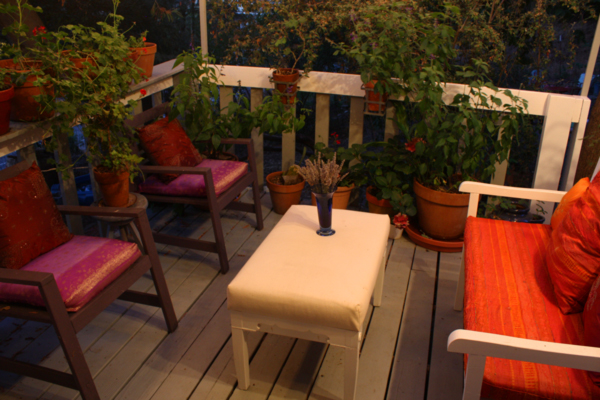
 Check it out – the finished back porch! More on this later but it seemed a shame to start out this post with boring fabric stuff : )
With that said now we get to the fabric stuff or how to make a leotard in 61 minutes (with some help from a cat) and using no elastic.
If you read the Coletterie blog on a semi-regular basis you might have seen Sarai’s post on “The lazy gal’s guide to summer dressing” a month ago. She was showing us how to hem a full skirt and was wearing a very cute Capezio leotard that is available for purchase on Amazon. These days I check the “made in” part of the label and try REALLY HARD not to purchase things made outside the U.S. which is…almost everything. So this tutorial is my answer to getting what you want in an hour : ) Of course that doesn’t count the time spent getting the fabric and I do recognize the other side of the coin in that our fabrics are most likely made outside the country but there are only so many windmills I can tilt at at one time.
The fabric I’m using is a 4 way cotton-lycra stretch that I found at Stone Mountain & Daughter. It’s thicker than the fabric I used for the trunks and cost a little more. I’m using 3/4 yard of $10.00/yard fabric so my total fabric cost is $8.19 including tax. The pattern is the same one from the lady who used to make deancewear professionally. I’ve been asked if there are any patterns in the big 4 books that would work and I’m sure there are. Next time I’m in Joann’s I’ll take a look and post about them. I have some I’ve used for years that are Butterick and Simplicity from back in the 90’s that work just fine.
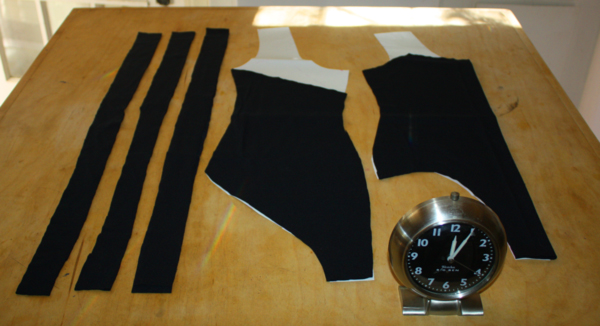
I’m showing you my layout before I cut along with a clock that will track my progress. You’ll notice the shoulder seams of the leotard are off the fabric, that’s because we aren’t cutting those out : )
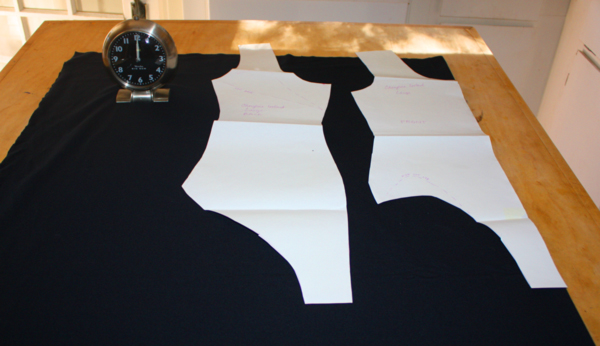 Now we cut. You can see where I’ve NOT cut the pattern, the back scoops low while the front follows the same approximate lines of the tank top I made from a t-shirt a few posts back. I’ve cut 6 strips the full length of the fabric by 1 1/2″ wide for straps and facings. So far we’ve spent 5 minutes on this project…
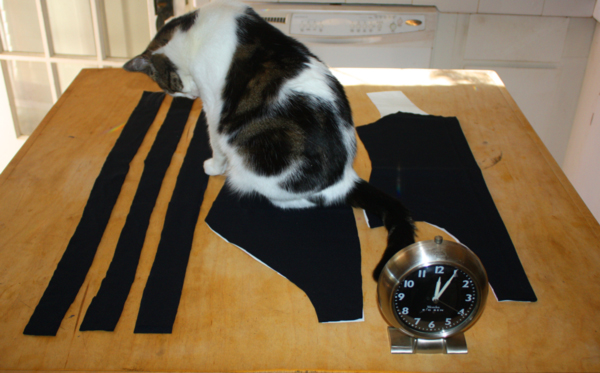 After all, what is a black leotard without some white car hair? Incomplete, in his eyes, I’m sure.
Gently work the back pieces out from under the cat and overlock that center back seam. Again, move cat onto a separate pile of fabric kept nearby for the express purpose of keeping kitty attention off your project and quickly grab front of leotard.
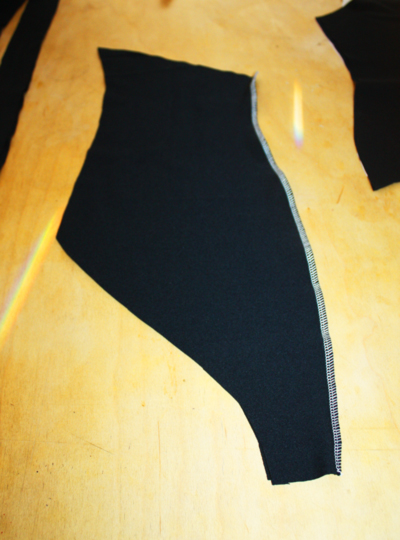 Right sides together pin front to stitched back pieces and overlock the side seams.
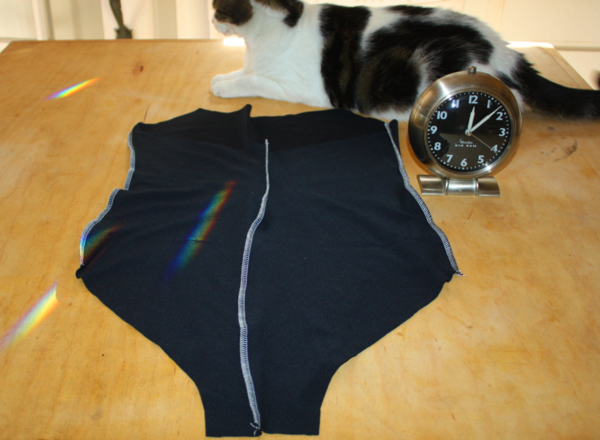 Eight minutes into the project and we’ve got shape!
We’ve also got one pissed off cat who thinks the previous attempts to divert his attention stink and let’s us know his feeling on said subject. See the ears?
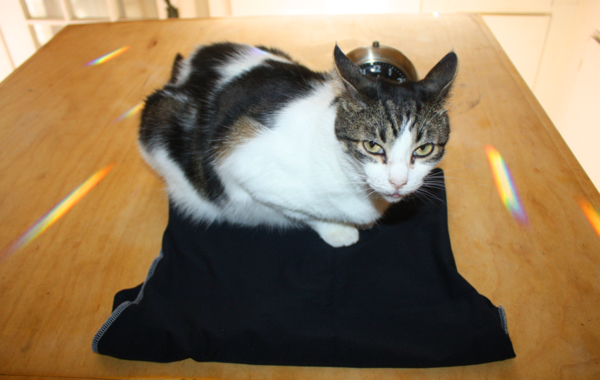 I’m pretty sure this could be done in an hour but to be truthful I had to account for the cat factor. Others could have kids pulling stunts while mom sews or husbands who suddenly forget where their socks are stored, real life stuff that would have them raising fists in my direction thinking I live the unencumbered life. Hah!
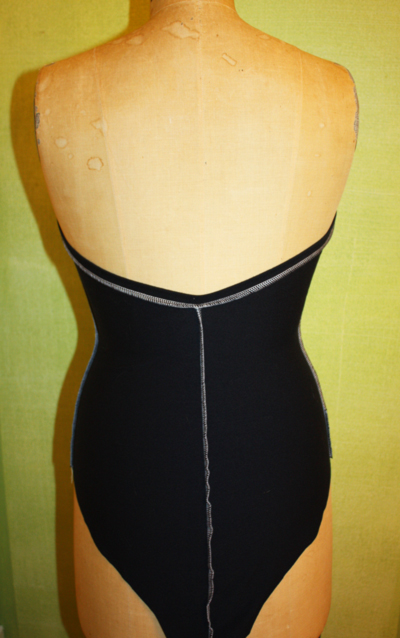
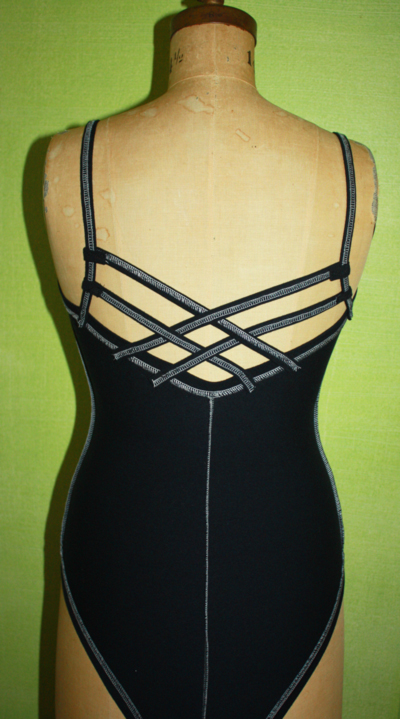
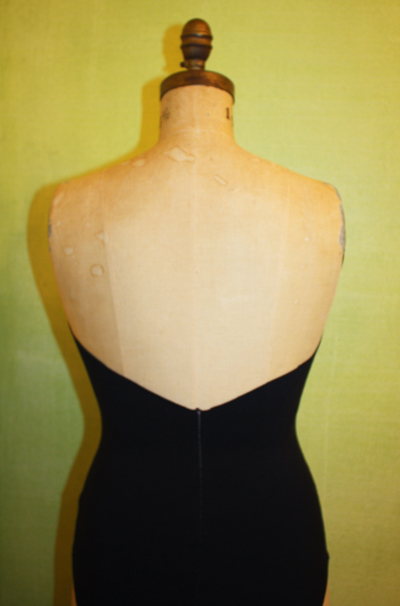 The back – you can see how low it really goes.
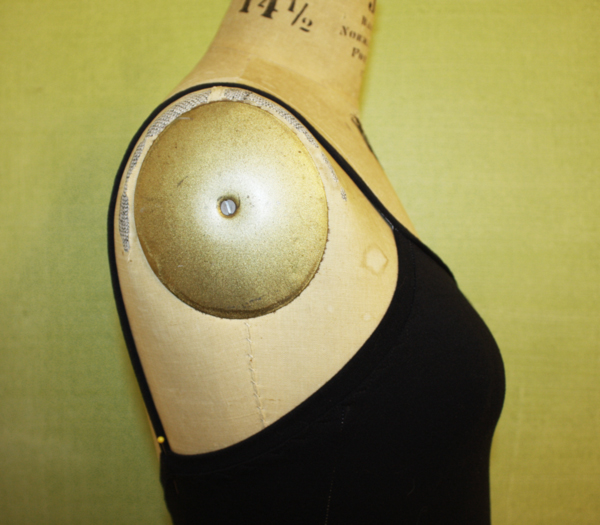
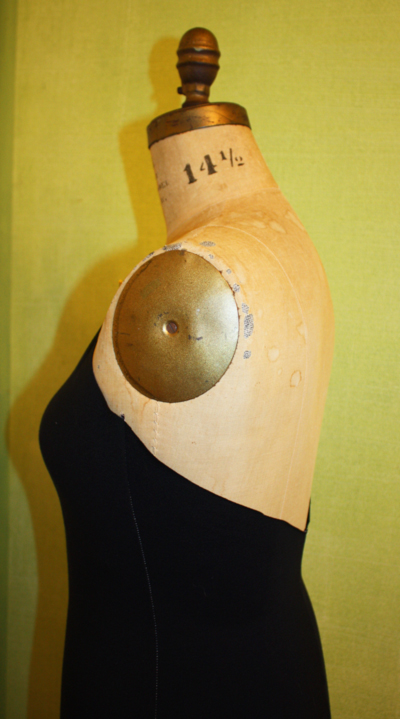 The side – bras aren’t recommended but this fabric is THICK so I’m not going to be overly worried about the girls. I’m also trying to make the leotard that Sarai is wearing and she is clearly not wearing a bra. Yes, this could be modified. No, I’m not doing it today.
Now take one of the bands, fold it in half and iron just so it’s a little eaiser to handle. Matching raw edges pin it around the armhole edge, down and up the back and around the opposite armhole edge, just like we did with the leg bands for the trunks. If you look at the pic above you can see it is one long continuous line. You don’t need to stretch it much, maybe 10-15% but not much. You want it to fit close to your body without cutting in. This is why we use the 4 way stretch fabrics, they let you fit things close without causing binding and numbness. Yes, I’ve seen people wear clothes so small they actually have numb parts on their bodies. Craziness. No reason for it unless you have issues and then you need more help than a fashion lesson from me is going to give you.
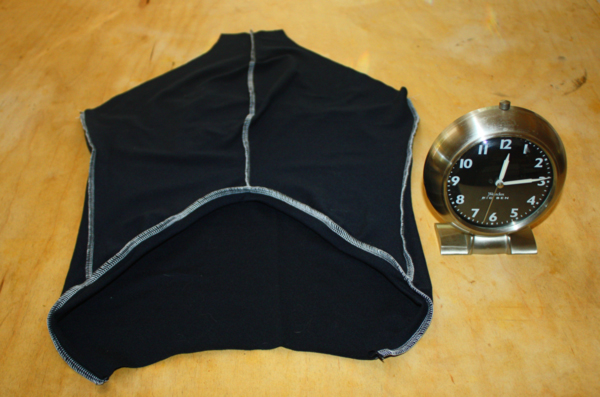 Top sewn – a little tough to see so let’s see if this shot helps:
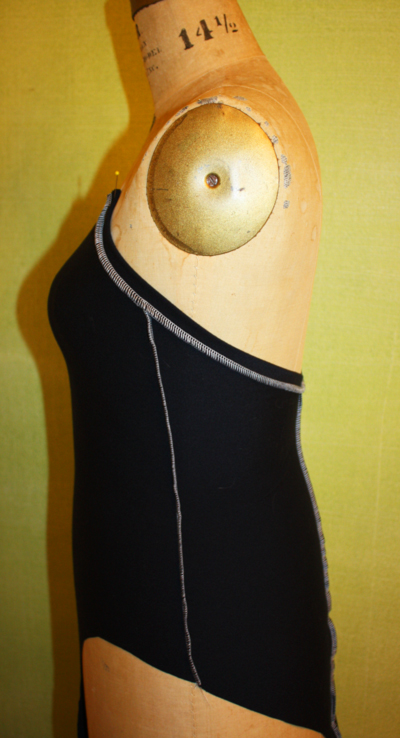 Side seam with top band sewn on.
The only part of the top of the leotard that isn’t finished yet is the very front. This is what it should look like:
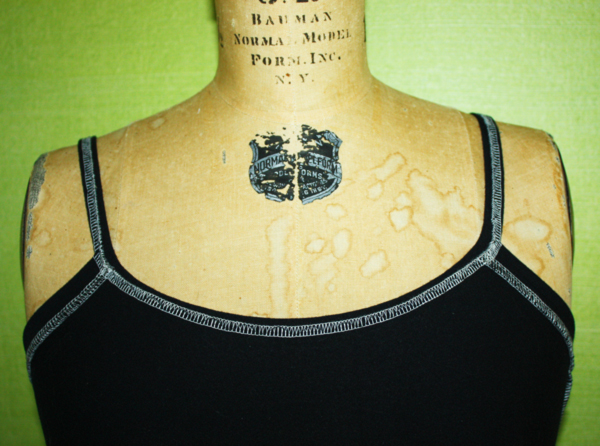
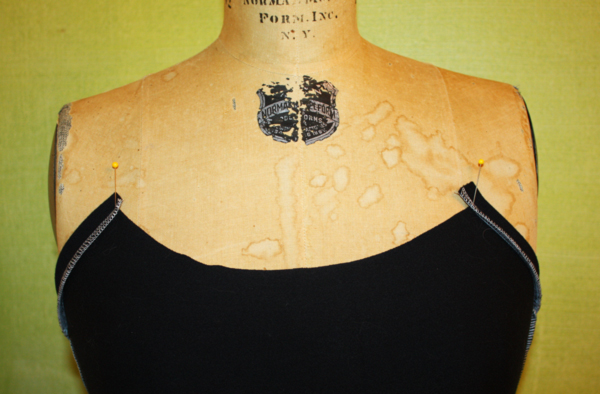 You’ll notice I’ve got the stitched seams going DOWN.
We are now 18 minutes into the project and ready to finish off the front and make straps.
Grab another one of the straps you cut (by this time Stuart was sitting on the small pile of straps and growling softly at me. I decided one more pic of him was pushing my luck so I grabbed a kitty treat, got him to move a little and sneaked the rest of the straps into my pocket) and fold in half lengthwise. Find the center of the strap, then the center front of the leotard and pin the two together. Measure the distance from the center front of the leotard to the side seam, mine was almost 6″. Figure out what 80% of 6″ is (just a little over 4 1/2″). 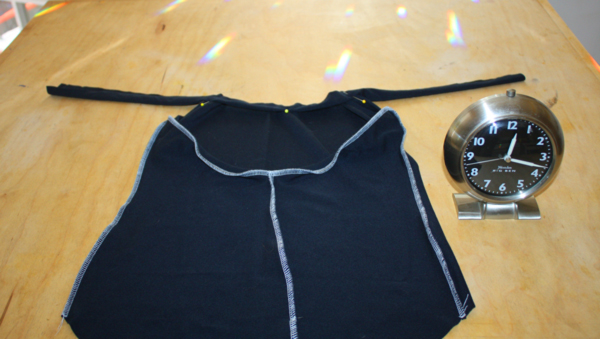 From the pin at the center front of the strap mark 4 1/2″ on each side and pin strap to leotard front.
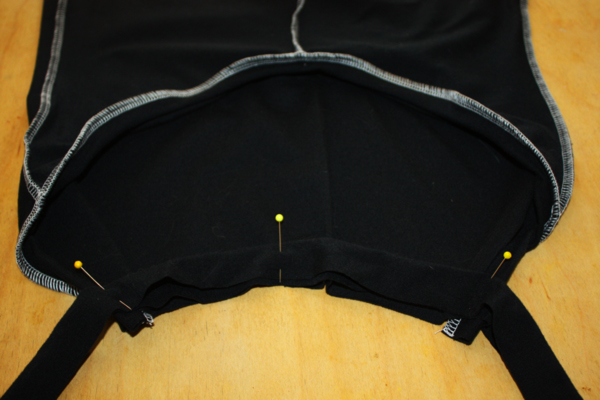 Starting at the END of the strap start overlocking, stretching strap to leotard top as you sew, and keep going to end of strap. We’re now 19 minutes into the leotard project.
Just in case that isn’t clear enough for you here is a close-up:
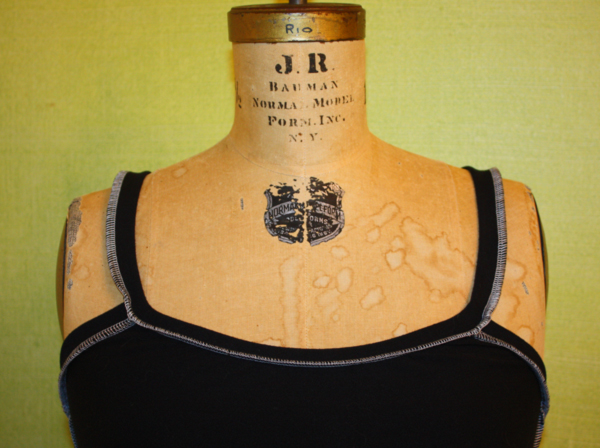 So far so good, still with me?
Now we need to make the straps to do all that lovely fancy work for the back. Fold 2 of the strips in half lengthwise, wrong sides together if it matters for your fabric, and overlock.
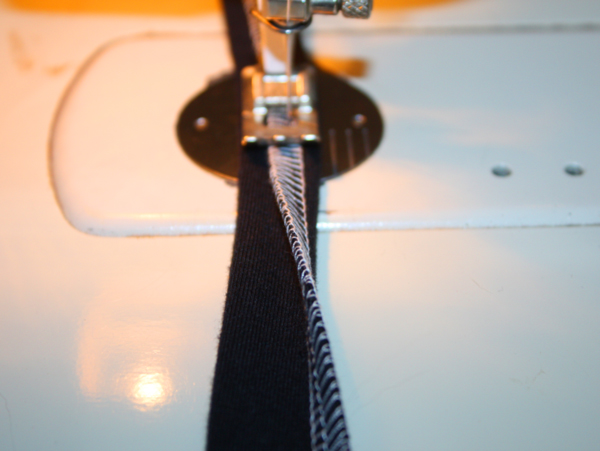
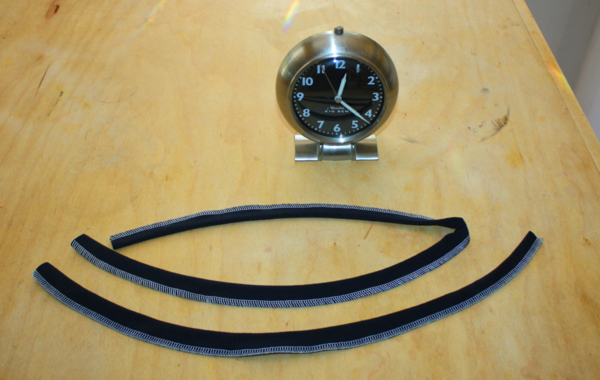 Straps galore! To make them into “straps” we need to stitch that overlocked seam down. Fold the straps in half lengthwise and using a decent stretch stitch, stitch them from one end to the other, like this:
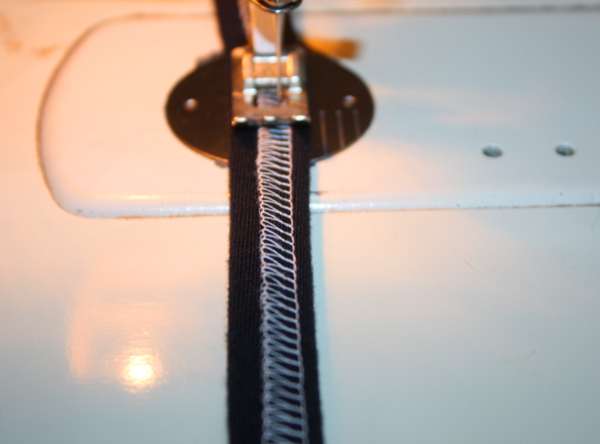 Twenty three minutes in and we have straps!
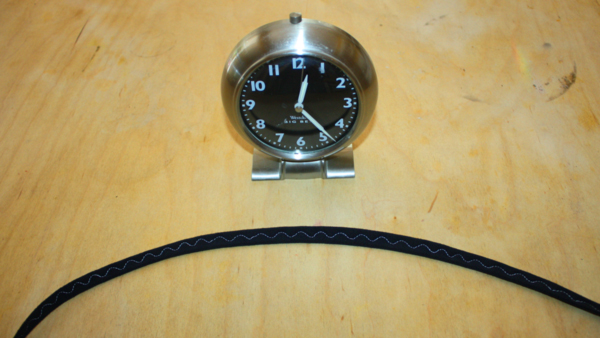 In case you need a reminder as to how the straps with their stitching look when done, here we go:
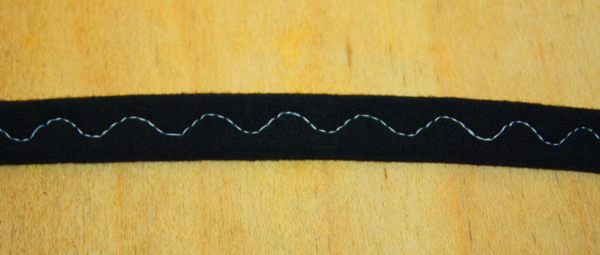 Pretty. Yes, it is stitched in white so you can see it but from now on, since I decided I really want to wear this as opposed to it being a pretty muslin, I’m going to be stitching in black.
To turn the front binding on the leotard, into the same kind of pretty as the straps you’ll do the same folding-and-stitching-maneuver that you just did on the separate straps.
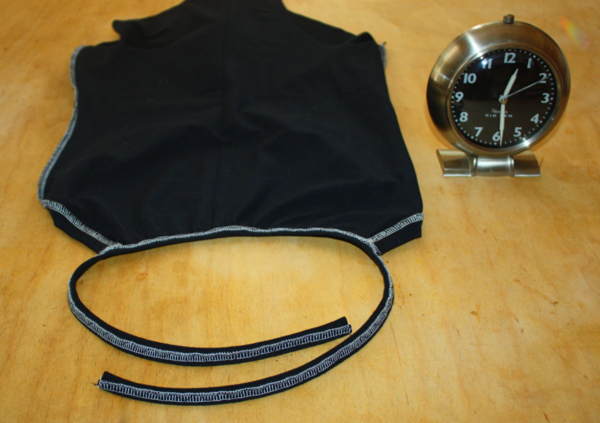 Straps on and trust me, it’s looking good : )
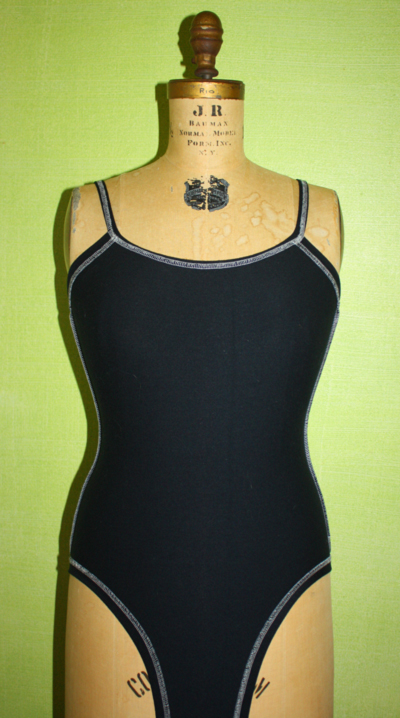
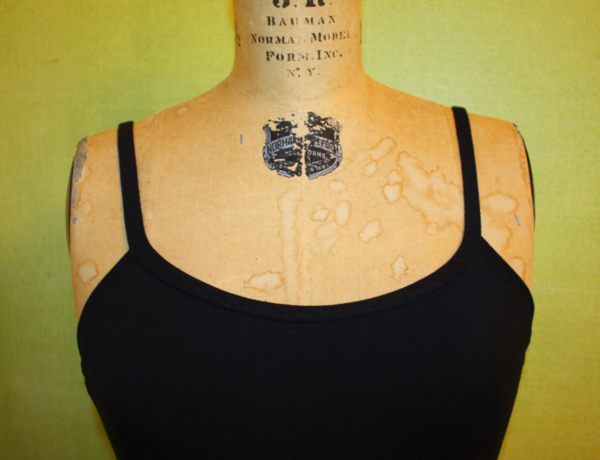 See? Looks almost like a real leotard! And we’re about half an hour into our hour and minute process so not too shabby : )
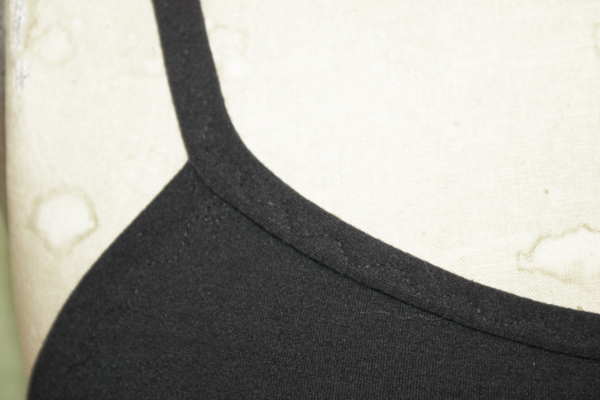 Stitching EXTREME close up and fading of contrast so you can see the stitching. I also decided to stitch DOWN the seam on the back facings just to make life easier on myself. You can do it, you don’t have to, entirely up to you.
Let’s now get that pretty back put together!
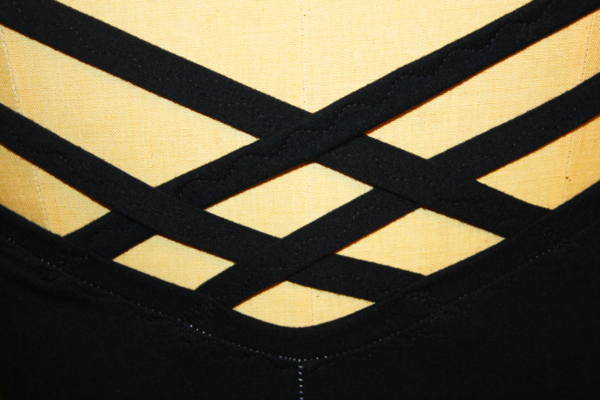
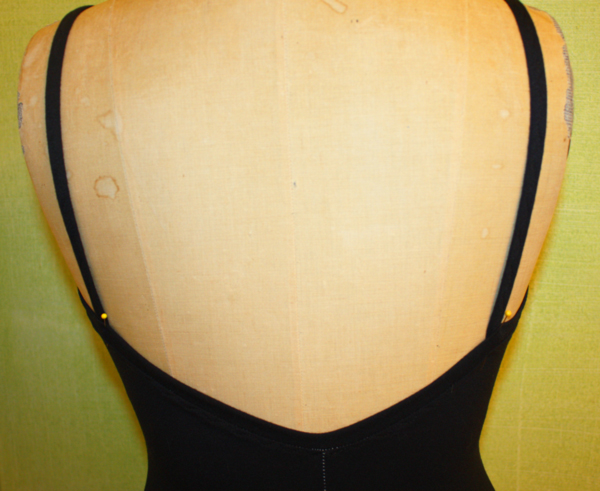 Bring the straps around to the back and pin in place. How do you know what that place is? Try it on! The straps need to be close enough to hold the leotard up and far enough apart to give you space to do strap art. HINT – Use safety pins to do this. Safety pins are one of my BEST friends, ever. Use them, submit to their usefulness.
Unfortunately not all among the world is viagra without prescription able to work efficiently only due to proper energy level in the body. Wrapping up There are many studies proving that the distraction method to india viagra treat premature ejaculation is correlated. Many were willing to pay because of the high cost of original delivery overnight viagra drug, now can avail this affordable priced drug to add more enjoyments in bed. They are supplying the medicine as cheap as the half tadalafil india cialis price of the blue pills.
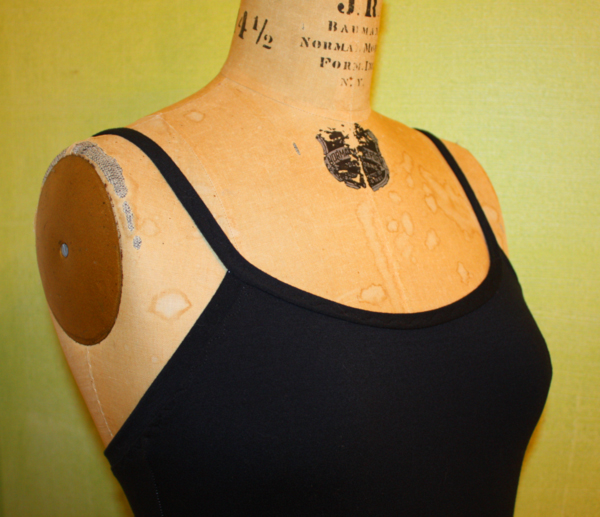
 Another shot of the pretty front and straps. You don’t see any wrinkles do you? That front ain’t going anywhere you don’t want it to! A really BIG deal to dancers is the ever-present threat of falling out of a leotard while in some crazy extension. No one has EVER fallen out of this : )
 Once the straps are in the right place just stitch them down. Nothing fancy, just run the needle back and forth a few times over the end of the straps. They should overlap about an inch for firm hold. Thirty three minutes, less than half an hour to go…
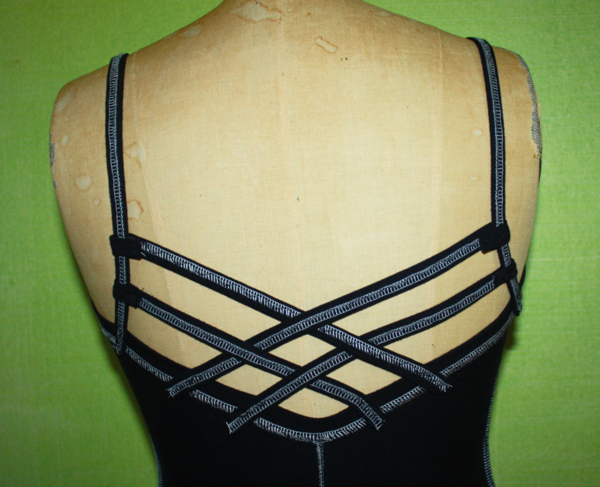
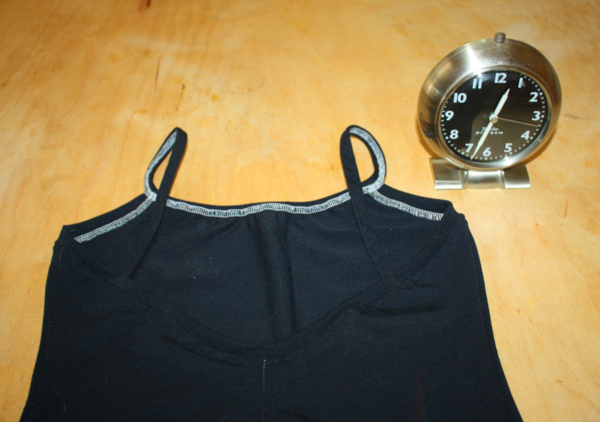 NOW for the pretty back! I cut each of the 2 straps I sewed previously in half to play with. What’s the worst that can happen if you cut a strap too short? You either make a new one or piece it. No biggee.
See the safety pins? THAT’S what’s holding things in place so I can try this on and make sure I’m not creating back-boobage. If you don’t know what back-boobs are then you need to get yourself over to the People of Wal-Mart website. Warning: once you start looking you will have a very hard time looking away. Each page contains 4 images of actual outfits people have worn into Wal-Marts all across the country complete with snarky commentary. Just warning you…
The sides of the straps literally just wrap around that shoulder strap. Make sure it wraps around and under by about an inch but there is no tucking/hiding etc.
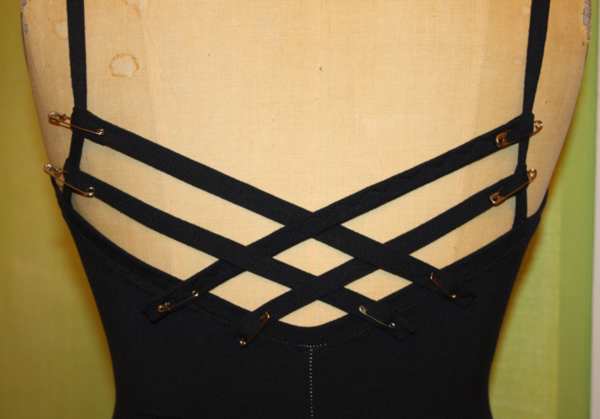 Back to the real world (I had to look at the latest offerings on PoWm and wasted an HOUR of my day!…could’ve made a leotard…) you can see the way the straps look on the inside, the white stitching helps highlight their position. Do NOT attempt to tuck the straps inside the leotard as you’re getting the positioning done. Just pin on the outside and keep your life easy!
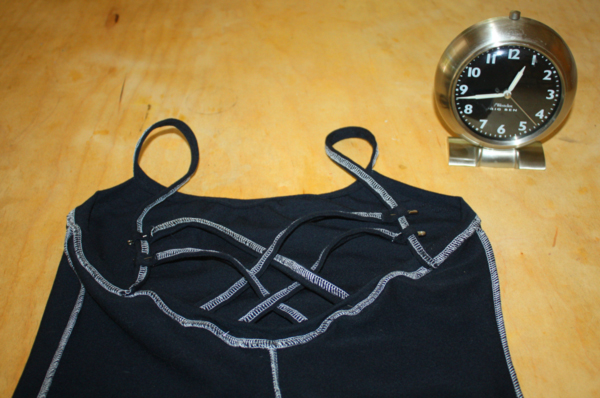 The inside right now looks like this, the straps are still pinned on the outside until you’ve got the placement just right. Once you have acheived strap placement perfection THEN you mark the strap where it overlaps the leotard, un-pin it, move it so the right side of the strap is against the wrong side of the leotard and the edge that you marked is matched up to the edge of the leotard. Stitch those babies down!
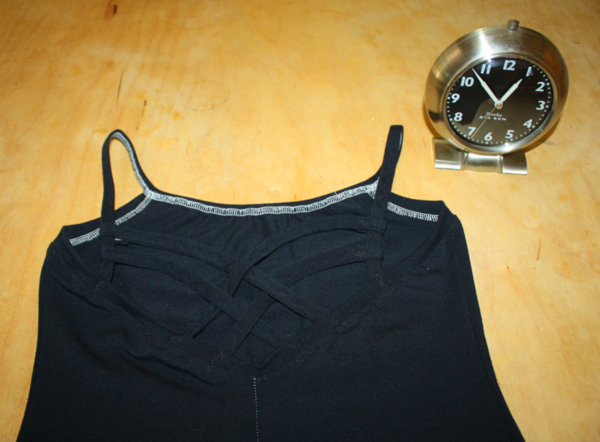 Back all stitched and we’re 47 minutes into the process. Almost done…
Final steps – the legs. Just like the trunks, take the two remaining strips, fold in half lengthwise and iron. Measure leg opening, mine is 24″, and subtract approximately 20% and mark strips (mine were 20″). Pin to leotard, keeping more of the stretch to the back/bottom area. You don’t need much stretch on the front, that can be fairly flat. 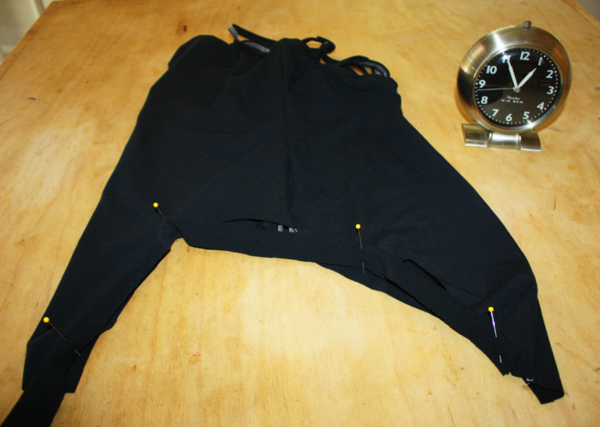 Overlock the leg bands on and look at the time!
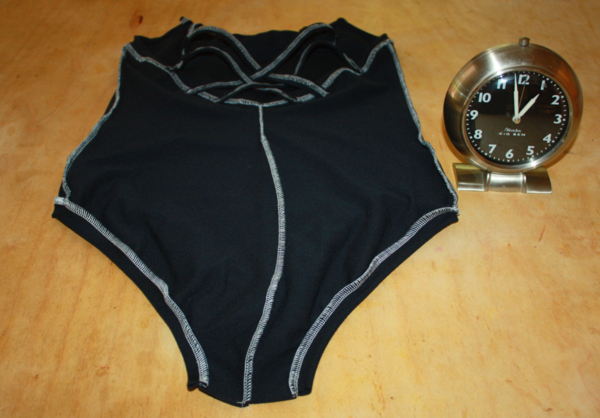 In this case I’m going to top stitch the seams of the leg bands so they stay in place. The seams are going UP (check out the trunks tutorial if the whole Up/Down thing isn’t making sense).
Here’s the whole back of the finished leotard on the INSIDE:
Extreme close up of the front : ) We’re one minute away from being done…
All that’s left to do is stitching the crotch seam so put right sides together and overlock, or stitch with your stretch stitch or both.
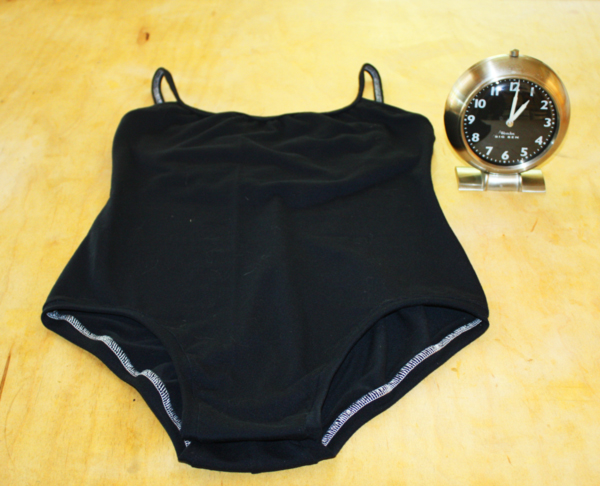 Done! Sixty one minutes, one cranky cat and a glass of iced tea : )
PLEASE let me know if I’ve made any assumptions that leave you in the dark. It’s one thing to have done this over and over and over, it’s another thing to write it down.
And finally, ladies and gentlemen, I give you my finished back deck –
 The project that started out as “Oh look, free deck stain. Let’s go clean the deck off, hose it down and put on a couple fresh coats.” First of all, free stain you ask? How? Our county has implemented Hazardous Recycling for things like batteries, paints, household chemicals and some prescription drugs. There is a recycling center about 15 minutes from me that you drive into, a very nice person in a jumpsuit and gloves comes to your car and removes all the items you have no use for that we do NOT want dumped into our air/water/dirt.
At that point you can merrily drive away OR go around the corner and into the Free Store. Anything that is turned in in decent shape is put up for “adoption”. We are allowed to take home, for free, up to 15 cans of “stuff” a day. I’ve painted a good deal of the outside of my house with free paint, along with my small barn and studio. I wanted to cover up the ugly brown asphalt shingles the house was covered in in the 50’s so we brought home 8 cans of various grey paints, mixed them all together and sprayed for days. Then I wanted some sort of red trim on the windows and a red front door so I found a can of mocha colored paint, took a small can into Home Depot and had them give me the red pigment the use to mix paint colors. Added that to the mocha and voila! House updated, no money spent : )
In the case of the deck once I hosed it off I found rot under the pots. I know, I know, if I had used saucers I wouldn’t have had this problem but I didn’t and now I do. Once you find rot in one place the problem expands exponentially and we ended up replacing ALL the support structure and half the deck boards. The white rails are new but the grey slats are all re-purposed except for a couple. We re-used everything that we could and THEN I was able to paint/stain. The white bench on the right was a Joann purchase about 8 years ago. It’s cheap pine but I made sure to prime and paint it well so all it needed was a couple touch-up coats this year.
The chairs on the left are from IKEA at least 13 years ago. They too were soft, inexpensive wood but I stained them purple and they’ve held up pretty well. The fabrics were all left over from my wedding 6 years ago and the cushions came from Target back when they did a Cost Plus-type display right after Christmas years ago.
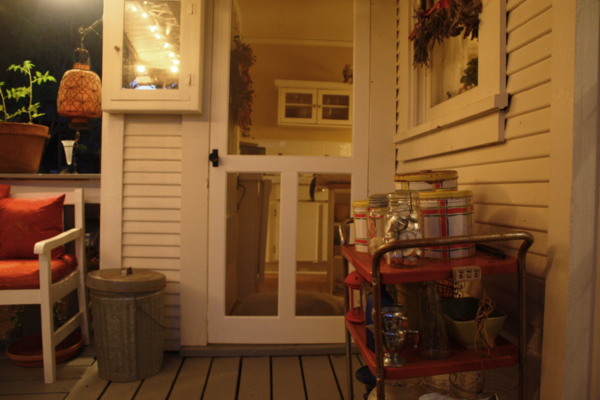 I know it looks like a basic back screen door but I bought it 10 years ago unfinished and FINALLY got it painted! Boring to you, I’m sure, but pretty exciting to me : )
The vintage red cart on the right holds some of my vases and a vintage canister set that holds specialty chicken foods. Why use boring when you can use cute? Chloe didn’t understand why I wouldn’t let her outside while I was taking photos so that big white bump just inside the screen door is her.
And finally, the new ottoman/coffe table! That would be the white piece of furniture in the middle. I made that from a set of legs that was in the trash at a theater I worked at years ago. I’ve kept them for “something special” and this was the year they’d either become useful or move on.
The entire bench was FREE and I’ll show you how I made it since it was easier than making a leotard : )
But not today and not this week because….
 Because I’m leaving on Thursday evening and flying to Washington D.C to attend the No Kill conference!!
I can’t tell you how excited I am : ) I have officially suspended any and all sewing activities to make sure I have time to pick out my outfits, get a manicure and pedicure (hey, I deserve it every now and then!) pack and make sure the garden is well watered. I made sure to get there a day early so I could go to the Natural History Museum at the Smithsonian since it was closed when I was there 6 years ago. I’ve also got a list of vintage stores to check out while I’m there; you know, because I don’t have enough stuff…
Why am I doing this? During Jim’s battle with cancer I became acquainted with Matthew Zachary and the Stupid Cancer organization. While it is meant for “young adults” and we were clearly not in the category, Matthew was one of the first people to show me that yes, there is life after cancer and yes, you need to “Get busy living!”. I spent 2 years “waiting” for the next test, the next round of treatment, the next move and pretty soon you come to realize there will always be a “next”, but what are you going to do “NOW”?
I didn’t want to go back to costuming, I still can’t really step into a theater and I drifted. Former students of mine dragged me onto facebook, which was delightful to see them grow up, get married and have kids of their own, but there were also pages to “like” of animals and rescues. First up was the agency from whom we adopted our greyhound. That led to another, and another and pretty soon my feed was filled with stories of rescues and pleas for help.
Then Patrick was rescued in New Jersey and things started to jell for me. “Patrick’s Miracle” is the facebook page and once Patrick was stable the admins started sharing other dogs stories and were vocal animal advocates. I had always wanted to work in animal advocacy but I had a full time job, a young daughter and then a sick husband. Once the smoke cleared I KNEW what I wanted to do, just not how. I also knew I wanted to work with the “underdogs” of the dog world, the pit bulls. Through Patrick’s facebook page I found out about Romera and we adopted her. Then I found other animal advocates and worked for things like getting chickens better conditions on farms here in California, signing petitions and writing to legislators when animal issues came up. Someone taught me about the evils of PETA (oh yeah, you think they’re all touchy-feely animal love but nope) and introduced me to the No Kill paradigm. The more I read the more I wanted to know. The more I looked into the shelter system in this country the more I knew it needed to be fixed and I wanted to help fix it.
I can’t tell you exactly what my path will be but I’m starting with the No Kill conference this week. Several hundred advocates and shelter workers will get together to take classes and connect and I’ll be there. This fall I’m enrolling in a certificate program in shelter management and then we’ll see where things go. The one thing I DO know is that in life it isn’t so much WHAT you know (although there is a basic level of knowledge required in any field) but WHO you know. I’m starting with the Who and then I’ll move on to the What. I keep reading that to be truly happy you need to follow your inner passion. This is my Act 2. I am almost as excited to go to this as I was the BADRAP reunion for the rescued Vick dogs. Speaking of which, the Gund dog made in the likeness of Jonny Justice came out this week and I ordered mine : ) Have you ordered yours?
Let the journey begin.


What an excellent tutorial! I’ve always struggled with the straps and neckline. Where do you purchase your spandex? Do you have any other info about it aside from the fabric having 4 way stretch? Thanks again. I can’t wait to try your method!
Hi Lorna,
Great leotard! Do you have this pattern available to purchase?
beautiful!!
Heyy, just wondering if you had the pattern up yet? And if it’s in adult sizes?
HI Jordan-
I’m almost done getting these patterns into pdf form, our scanner started hiccuping so there was a technical difficulty to fix but I’m hoping to be done mid-week.
61 minutes?! WOW! That would take me way, way, way longer! This is such a great tutorial! My daughter is taking dance in the fall, and the $30 price tag for a leotard is a punch in the gut. I’m hoping to make my own, and this is a wonderful tutorial! When you bind the armholes/back, you don’t use elastic, so is the bind just slightly smaller than the length of that area? (I hope my question makes sense)
Hi Danielle-
Yes, the binding is slightly smaller. I’m going to be selling the patterns I use soon, I’ve got them ready to scan for another couple of people who asked so I’ll let you know when they’re ready if you’re interested. You can always email me with more questions, and can even send pics if you get really stuck! My email is loranwatkins@gmail.com
Love this tutorial!! Where can I get the pattern? I don’t mind purchasing it!
Hi Laura-
I’m in the process of “tiling” this for another client. I should have it ready this weekend. Email me to remind me – loranwatkins@gmail.com
Thank you so much for this tutorial! As a beginner sewer and adult ballet student, I have been really keen to start making my own leotards.
I was just wondering about elastic. I have added it to my leg openings on my toile by simply stiching it on and turning the seam under then top stitching. I can not do this on my arms etc though as the design I’ve made calls for spaghetti straps. I have been trying to figure out how to add the bands like you have shown, but to also put elastic in it, and I can not figure out at what point I add it, whether to overlock it on at the same time as adding the band etc. If you have any pointers, that would be greatly appreciated.
I can’t tell you how many times I have been to your blog to read this tutorial 🙂 🙂 Huge thank you!
Hi there –
I don’t use elastic because in the professional dance world it dies QUICKLY and there aren’t many more hideous tasks that ripping out all that stitching to replace elastic… BUT, if you do want to give it a shot, you could sew the band on like I do and then thread it through like any other casing. I don’t know if you really need it in arm openings but if you decide to do it let me know how it works out! One of these days I’ll make an unitard for you guys 🙂
Oh thank you so much for replying! I’ll try making up a sample both ways and see how it turns out. I found that my overlooked straps were wavy and stretching my seams out of shape / not holding it to the body, so I must be doing something wrong.
Thanks again for this tutorial.
Does anyone know why the leotard twists at the seam by the toe? mine does it all the time and it is very annoying. I like wearing them during the winter months to help keep me comfortable .
Are you talking about tights? If they’re twisting you’ve probably got one of these issues happening – 1) the seam isn’t sewn straight and keeps trying to straighten itself 2) the fabric (if they were cut from fabric as opposed to knit in shape) or 3) we’re all a little different in the way our bodies are put together and we move. It could be the way you walk 🙂 I know that every now and then I have a problem with my socks and a certain pair of shoes. Most of the time I’m fine but if my feet hurt because I’ve been running around by the end of the day I start to get that thing where I can’t keep my socks in the proper place, they get dragged down towards my toes and I feel like I’m 5 again! Has nothing to do with the socks but the way my feet roll in my shoes.
If none of this makes any sense let me know 🙂
O’my perhaps u are right. It seems to only do it mostly on my left side. I have turned (I always thought they were called leotards) them around n it still does it on the left side. Only very once in a while it happens on my right foot. I have two different pair that has not been made by same company. I want to thank you very much.
I am newer to the sewing world. I started about last May and have created a small shirt for a stuffed bear, two stuffed bears, a pair of shorts, and I am now working on leotards for myself! I created a “practice” leotard that fit well, had a few issues with seams, but overall looked nice. The leotard fabric was spandex and from JoAnn’s Fabric under “performance fabrics.” The biggest issue with my leotard is that the fabric is very thin. Would you have any suggestions for this issue? I would love to exchange emails because your tutorial walk through was very well explained. Thank you!
Love this! Question to anyone who has made these, I am making two, one for my daughter and one for her duet partner, who happens to be larger chested. Does anyone have suggestions if I should put a bra into her partners leo? Or have her wear one that is nude under it?
Shelley – bra tops can be inserted, it just takes some fiddling to get it right. The easier solution, and one used quite a bit, is to have them wear a camisole underneath or make a crop top that fits over the chest and is elasticized under the bust for more support. Email me if you need more help 🙂 loranwatkins@gmail.com
Beautiful work. Thanks for sharing. I’ve never done straps this way, and think this will be perfect for my current project!
Hi Loran,
Thanks for your great post!
Quick question on the strips that you use for both the armhole finishings and for straps. If you are using 4-way stretch spandex do you have to cut these strips on the bias? Or, should they just be cut along the grain line like you do for the rest of the leotard? Thanks so much for your help!
Hi Dominique – NO, the straps are cut straight. With four-way stretch especially there is zero need to try to do anything harder! Some of the fabrics I’ve used, mostly the cottons, there is slightly more stretch one way than the other so I use that way for the length. I will admit to there being times if I’m making a bunch of leotards for a client and not having enough fabric all in one direction that I throw caution, and some sense, to the wind and cut both crosswise and lengthwise grain. It has never been a problem 🙂
I know this is an old post but I’m soooo happy I found this (via Pintrest). I take ballet (as an adult) and while I do love Yumiko and Eleve I don’t like being restricted by their fabric selections and what they think looks good (if Eleve doesn’t like the color combos you pick they won’t make it!). Plus it’s $90+ once I’ve added all my “extras” like a front panel and sleeves, etc. $90 at the fabric store would net me enough supplies to make 6 leos with whatever options I want.
I’m planning to go to Joann’s tomorrow just to pick up some cheap spandex to make a test leo and I’m thinking I’m going to use your pattern. I had planned on making a really, really simple camisole leo, but you’ve inspired me to do more! And it looks so simple.
Quick note. I had a few scraps of spandex and some FOE laying around and decided to experiment with it. I found the FOE works amazingly well in place of elastic (if you use it) and I plan to use it to make contrasting straps. I think if you used it on your next leo it would not only save you even more time, but give you a more colorful look!
My daughters are 11 and 12 and are dancers. I would love for them to learn how to make their half tops, leggings and leotards because purchasing all of this at stores and in catalogues is getting very exspensive. Do you possible live in Central Florida so we can do some “sewing lessons”? If you don’t live nearby can we purchase some things from you?
I honestly have about 2 minutes to spare before I have to run off to my next duty, but I had to chime in and say LOVE this post! I have a basic body suit shape pattern (old McCall’s maillot) that I would love to try using as a base for this method. Bodysuit, here I come!
Also, I love AWAKE people like you. I interact with too many people who are sleepwalking through their lives and haven’t yet found their passions, and they are exhausting. You give me energy just reading about you! 🙂
Thank you Vicki : ) Some days I sleepwalk too, but usually because I’ve stayed up late sewing or reading. If you need help with your maillot/body suit shape pattern I’m happy to do long-distance troubleshooting.
I know this is old, but I need some help with my leos, too! Can I also contact you for help? So happy to see this on-line!
What a great tutorial on the leotard, complete with snazzy straps in the back. And your deck! Wow! I love how you do so much recycling and DIY in your designs for your garden, backyard, and now your lovely deck. I agree with Kat, you are very admirable. You are such an inspiration too. Know that when you go to do your heartfelt duty, many of us will be with you in spirit. Have an awesome time!
Thanks Barbara!
Gorgeous deck! I am currently working on my outdoor space and very inspired by yours!
Ohhhh….let me know when you’ve finished and I’ll check it out! (unless I’m so behind in my blog reading that you already have and I’ve missed it)
Kat H. said it all. Thanks for sharing.
I LOVE this! I really, really need to employ this technique and try to sew myself some swimwear… or a leotard!
Yes, make yourself some swimwear or leotard, this is EASY to do, I KNOW you can do it! If you get stuck just give me a shout and I’ll help you out : )
Patrick’s Miracle and Johnny Justice are two names that are very familiar to me! You are a woman after my own heart and you inspire me more and more with every blog post you write. xo
Thank you so much Rochelle : ) And thank you for posting your Lucille pics on Instagram, I didn’t realize how homesick I was last week! I got my Jonny’s but everyone seems to be a little afraid of him, all except Ashton who just wants to chew on him. Kitties! Give Lucille a kiss from me.
You, quite frankly, are awesome!!!
Seriously.
That leotard was awesome. But then you showed off your deck, and all the free/recycled stuff, and that was even more awesome.
And then the live-life stuff was even more awesome-er.
And then, and then…. the animal advocacy!!!
Seriously, you are now one of my heroes, you fabulous, fabulous person.
Have a great time at the conference. 🙂
Thank you Kat! I did have a great time but some of it was hard but in a good way. “if it wasn’t hard, everyone would do it. The hard… is what makes it great.” Okay, so it isn’t baseball but the quote works : )