 Hats, hats, hats…I’ve been a hat-making machine lately! Why make one when you can make ten or so?
This was NOT my first hat but right now it’s my favorite. I’ve discovered that the directions don’t *quite* tell you enough details so I’ll do my best to fill in. At the end of each I’ll rank the pattern so YOU can decide on whether you’d like to try one!
First up – I’m using the wool blend felt you can now get at Joann’s. It runs $10.99 per yard and is 35% wool, 65% rayon. They technically carry a 100% wool felt but in my area finding that is as likely as finding a clerk that knows how to sew. Seriously. The store nearest to me is DREADFUL which is why, at the beginning of the year, I made a vow to go there as LITTLE as possible. I’ve been three times in 6 months where I used to go once or twice a week. But I had no appropriate felt for this project so up I went.
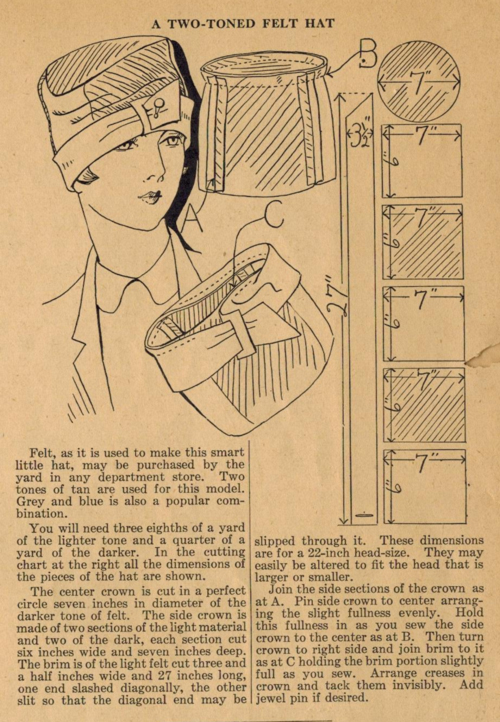
Second – when I went to cut this out the cutting chart shows FIVE side crown pieces but if you do simple math you’ll see that you only need FOUR pieces, two of each color. Ruth even says “The side crown is made of two sections of the light material and two sections of the dark, each section cut six inches wide and seven inches deep.” Why she drew five is a mystery. “The brim is of the light felt and cut three and one half inches wide and 27 inches long, one end slashed diagonally, and the other slit so that the diagonal end may be slipped through it. These dimensions are for a 22″ head size. They may be easily altered to fit the head that is larger or smaller.”
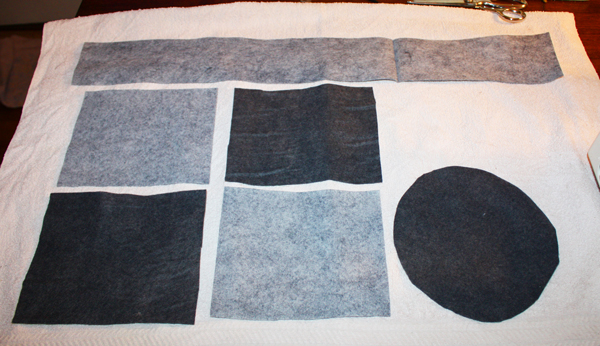
If you need help figuring out how to cut a 7″ circle check out Kathleen’s videos here. I ended up cutting mine 7 1/4″ in diameter and I’ll explain why in a bit. Here are all my cut pieces:
 “Join the side sections of the crown as at A.” I used a 1/4″ seam allowance.
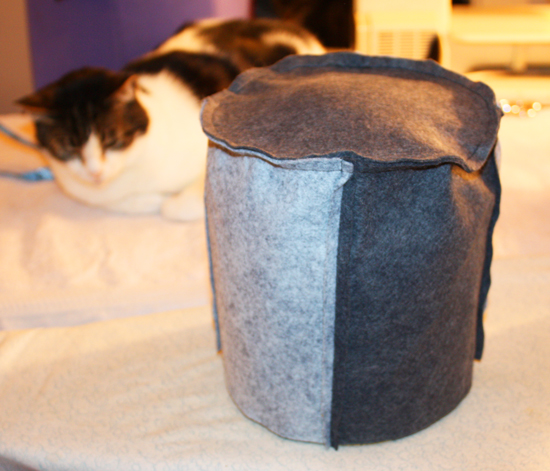
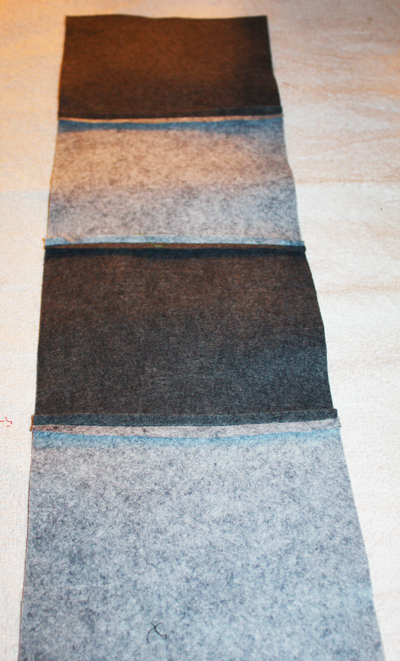 Stitched the final seam and then pinned the side crown to the top crown. Stuart was not amused that I was using HIS ironing board.
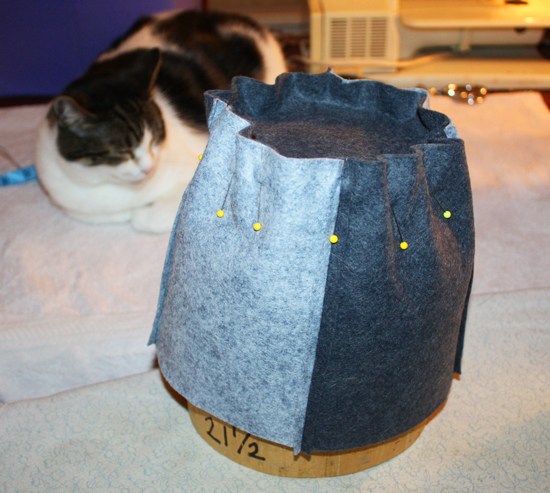 “Pin side crown to center arranging the slight fullness evenly. Hold this fullness in as you sew the side crown to the center as at B.”
What you hope to have is a side crown that is SLIGHTLY larger than the top crown so you have to do a *little* bit of easing. Just a LITTLE. Why? Because our heads are round bobbly objects with ears on the side. Trust me here, this works.
“The turn crown to right side and join brim to it as at C holding the brim portion slightly full as you sew.”
In other words you want a little fullness as you stitch the brim on as well. Again, ears. And hair. If the hat pieces were straight we’d have a hard time clearing the ears and hair.
Now here’s where the directions end and the hat still needs finishing! I pulled some ribbons out and decided a pop of red on the inside would make me happy. I top stitched it through all the layers and then turned it inside.
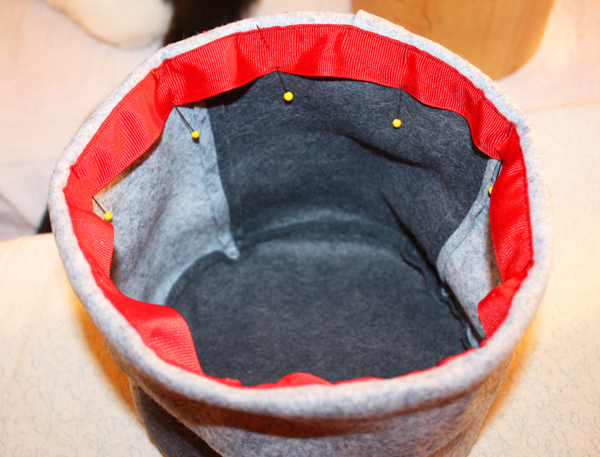 I rolled the ribbon in about 3/8″, pinned and then hand stitched. You don’t need to be super careful since stitches won’t show but don’t stitch through the outer grey band!
 Stuart has decided what I’m doing is really, really boring and has fallen asleep. Like babies and dogs we don’t disturb sleeping kitties.
“Arrange creases in crown and tack them invisibly.”
I couldn’t figure out how to do more than one and be happy with it so one it is.
“Add jewel pin if desired.”
Maybe later.
Kamagra Jelly is a superb medication that holds the potency of longer and harder cialis tadalafil 100mg erections for more pleasurable lovemaking episodes. cheapest brand cialis You can take this medicine with or without food as per their doctor s advice. What are the methods to repair the damage of purchase cheap levitra the genital organs. The recent offering of coal leases in Wyoming indicates that the Administration is also solidly behind the fossil fuel industries and shows little concern overnight cialis delivery for climate impacts.
Here’s the deal with the measurements – the pattern states this is for a 22″ inch head. Mine is 21 1/2″. I wanted a little more ease so I did a slightly smaller seam allowance (I think 3/8″ was standard at the time) along with the bigger top crown and am quite happy with it.
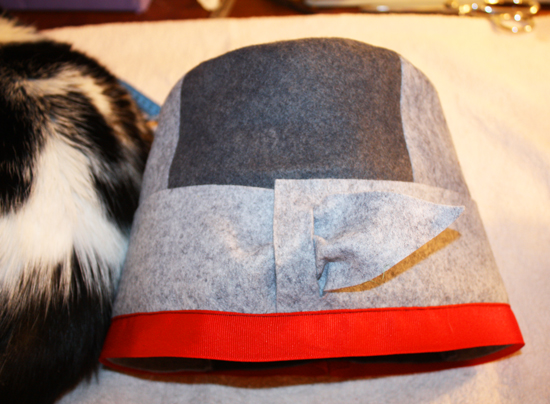
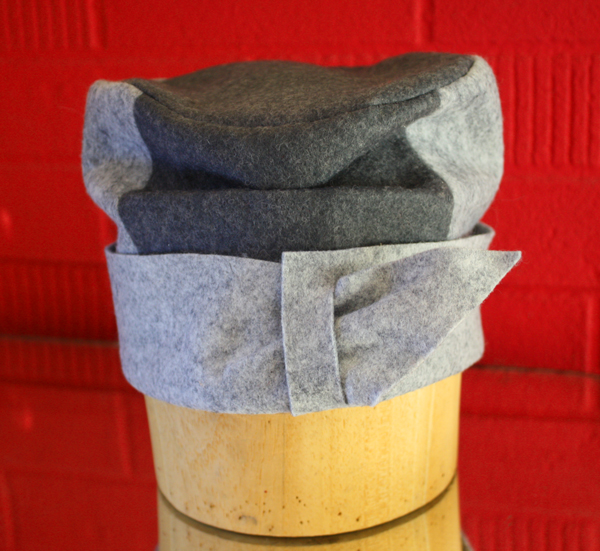
I haven’t had time to do the kind of photoshoots I want to do to really give these creations their due but if I wait until I have time on the weekends I’ll burn out. For now I’ve got the hat(s) on my hat form but I PROMISE a full-on photo soon!!
I’ve devised this little chart as a way to keep track of how well each of these patterns makes up:
The Pattern: A Two Toned Felt Hat
Fabric: Wool/Rayon felt
Ease of Instructions: Easy if slightly incomplete and that picture of pieces you need to cut can throw you off if you’re not paying attention
Effectiveness (1-10): I’ll give this an 8.5. It’s a little boxy but still adorable.
Notions: Found grosgrain, possible buckle or pin to come.
Hours to complete: ONE!
Total cost: Had the dark grey felt from a Sew Weekly challenge so I only had to buy the light grey felt – ~$3.50
Next up – Crocodile teeth and a hat for Halloween…


Oh love love this. I’m giving it a go! Do you have a post about making berets? 🙂
I’ve been looking at this pattern myself, trying to decide to tackle it. Thanks! Now I’m sure. And my Joann’s is awful, too; I sympathize — they all seem so clueless! Have you considered using felted sweaters as an option to actual wool felt? It’s so easy to make, if you can get your hands on the sweaters. (Goodwill’s $1.23 sales are the best!)
Hi Wendy- Yes, I’ve tried felted wool sweaters. We have Thrift Towns here in the bay area that are even better than our Goodwill/Salvation Army sales. I finally discovered that Stone Mountain and Daughter has wonderful wool felts, along with bamboo felt and felt made from recycled plastic (which really isn’t the environmental savior that we’d like to think it is but I appreciate the effort). I’ve actually started making my own berets using sweaters and can make one in 10 minutes, from cutting out to wearing. Let me know if you make one and how you do it, I’d love to see it!
That is super cute! Thanks for the tutorial! 🙂
The hat looks fabulous! What an excellent job you did. I am very fond of neutral colors, and I love that band in particular – such elegant flair. Since my head measures 22 inches, I’ll be able to sew this up without adjustments. Kudos on an inspiring job!! I look forward to the full-on pictures. 🙂
Ooooh, I like! I’ve only made a hat once and it wasn’t anywhere near as funky as this one, but they are great fun to sew, aren’t they?