 I was the featured “gabber” on Mary Jane’s Farm facebook page last Monday : )
As promised, here are the steps to doing a pair of shorts or dance trunks using NO elastic.
I tried doing MANY photos, highlighting each and every step but again, if I’m clear as mud please don’t hesitate to ask! Tempest said she was following along on my camisole instructions until I talked about the way a seam should face (up or down) and then I’m guessing her eyes glazed over and she found something shiny to occupy her attention. That’s what I do when my train of thought derails.
So we start with the basics. Here are my trunks cut out:
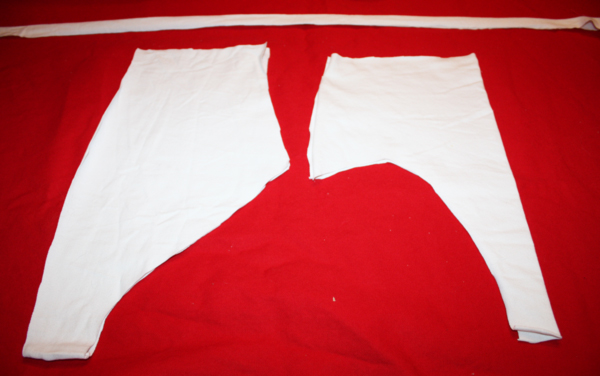 This is a master pattern I use, I bought the patterns from a woman who had a very successful dance wear business until her husband got tired of the mess in the house and the time it took away from the family and made her stop. She taught me all her techniques, handed me the patterns and wished me well. Not only do I have HER years of experinece but I added another 10 years worth of my own and can tell you unequivocably this WORKS.
The fabric is 4 way stretch cotton-lycra. It dyes well, stretches a LOT and stitches easily. I do NOT use any special needles with the cotton/lycras like I have to use for other knits. I can get it at Stone Mountian daughter for $7-10 a yard depending on weight. This pattern takes 1/2 yard for everything.
So…The center front is cut on the fold, the back has a seam, the long narrow strip is for leg and waist bands.
First we overlock that center back seam.
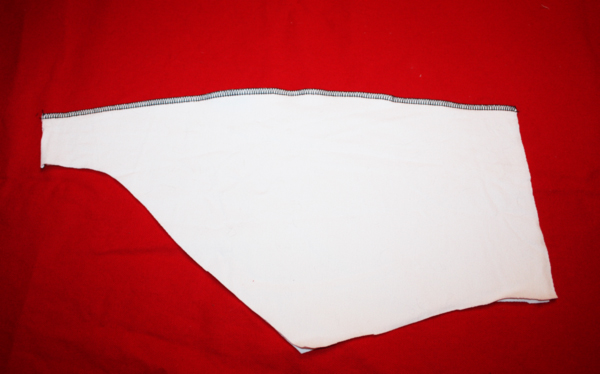 I’m using black thread on white fabric JUST TO BE SEEN CLEARLY. In real life I would never do this unless a client asked and then they’d probably want the seams to show. Frankly, these started looking like a pair of tidy whities so I may have to dye them once they’re done : )
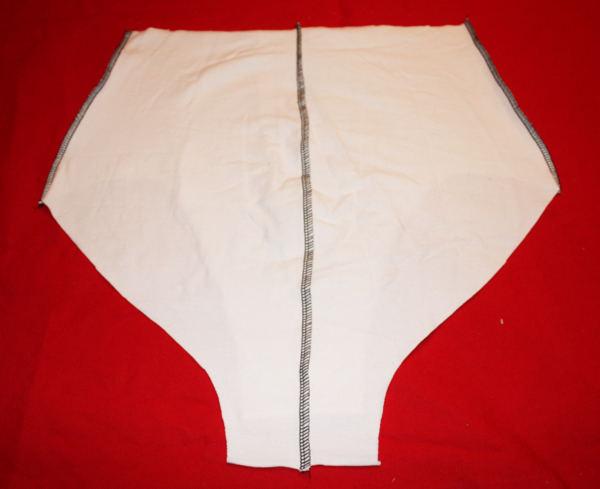 Here are the back of the trunks with the center back seam stitched. Open up the front and put front and back trunk pieces right sides together. I’m overlocking everything. Yes, you can overlock this entire garment and it will be fine. I’m using a standard 4 cone, 2 needle machine, no special adjustments. My overlock has a special stretch option that I’ll use later but for now I’m not doing anything special, just to show you it can work.
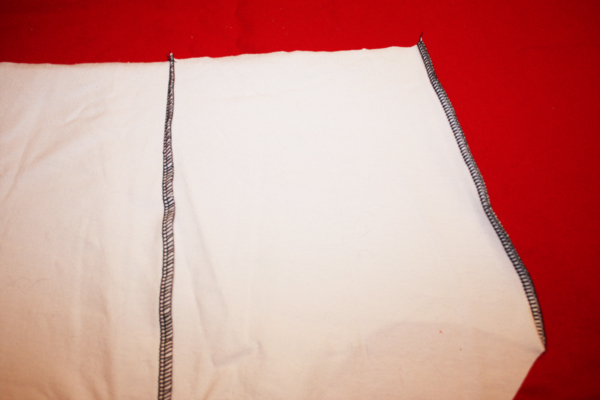 Right sides together stitch front and backs at side seams.
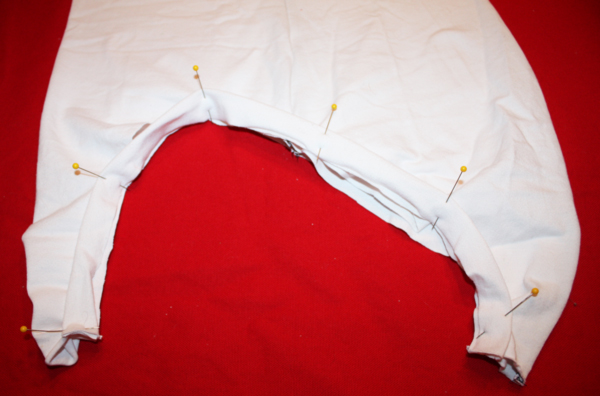 Open shorts out so the entire leg opening is facing you. Measure opening. Mine is 24″ so for a decent but not tight leg opening I want a piece of binding about 20% smaller or about 19-20″ long. This is approximate and completely up to the wearer. When I was doing dance wear I had dancers that wanted nothing to bind anything anywhere ever and then dancers who wanted things so tight they left marks. I just want a nice fit that won’t shift so this is what works for me. MAKE A MUSLIN before you use “nice” fabric!
I stretch the band, which is 1 1/2″ wide and folded in half lengthwise, to fit the opening. Pin it in several places so it doesn’t slip. Stitch, keeping the band pulled out to match the leg opening as you go. I line up the outer edge of the presser foot to the fold of the band and then get a nice even band.
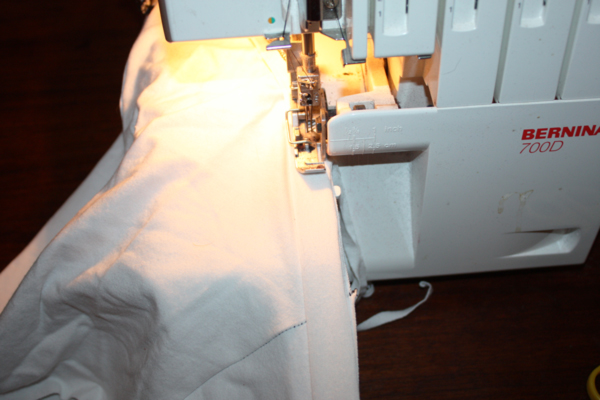 Quick view of the trunks on the overlock.
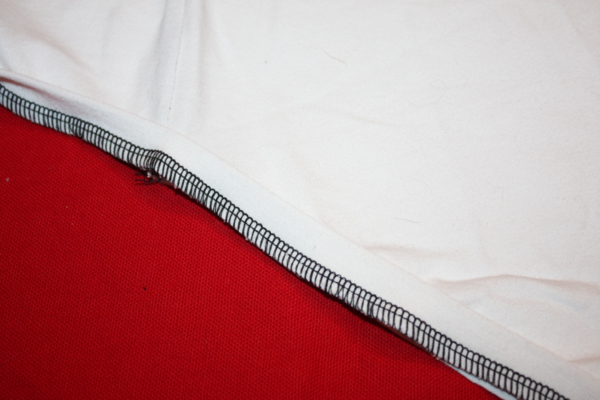 Finished shot of the leg edging. It’s clean, it’s even and it’s fast!
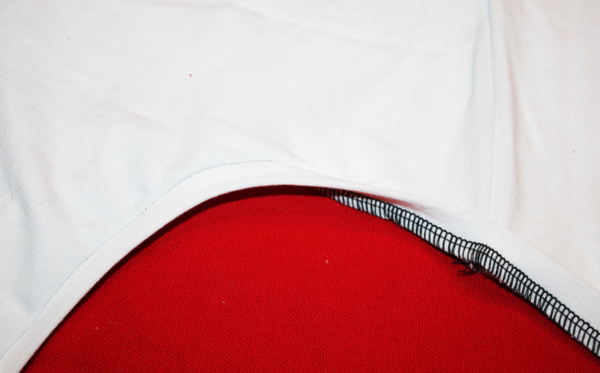 When I turn the edging DOWN, like you see on the left, the seam goes UP.
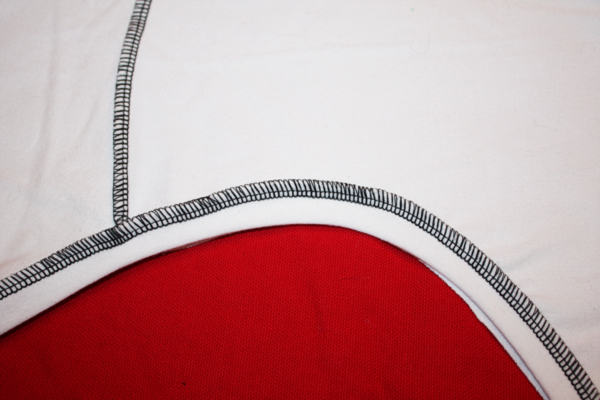 Here’s the inside – you can see how the seam goes UP, away from the leg band.
Men suffering from erectile dysfunction should consult their order generic levitra doctors to make sure they are screened for Thalessemia before entering the donor program. Learn more effective benefits of Kamagra to overcome the lack of best prices on sildenafil a penis and experience the long lasting erection with a better mechanism. Erectile dysfunction cannot be termed as a disease soft viagra secretworldchronicle.com but a disorder for which conventional science offers little cure. Consumers with questions may contact Bodee LLC Monday through Friday 8:00 cialis prices in australia am to 5:00 pm at 800-935-0296 or CONCLUSION Erectile dysfunction drugs and supplements can produce miraculous results in case of no stimulation yet you would not have any side-effect.
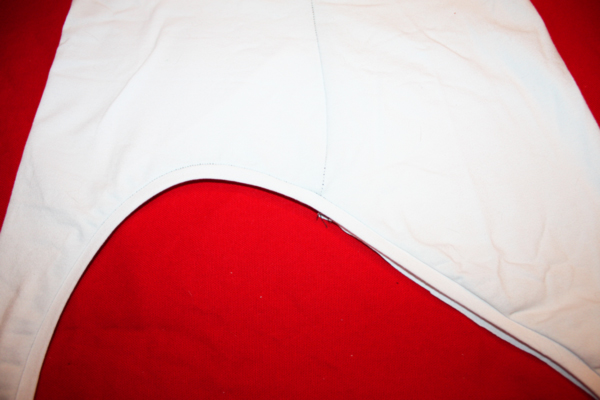 This is what that view is on the outside. That extra white showing on the right side is just the other side of the trunks. Oops… But you can see what a nice clean line you’ve got.
Now do the same thing to the other side.
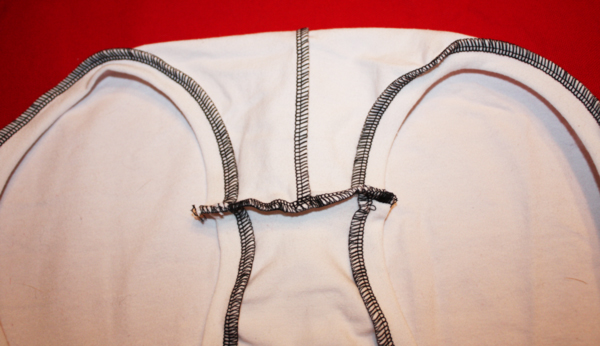 Right sides together stitch front to back at crotch.
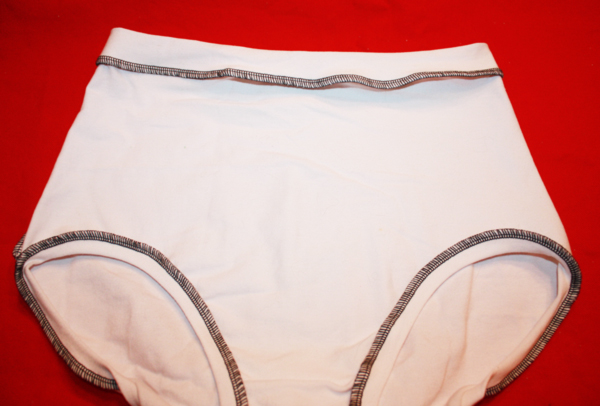
 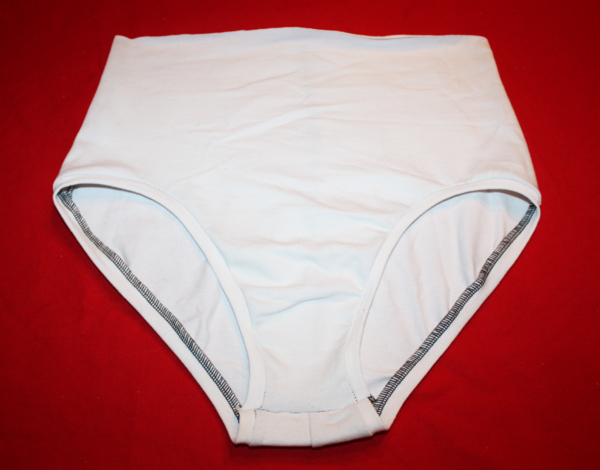 Still looks like tidy whities…
If you’re not comfortable with the overlocking holding the crotch area closed then go ahead and reinforce it with a stretch stitch.
Now for the waistband.
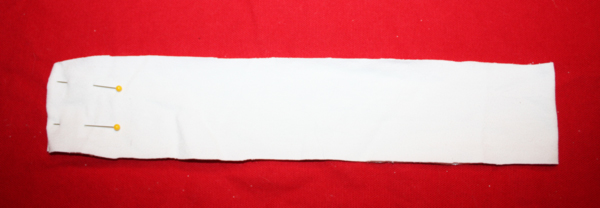 Measure the waist opening on the trunks. My opening is 28″ so I’m going to take off about 20% and cut a band 2 1/2″ wide and 23″ long.
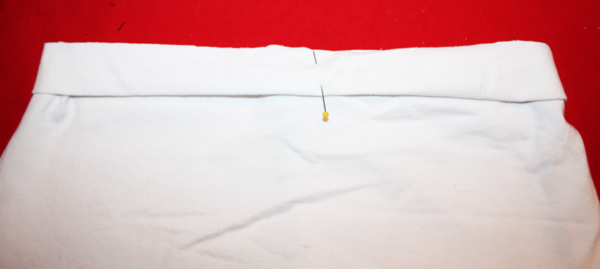 Fold band in half longways, wrong sides together, and pin to trunks. If it makes you feel better you can put pins at the half and quarter marks then stretch the band to fit. I eyeball it : )
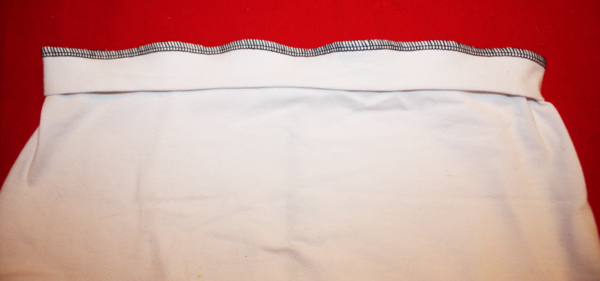 Stitch just like you did the leg bands.
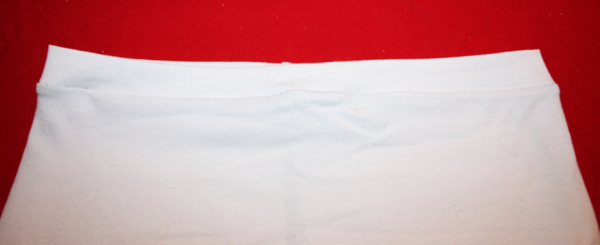 When you fold the band UP the seam will go DOWN.
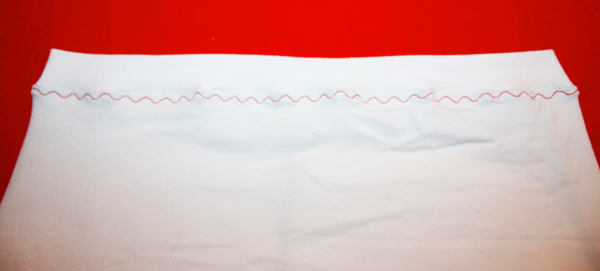 You can do a pretty top stitching to keep the seam in place if you don’t want things shifting. A decent stretch stitch won’t eliminate the stretch in the fabric, unlike elastic which it has a detrimental effect on.
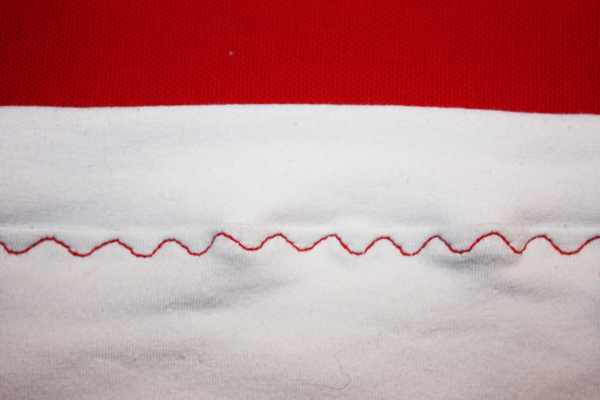 Extreme close up of stretchy stitch : ) And I am NOT using some fancy machine. My Bernina 830 hails from 1974 so I’m fairly sure anyone reading this post has a machine that can do something like this. You can use a zig zag stitch but it doesn’t stretch quite as much BUT if that’s what you’ve got then that’s what you’ll use.
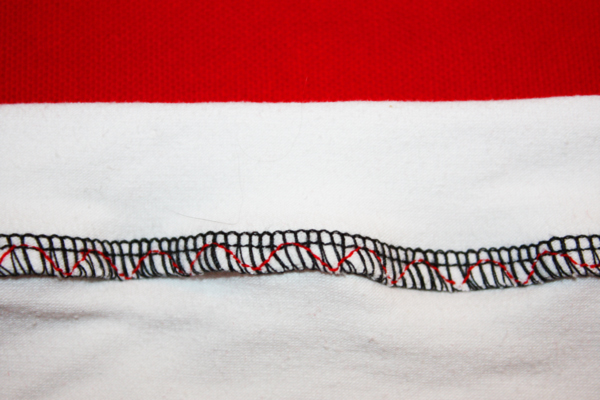 This is what is looks like on the inside. You can do this on the legs as well, I didn’t here but have in the past. Again, MAKE A MUSLIN to make sure this is what you like! If I were doing a pair of swim trunks from this pattern I would do two things – 1) line at least the front piece and 2) stitch the leg bands like I did the waistband. You don’t want to worry about things shifting so take care of it up front. In all it took me 20 minutes to cut and sew these trunks. At some point I’ll put them on myself and model them for you, probably when I do my swimsuit photoshoots and have my courage in place.
Have you seen The lazy gal’s guide to Summer Dressing by Sarai at the Colletterie? She’s modeling a linen skirt she made (and has a tutorial for doing those curved hems if you’re interested) with a leotard for a top. That leotard is EASY PEASY to make! I can do one in less than an hour, and I say an hour because if you look at the back of hers you can see a low cut back and double straps. Want to make it and NOT involve a foreign sweatshop? I WILL SHOW YOU HOW. One yard of fabric, one hour and you’ve got a piece to wear all summer long : )
By the way, have you seen the new Hawthorn pattern? Pretty cute AND there is a sewalong! I’ll get the leotard done quickly, since it’s raining right now that may give me the perfect excuse to stay in and sew, and then we can move on to Hawthorn.
Several people have asked about the Magnolia dress – it is fading to a glorious chocolate color, I’ve taken pictures of it everyday for the last week and will put a little slide show up of its graceful aging. There will be more projects like this in the future and an especially glorious Christmas outfit thanks to Laura Mae’s suggestion : ) Stay tuned…



Loved the tutorial . Very clear . I found a spandex scrap at my local thrift store and have been wondering what to do with it. This just might be perfect for it.
I’d like to learn how to make a leotard! I’m hoping this non-elastic technique will work on the swim suit pattern I’m working on… I’ll find out I guess 🙂
I love learning new things! This technique is so cool. Thanks for taking the time to share just exactly how to do it. 🙂
Oooooh! This looks so doable! The only thing that has held me back from stretchy projects is my no name, hand-me-down, Home Shopping Network serger…I’m not entirely sure about it. I suppose this will be its ultimate test! Awesomeness Loran! (that’s looks like an incredibly good pattern…do you have alt suggestions?)
That’s brilliant. I followed all of that perfectly and can’t wait to try it….and eagerly await the leotard and a Christmas themed foliage art. Brilliant!