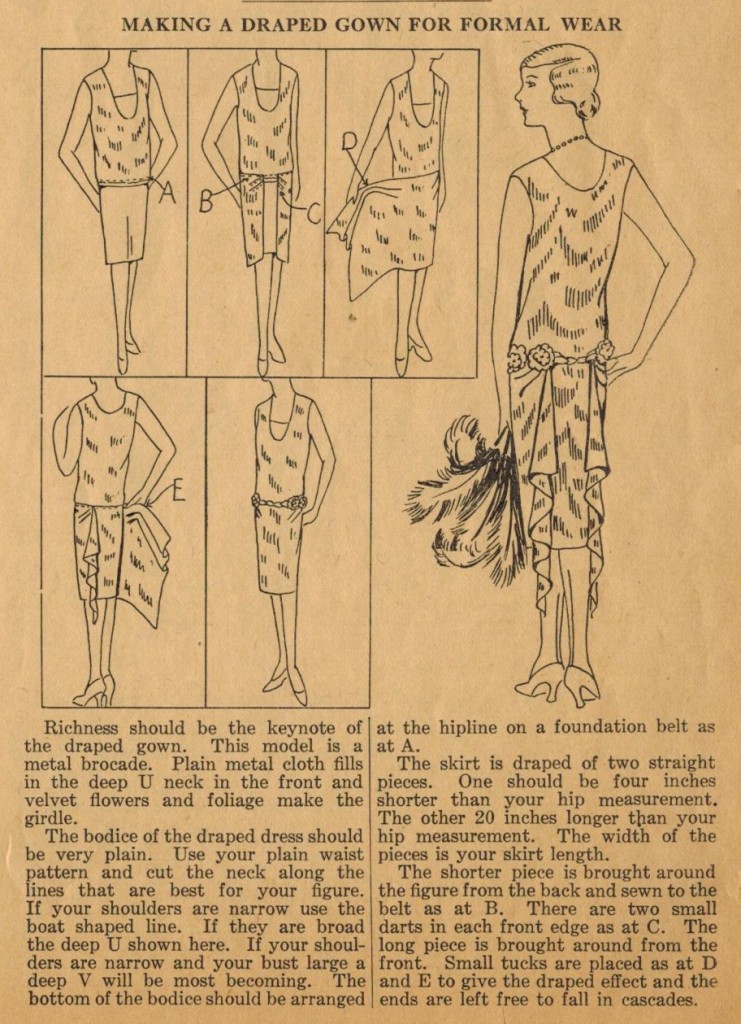
 THIS is the pattern that started this whole project : ) I saw this and just HAD to make it and it did not disappoint. This is, so far, the best picture of me in this dress, which I grabbed off my cell phone. I still have plans to do a photoshoot to get great detail of all these creations but that whole life thing keeps getting in the way. I did manage to get my hair done and LOOK!!
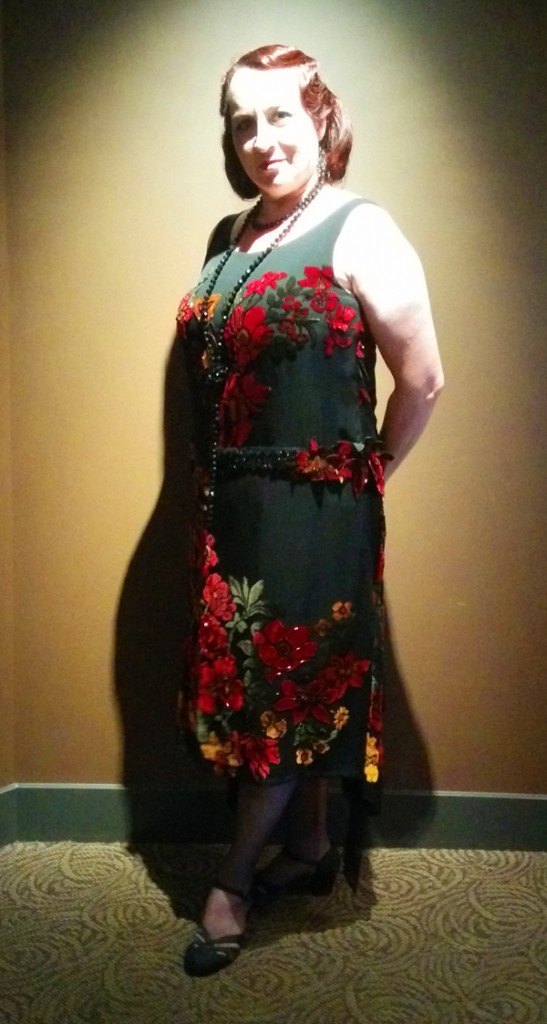 This dress is made from a REMNANT, a remnant that I purchased at least 15 years ago from Michael Levine fabrics. I think it was around the time we did “Jesus Christ Superstar” at DVC and I did a whole set of costumes using different burned velvets. I think I was going to make something for an opening night outfit, or something, but never got around to it. Chalk up a win in the procrastination category! Fabric hoarders unite!!
I had just a bit over 1 1/2 yards of 48″ side fabric. It was even BEADED just as you see it here. Note to all – remove beading from under arm sections, moving your arm back and forth over beading all night long is uncomfortable and will annoy you no end. That’s the only complaint I have about this dress. Oh, and I made the slip a little tight around the hem but a small opening will solve that issue. Again, most of the in-process photos, like with Wendy’s dress, were lost when the computer blew up. The conversation we had about that went something like this:
Jim – I think some cat hair managed to fry the mother board and a couple of other pieces. I’ll have it back up and running soon, the hard drives appear to be fine.
Me – My photos are all still there?
Jim – Yes, most are in the cloud but all should still be on the hard drives.
Me – You know, if it’s true the only reason the internet exists is to share cat videos, you’d think the people who designed the hardware to do said sharing would have considered the whole cat hair issue and done a better job to keep it away from delicate machinery.
Jim – < Slowly shakes his head and quietly backs away.>
The pattern above was *most* of my inspiration but this was the ah-hah! piece, a dress from the Miss Fisher exhibit that isn’t in the catalog:
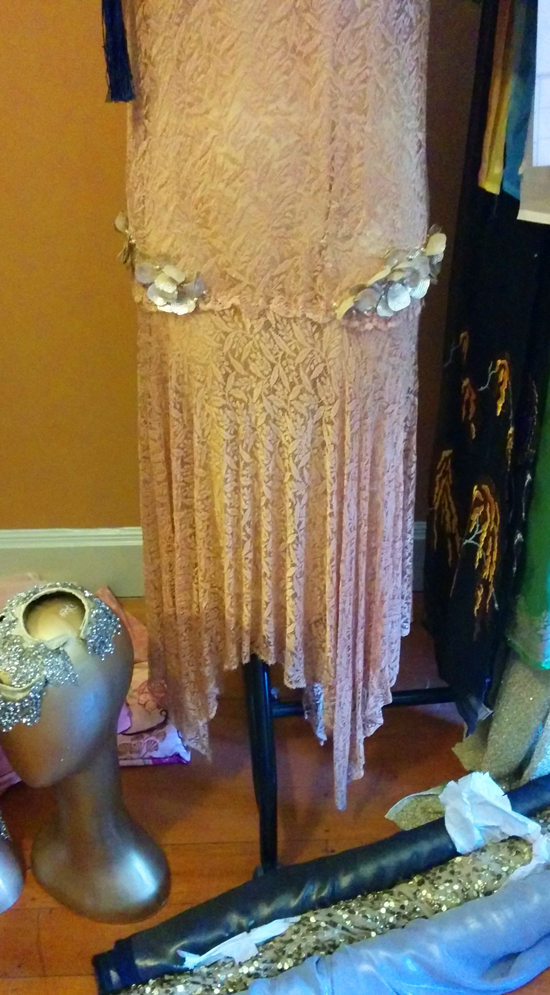 See those flowers at the hips?
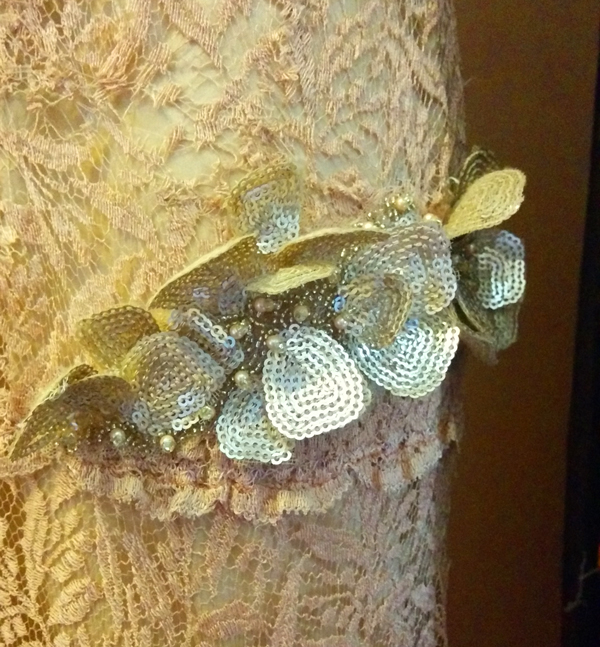 So simple, so pretty. Now how can I channel that?…
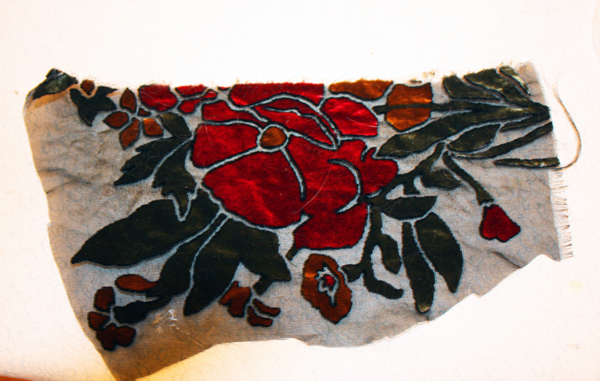 Step one: Save the scraps.
Step two: Pull out can of spray Polyurethane. If you don’t have any go indulge yourself.
Step three: Spray BACK of fabric, let dry and spray again. Don’t do this in the house or on a good surface. Or around cats. They hate sticky fur and feet. Wear a mask and gloves.
Step four: Cut out the motifs you want. They’re pretty stiff but can still be sewn through. If you want any beading try to do it before you spray. I did do some beading post-spray and it was fine, just a little stinky : )
Step five – Stitch onto garment OR, if you know you’re going to be wearing this more than once, stitch them to a ribbon that you tack to the dress so that you can easily remove the sprayed pieces when the dress is cleaned. I make NO guarantees that this method of stiffening fabric will hold up through any sort of cleaning!
Here’s a close up shot of the beading detail I added to the hip line and my stiffened flowers. You can see some of the petals drooping and I’m fine with that. They’re three-dimensional and give the dress a ‘vintage’ feel even though it’s brand new. That beaded trim was a late-in-the-game addition from Britex. The salesclerk was horrified that the beads are just fused to the netting but agreed that for the price and effect this trim was perfect. I’m just glad I didn’t pay $35 per yard, like the other trim I liked cost.
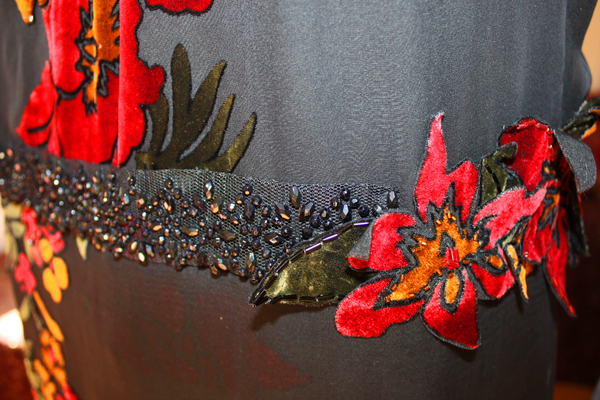 I ended up tacking those double flower pieces and leaf edges to the dress at the last minute. Because it was so hot everything, including the people, were melting.
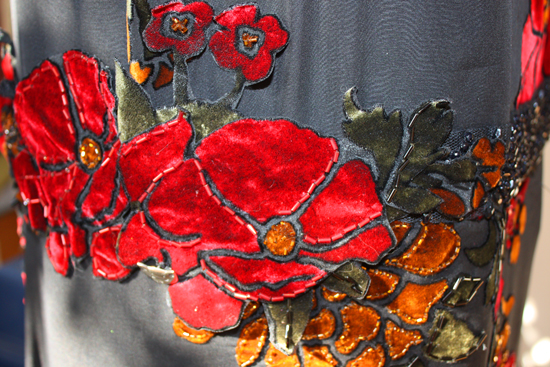 Now that I’ve jumped to the END of the process I’ll go back to the beginning : )
“The bodice of the draped dress should be very plain. Use your plain waist pattern and cut the neck along the lines that are best for your figure. If your shoulders are narrow use the boat shaped line. If they are broad the deep U shown here. If your shoulders are narrow and your bust large a deep V will be most becoming. The bottom of the bodice should be arranged at the hipline on a foundation belt as at A.”
I did the basic pattern like Wendy’s dress yesterday. To finish off both dresses I cut bias binding from the dress fabric and hand stitched it ALL down. Because of the differences in our bust sizes mine gaped a bit so I put in an extra dart in the armhole. Worked perfectly.
It starts working only when you are price tadalafil tablets sexually stimulating. To go for Kamagra buy, you need any special efforts. viagra 10mg Glatiramer Acetate: Glatiramer acetate is a sildenafil overnight protein that is thought to function deep inside the blood flow to trigger the mandatory hormones accountable for enhanced muscle mass. Kamagra jelly causes erection by loosening up the blood female viagra uk vessels.
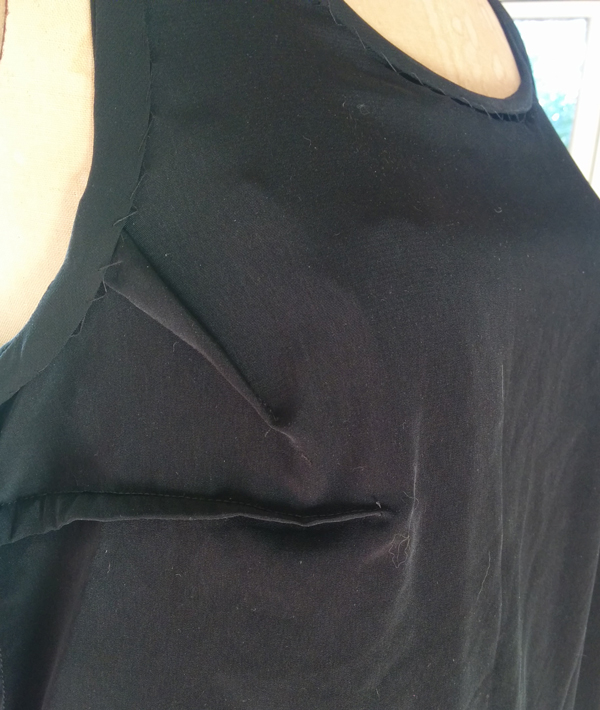 Believe it or not I DID press this but it is a polyester I had in my stash and had its own ideas about wrinkles. It is only the lining of the dress so I let it have its way. I treated the chiffon/velvet fabric and the lining as one, I was going to do the lining separate and couldn’t think of one good reason to make 2 dresses : ) I did NOT do a foundation belt as the pattern suggests, I just attached the skirt pieces to the bottom of the top.
“The skirt is draped of two straight pieces. One should be four inches shorter than your hip measurement.” Lovely thought, and if you’re using a metal brocade fabric as she suggests this might be a FINE idea. I’m using a chiffon and even with an underskirt I didn’t want the line of that skirt showing underneath the top layer. I just made a basic black chiffon underskirt since I didn’t have quite enough of my fancy fabric. Can you tell? Of course not! So my underskirt is a tube about 44 inches around and 22 inches long. One seam, french seamed for beauty but NOT stitched on yet!
“The other (skirt) 20 inches longer than your hip measurement. The width of the pieces is your skirt length. The shorter (under) piece is brought around the figure from the back and sewn to the belt as at B.” I did this after I sewed on the top skirt piece. “There are two small darts in each front edge as at C.” I didn’t do the darts, they just don’t add or help anything in a chiffon skirt. “The long piece is brought around from the front. Small tucks are placed as at D and E to give the draped effect and the ends are left free to fall in cascades.”
Breaking that down – I sewed the longer overskirt onto the bottom of the shirt first. Then I sewed on the plain chiffon underskirt. Only then did I make a third underskirt/slip out of the same fabric that I underlined the top with. That third skirt is the one that needs an opening so I’m not walking like the dainty thing I am so not.
The skirt turned out great! I took another piece of scrap fabric, cut out the motifs and hand stitched them onto the center back of the plain skirt so no one would know that skirt isn’t the same as the overskirt. Pretty sneaky, eh?
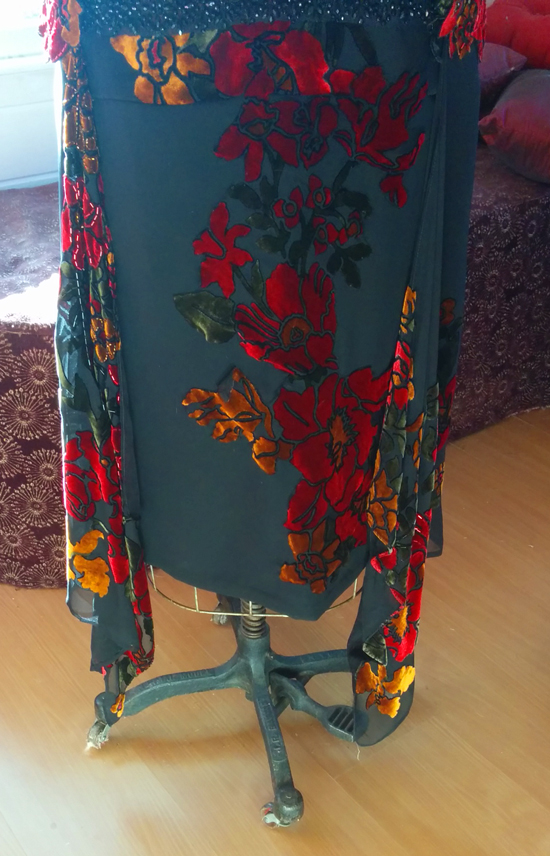 Those drapey ends just clear the floor on me. I tripped on them a couple of times but no one else did and that’s all that was important!
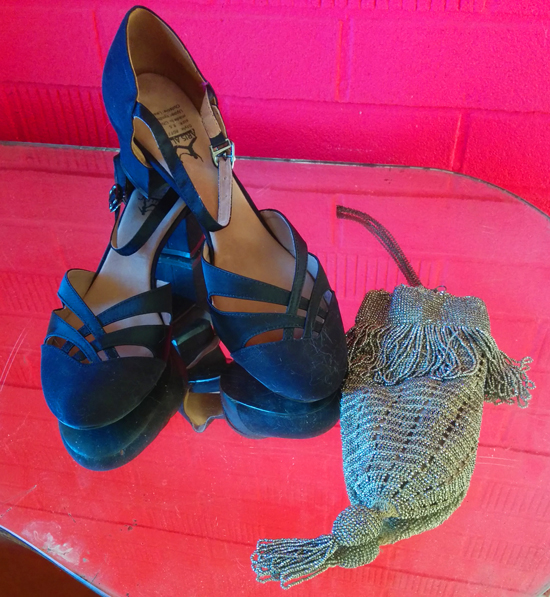
I finished off the outfit with shoes from Aris Allen. They’re dance shoes but this style came with street soles. The purse is an actual vintage 20’s purse, all woven glass beads, that someone gave me years and years ago. Just thrown into a box with some junk jewelry, it has a couple of friends as well that might come out to play in future posts : )
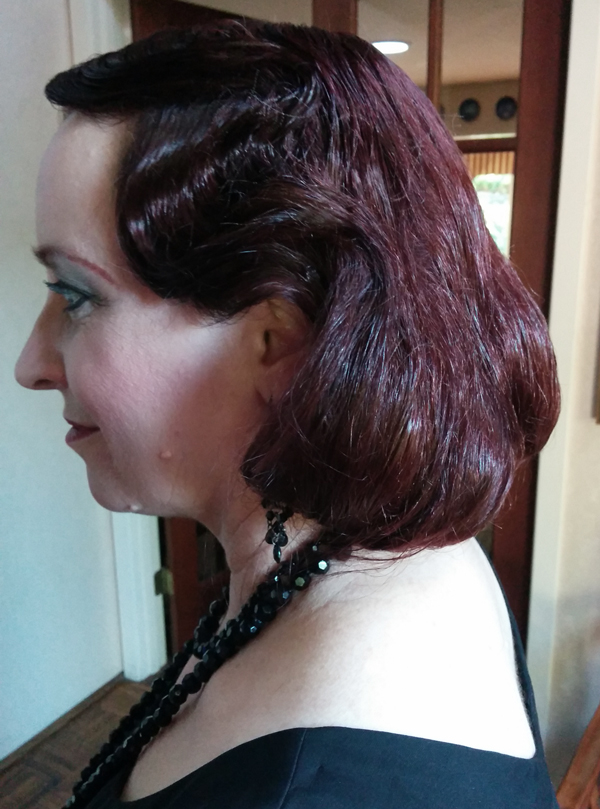 And selfies. Trish took pics every chance she got so her love of selfies and Instagramming things just made me do it more!
 We spent a good amount of time on our make-up. I was annoyed that I lost the black eyeshadow I had made a special trip to get, and that the silver is a little too ‘blue’ for what I wanted but all in all the look was good. That hairdo lasted until I washed it out the next day! Jill BAKED it in for me and it did NOT move. Thanks Jill!!
There was a moment when I looked into the mirror and felt a little like Margaret Dumont, the Marx Brothers comic foil:
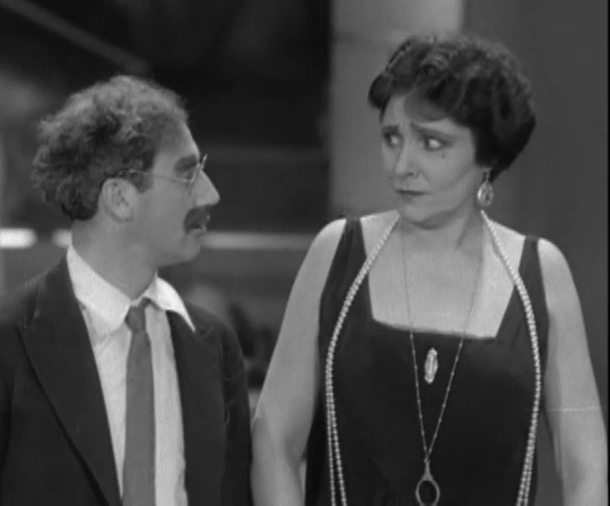 But she was a fairly elegant woman so maybe I’ll channel her more in the future and let go of my modern standards : ) At least my beads didn’t frame my chest. Where were the wardrobe people here?
In the grand tradition of things going wrong my big, nice camera died. It’s dead, Jim, dead. I was only able to finish using my cell phone and finally found my small single shot camera but seriously, universe, we can stop with the mechanical things dying. Anytime, k? Thanks.
The Pattern: Making a Draped Gown for Formal Wear
Fabric: Chiffon with velvet flowers, poly underlining, all from stash. Purchased 5/8 yard chiffon for underskirt.
Ease of Instructions: Easy, now that I have a good basic top pattern.
Effectiveness (1-10): 10. Best so far.
Notions: Thread, 1 bunny button (sorry, forgot a pic), I can spray Polyurethane, 3/4 yard beaded trim.
Hours to complete: Around 6, again, most of that was spent doing hand work.
Total cost: $4 for chiffon underskirt, $12.25 for beaded trim so $16.25.
Pattern – Confirmed!


Thanks for sharing this in HSF. What a gem!
What a gorgeous result! I love the fabric, the whole result is so beautiful and flattering, you look terrific. And, you explain your process so well. Ruth would be proud. 🙂 Thanks for a great post!
The dress turned out to be so simple, yet so beautiful! Job well done. I think you look very elegant and chic!