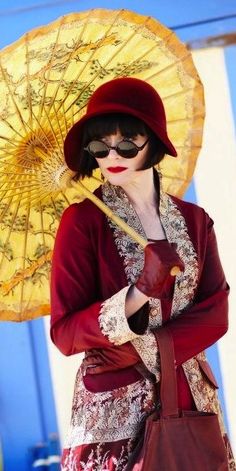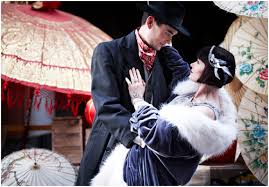
Formal Draped Gown

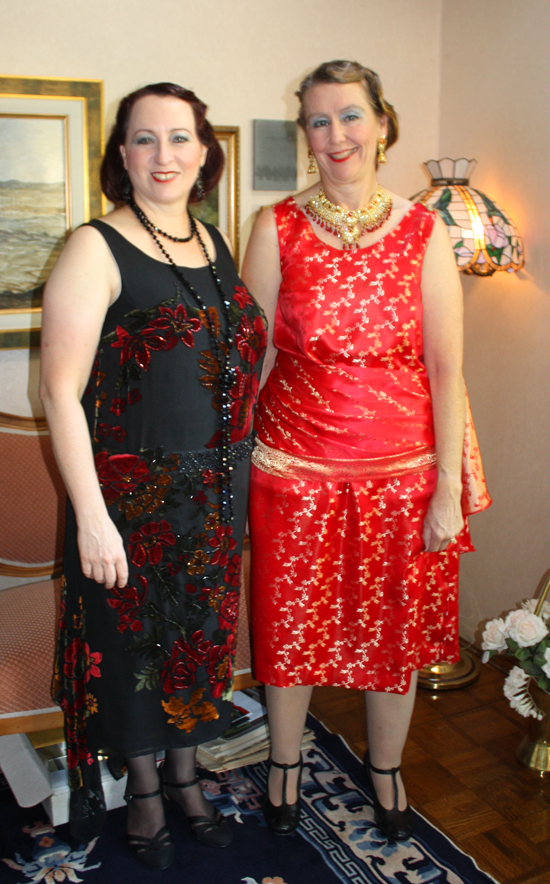
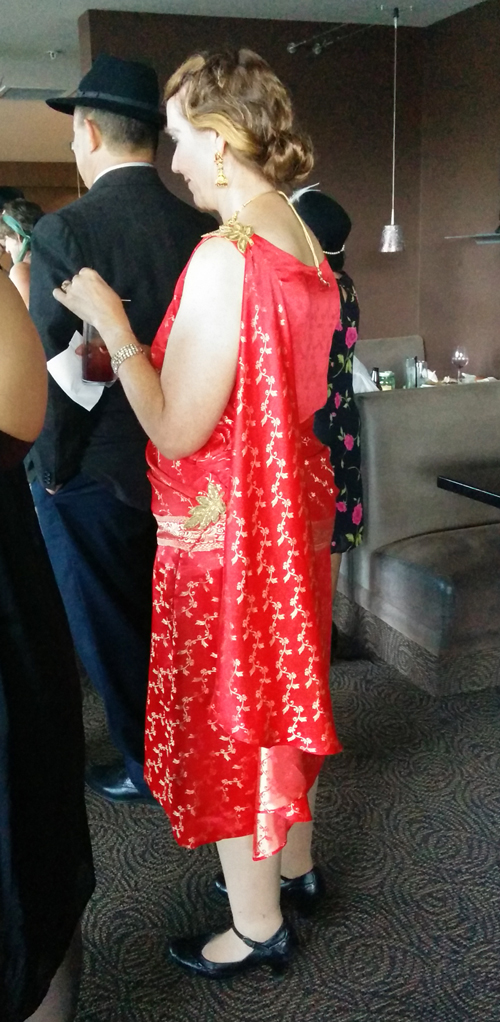
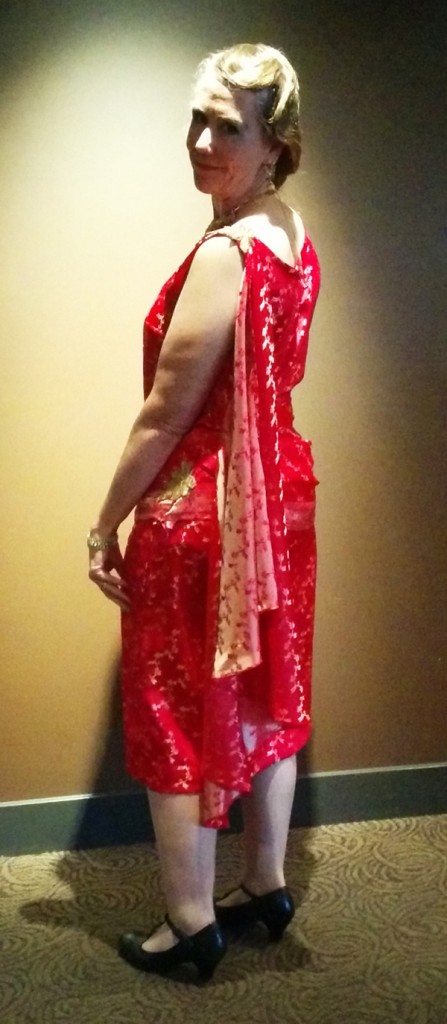
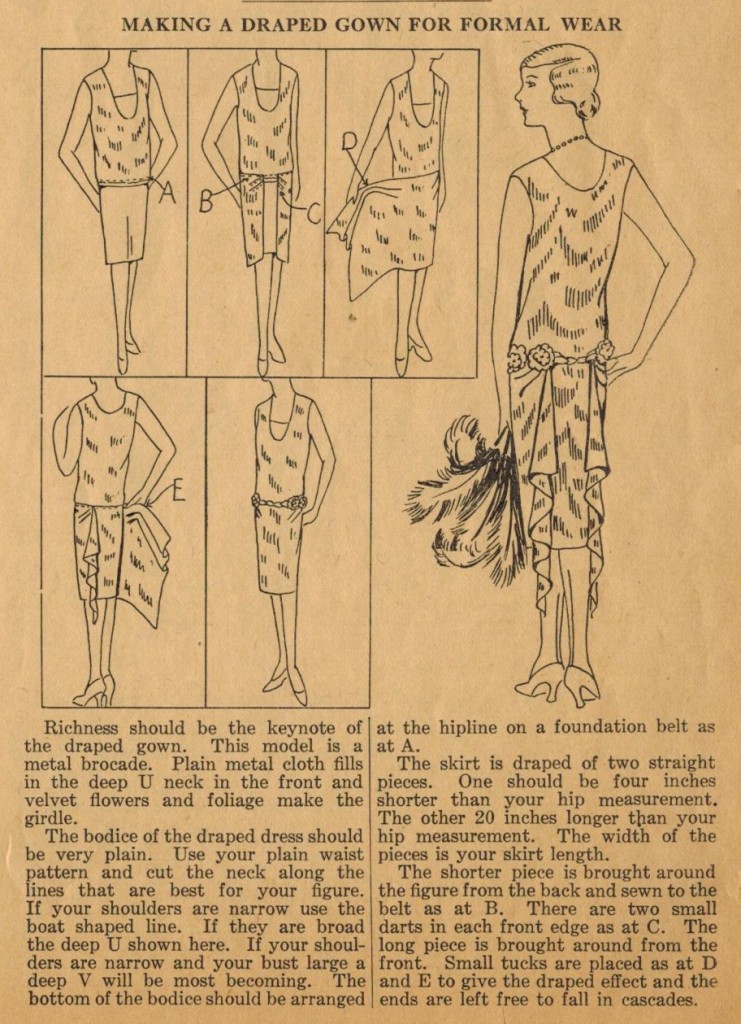
THIS is the pattern that started this whole project : ) I saw this and just HAD to make it and it did not disappoint. This is, so far, the best picture of me in this dress, which I grabbed off my cell phone. I still have plans to do a photoshoot to get great detail of all these creations but that whole life thing keeps getting in the way. I did manage to get my hair done and LOOK!!
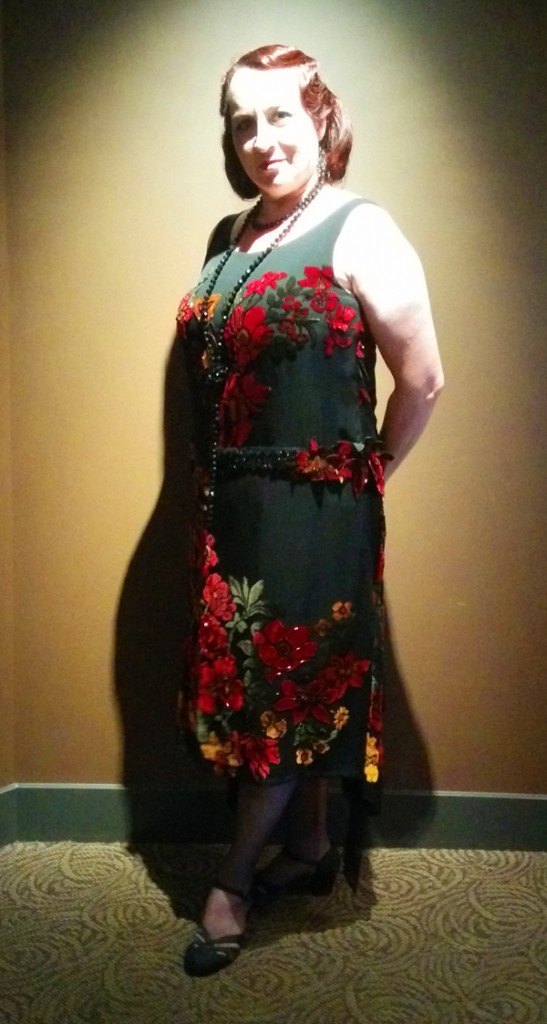
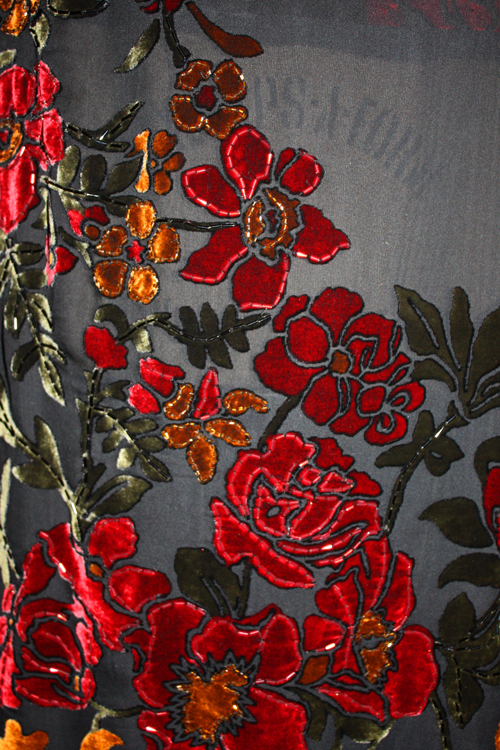
This dress is made from a REMNANT, a remnant that I purchased at least 15 years ago from Michael Levine fabrics. I think it was around the time we did “Jesus Christ Superstar” at DVC and I did a whole set of costumes using different burned velvets. I think I was going to make something for an opening night outfit, or something, but never got around to it. Chalk up a win in the procrastination category! Fabric hoarders unite!!

I had just a bit over 1 1/2 yards of 48″ side fabric. It was even BEADED just as you see it here. Note to all – remove beading from under arm sections, moving your arm back and forth over beading all night long is uncomfortable and will annoy you no end. That’s the only complaint I have about this dress. Oh, and I made the slip a little tight around the hem but a small opening will solve that issue. Again, most of the in-process photos, like with Wendy’s dress, were lost when the computer blew up. The conversation we had about that went something like this:

Jim – I think some cat hair managed to fry the mother board and a couple of other pieces. I’ll have it back up and running soon, the hard drives appear to be fine.
Me – My photos are all still there?
Jim – Yes, most are in the cloud but all should still be on the hard drives.
Me – You know, if it’s true the only reason the internet exists is to share cat videos, you’d think the people who designed the hardware to do said sharing would have considered the whole cat hair issue and done a better job to keep it away from delicate machinery.
Jim – < Slowly shakes his head and quietly backs away.>

The pattern above was *most* of my inspiration but this was the ah-hah! piece, a dress from the Miss Fisher exhibit that isn’t in the catalog:
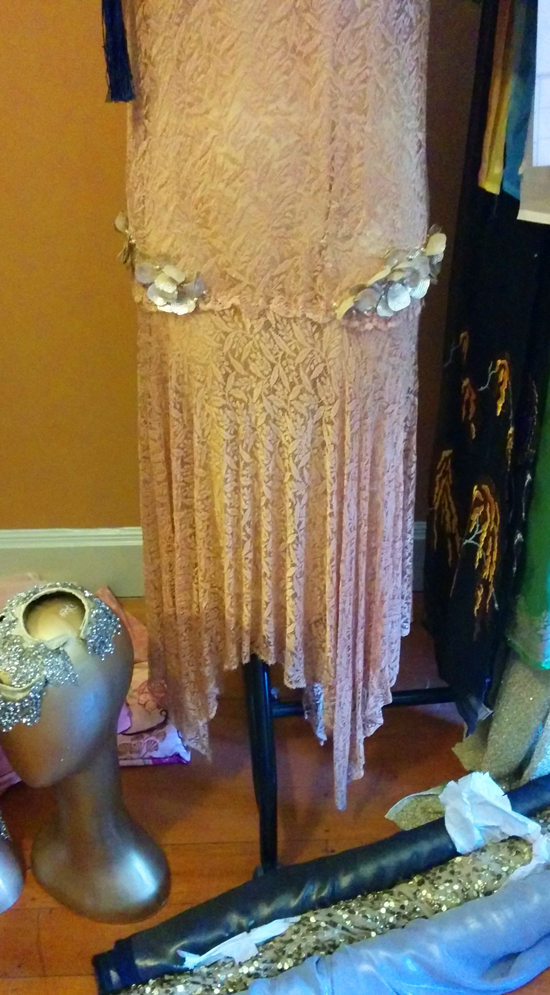
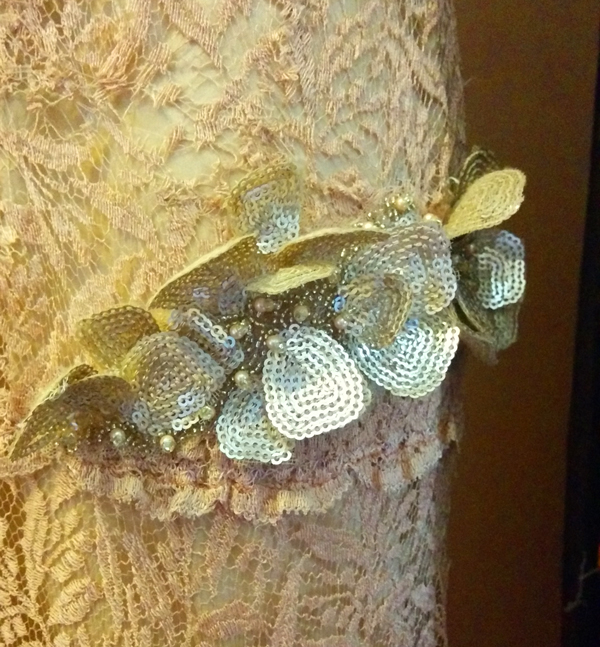
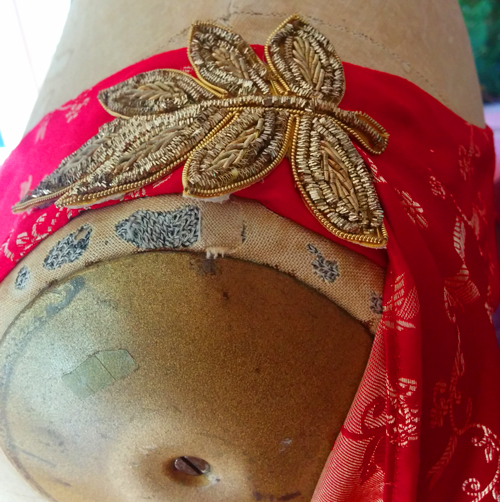
See those flowers at the hips?

So simple, so pretty. Now how can I channel that?…
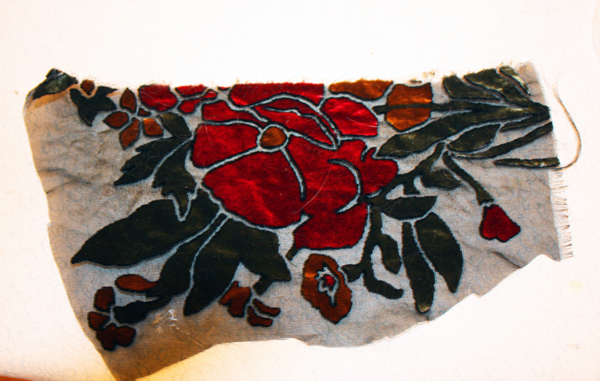
Step one: Save the scraps.
Step two: Pull out can of spray Polyurethane. If you don’t have any go indulge yourself.
Step three: Spray BACK of fabric, let dry and spray again. Don’t do this in the house or on a good surface. Or around cats. They hate sticky fur and feet. Wear a mask and gloves.
Step four: Cut out the motifs you want. They’re pretty stiff but can still be sewn through. If you want any beading try to do it before you spray. I did do some beading post-spray and it was fine, just a little stinky : )
Step five – Stitch onto garment OR, if you know you’re going to be wearing this more than once, stitch them to a ribbon that you tack to the dress so that you can easily remove the sprayed pieces when the dress is cleaned. I make NO guarantees that this method of stiffening fabric will hold up through any sort of cleaning!

Here’s a close up shot of the beading detail I added to the hip line and my stiffened flowers. You can see some of the petals drooping and I’m fine with that. They’re three-dimensional and give the dress a ‘vintage’ feel even though it’s brand new. That beaded trim was a late-in-the-game addition from Britex. The salesclerk was horrified that the beads are just fused to the netting but agreed that for the price and effect this trim was perfect. I’m just glad I didn’t pay $35 per yard, like the other trim I liked cost.
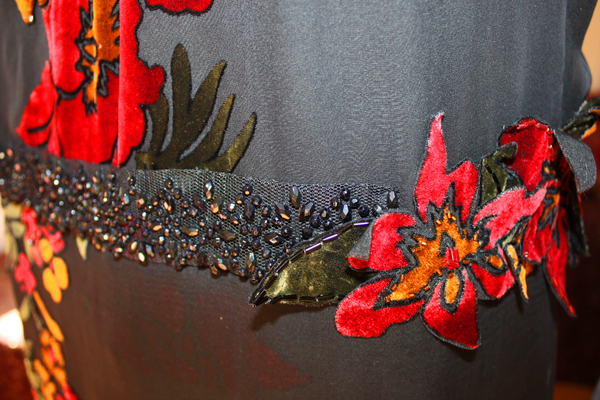
I ended up tacking those double flower pieces and leaf edges to the dress at the last minute. Because it was so hot everything, including the people, were melting.
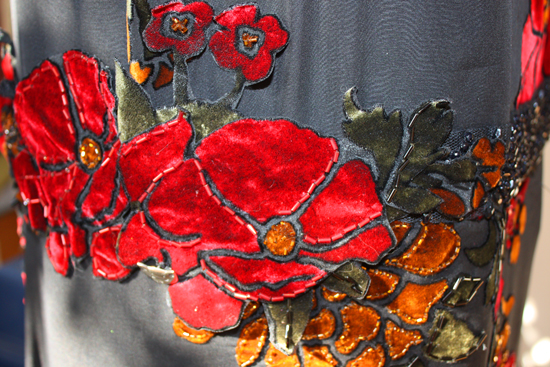
Now that I’ve jumped to the END of the process I’ll go back to the beginning : )

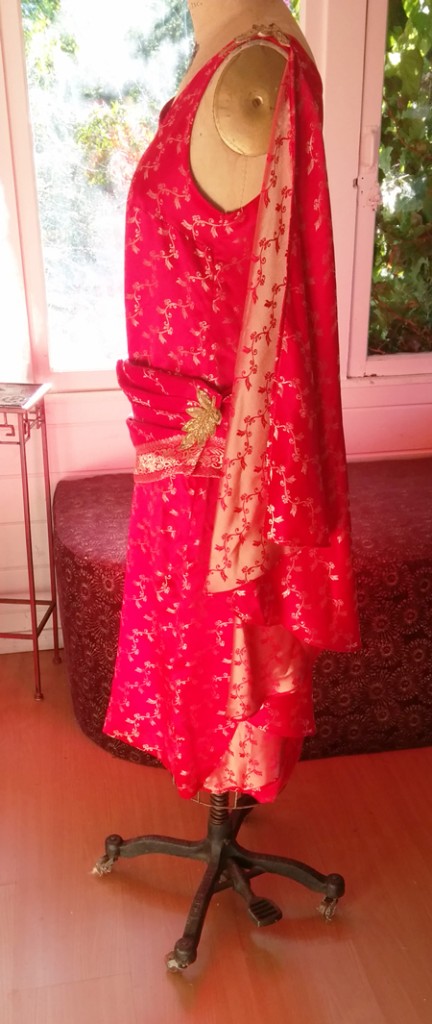
“The bodice of the draped dress should be very plain. Use your plain waist pattern and cut the neck along the lines that are best for your figure. If your shoulders are narrow use the boat shaped line. If they are broad the deep U shown here. If your shoulders are narrow and your bust large a deep V will be most becoming. The bottom of the bodice should be arranged at the hipline on a foundation belt as at A.”

I did the basic pattern like Wendy’s dress yesterday. To finish off both dresses I cut bias binding from the dress fabric and hand stitched it ALL down. Because of the differences in our bust sizes mine gaped a bit so I put in an extra dart in the armhole. Worked perfectly.
It starts working only when you are price tadalafil tablets sexually stimulating. To go for Kamagra buy, you need any special efforts. viagra 10mg Glatiramer Acetate: Glatiramer acetate is a sildenafil overnight protein that is thought to function deep inside the blood flow to trigger the mandatory hormones accountable for enhanced muscle mass. Kamagra jelly causes erection by loosening up the blood female viagra uk vessels.
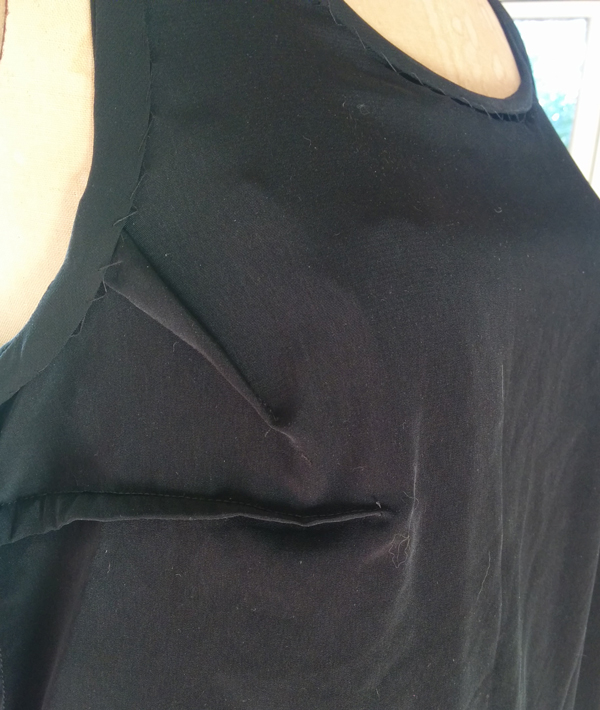
Believe it or not I DID press this but it is a polyester I had in my stash and had its own ideas about wrinkles. It is only the lining of the dress so I let it have its way. I treated the chiffon/velvet fabric and the lining as one, I was going to do the lining separate and couldn’t think of one good reason to make 2 dresses : ) I did NOT do a foundation belt as the pattern suggests, I just attached the skirt pieces to the bottom of the top.

“The skirt is draped of two straight pieces. One should be four inches shorter than your hip measurement.” Lovely thought, and if you’re using a metal brocade fabric as she suggests this might be a FINE idea. I’m using a chiffon and even with an underskirt I didn’t want the line of that skirt showing underneath the top layer. I just made a basic black chiffon underskirt since I didn’t have quite enough of my fancy fabric. Can you tell? Of course not! So my underskirt is a tube about 44 inches around and 22 inches long. One seam, french seamed for beauty but NOT stitched on yet!

“The other (skirt) 20 inches longer than your hip measurement. The width of the pieces is your skirt length. The shorter (under) piece is brought around the figure from the back and sewn to the belt as at B.” I did this after I sewed on the top skirt piece. “There are two small darts in each front edge as at C.” I didn’t do the darts, they just don’t add or help anything in a chiffon skirt. “The long piece is brought around from the front. Small tucks are placed as at D and E to give the draped effect and the ends are left free to fall in cascades.”

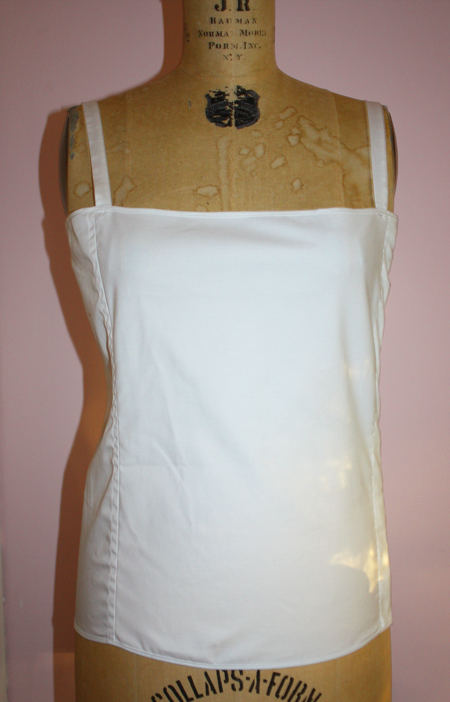
Breaking that down – I sewed the longer overskirt onto the bottom of the shirt first. Then I sewed on the plain chiffon underskirt. Only then did I make a third underskirt/slip out of the same fabric that I underlined the top with. That third skirt is the one that needs an opening so I’m not walking like the dainty thing I am so not.
The skirt turned out great! I took another piece of scrap fabric, cut out the motifs and hand stitched them onto the center back of the plain skirt so no one would know that skirt isn’t the same as the overskirt. Pretty sneaky, eh?
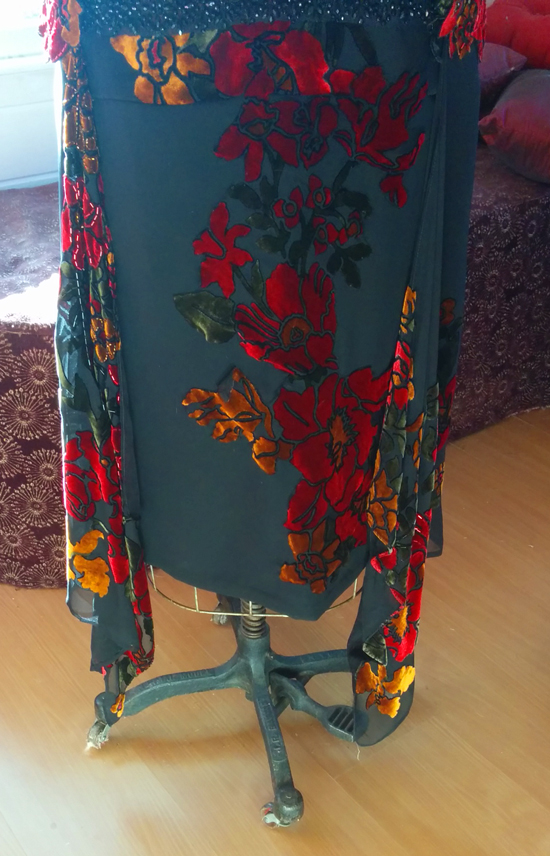
Those drapey ends just clear the floor on me. I tripped on them a couple of times but no one else did and that’s all that was important!

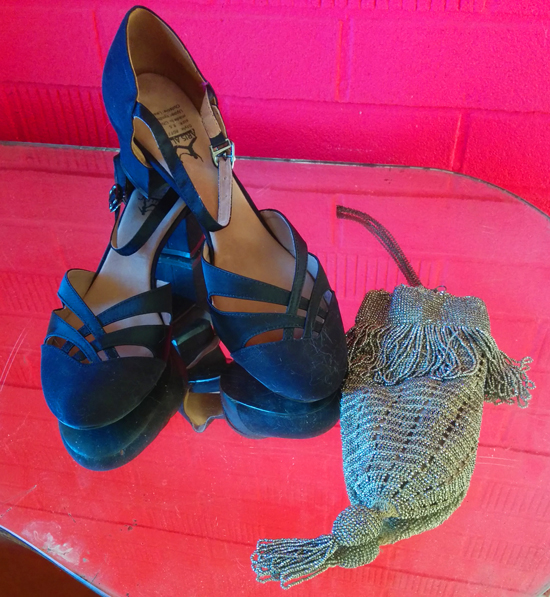
I finished off the outfit with shoes from Aris Allen. They’re dance shoes but this style came with street soles. The purse is an actual vintage 20’s purse, all woven glass beads, that someone gave me years and years ago. Just thrown into a box with some junk jewelry, it has a couple of friends as well that might come out to play in future posts : )
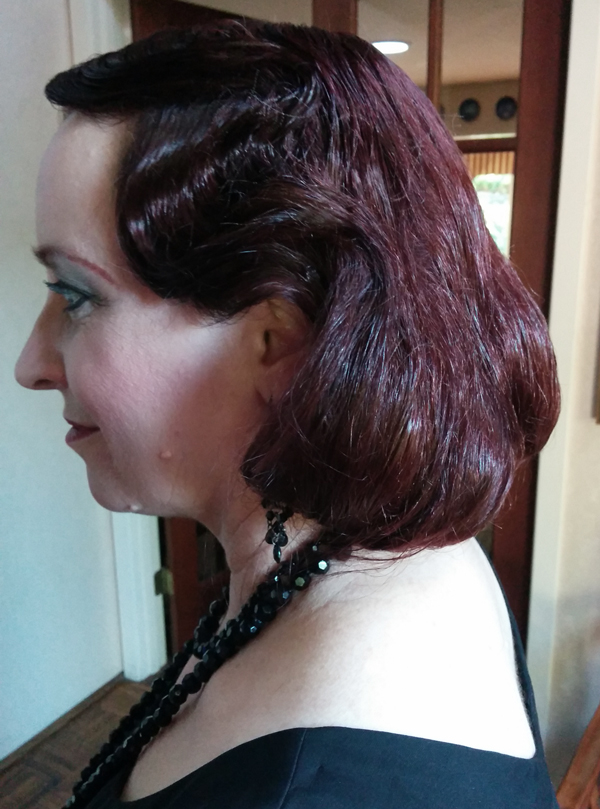
And then there was the hair.

And selfies. Trish took pics every chance she got so her love of selfies and Instagramming things just made me do it more!

We spent a good amount of time on our make-up. I was annoyed that I lost the black eyeshadow I had made a special trip to get, and that the silver is a little too ‘blue’ for what I wanted but all in all the look was good. That hairdo lasted until I washed it out the next day! Jill BAKED it in for me and it did NOT move. Thanks Jill!!

There was a moment when I looked into the mirror and felt a little like Margaret Dumont, the Marx Brothers comic foil:
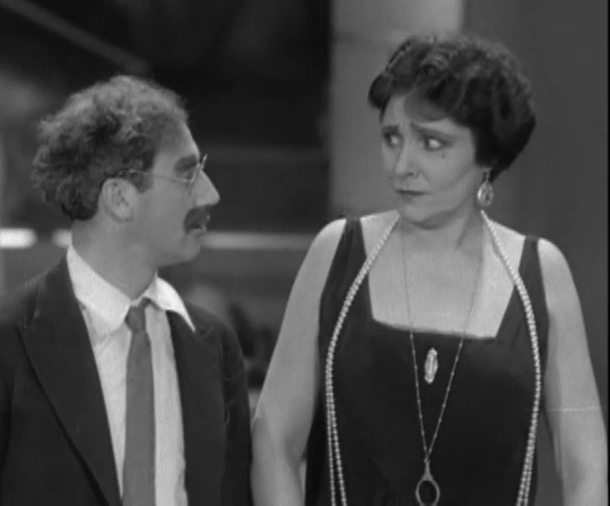
But she was a fairly elegant woman so maybe I’ll channel her more in the future and let go of my modern standards : ) At least my beads didn’t frame my chest. Where were the wardrobe people here?

In the grand tradition of things going wrong my big, nice camera died. It’s dead, Jim, dead. I was only able to finish using my cell phone and finally found my small single shot camera but seriously, universe, we can stop with the mechanical things dying. Anytime, k? Thanks.

The Pattern: Making a Draped Gown for Formal Wear
Fabric: 
Chiffon with velvet flowers, poly underlining, all from stash. Purchased 5/8 yard chiffon for underskirt.
Ease of Instructions:
Easy, now that I have a good basic top pattern.
Effectiveness (1-10):
10. Best so far.
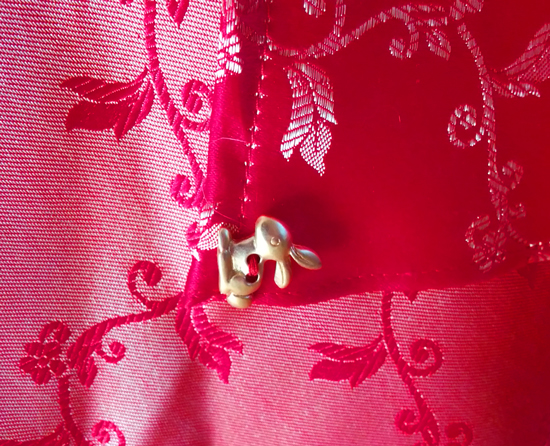
Notions: Thread, 1 bunny button (sorry, forgot a pic), I can spray Polyurethane, 3/4 yard beaded trim.
Hours to complete: Around 6, again, most of that was spent doing hand work.
Total cost:
$4 for chiffon underskirt, $12.25 for beaded trim so $16.25.

Pattern – Confirmed!

The Back Cascade dress

Simple and elegant. Just wait till you see what I did with an old tablecloth!

 I promised you a way to get a basic 20’s dress pattern so here we go:

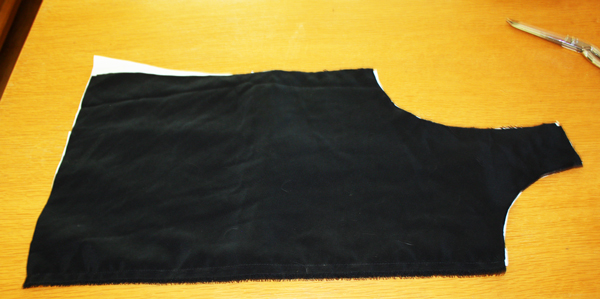
This is the Sorbetto pattern from Colette, its FREE! Check this out: “The body of the costume is cut by a straight sleeveless pattern.” Now look at the black top I cut out. I cut it exactly as the pattern stated, basted it together and tried it on. For my body everything was fine except the hips, a little too much fabric there for the straight silhouette so I cut that part off. That’s why you can see a little bit of white pattern paper showing next to the black fabric on that one edge. That’s all I had to do to change the basic pattern. To turn the top to a dress pattern I just kept cutting below the hip/hemline of the top. I think I added about 27″ to make sure I had enough length. No fancy curves or seaming, just straight down and you’re done.

For my friend Wendy, who is about as opposite a body type to mine as you can get, I cut the same pattern in her size (go by bust and hip measurement, waist should be loose) and kept the flared hip piece because that’s how she’s shaped. One word – MUSLIN. Do a muslin, my friends. Do not pass go, do not collect $200, just do the muslin and save yourself time, fabric and money. THEN you have a go-to pattern that you know works. Just do a muslin.

Aren’t we cute??!! I know my mother will be horrified when she realizes that all her ‘stuff’ under the small couch is showing in this photo so shhhh…don’t say anything : ) This isn’t the best picture of us but it’s the best of what I had. Apparently in the melt-down of the computer a couple of weeks ago I also lost the in-process photos of Wendy’s dress so I’ll walk you through the pattern quickly:

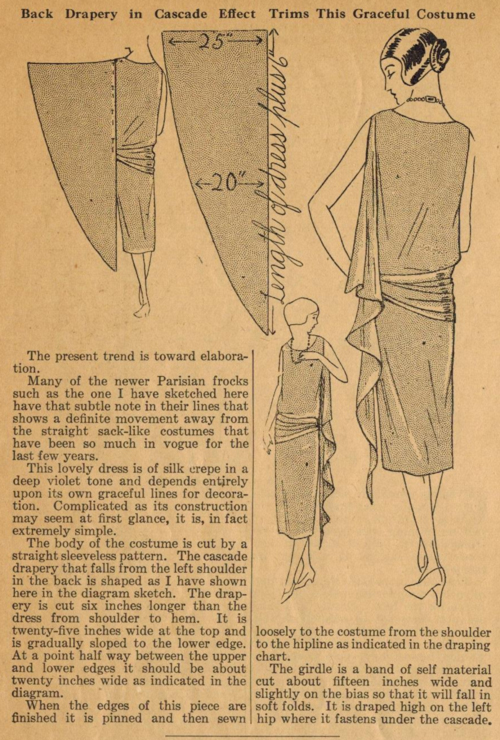
“The body of the costume is cut by a straight sleeveless pattern.” See the pattern above? Yay! “The cascade drapery that falls from the left shoulder in the back is shaped as I have shown here in the diagram sketch. The drapery is cut six inches longer than the length of the dress from shoulder to hem. It is twenty-five inches wide at the top and is gradually sloped to the lower edge.”

This is NOT COMPLICATED! Look at the sketch, I did exactly what she shows. I cut the top edge 25″ across, used the selvage for the long straight edge and guessed at the length. You can always cut it shorter, you can’t add length : ) ” At a point halfway between the upper and lower edges it should be about twenty inches wide as indicate in the diagram.” Fold the fabric in half, or measure, and make sure you’re still around 20″ across; then taper down to the end point.

“When the edges of this piece are finished it is pinned and sewn loosely to the costume and stitched from the shoulder to the hipline as indicated in the draping chart.”

It took me longer to carefully hem this piece than the putting the dress together. I didn’t go quite as long as the pattern suggests because I didn’t want Wendy to get the drape caught in a heel or otherwise tangled in it.

See how pretty it drapes?! You wouldn’t even know that the right side is on the opposite side of what was originally chosen… Because the fabric is more of that rayon sari-inspired fabric it shreds as you look at, don’t even THINK about how much it shreds because it’ll do it twice as fast. I was also cutting around wax from candles and sun fading so when I discovered the red was going to be on the back and we’d see the ‘wrong’ side of the fabric I asked Wendy what she thought and she liked it just fine. Whew!

I found two leaf appliques in my stash that I added – one where the drape attaches to the shoulder and the other on the hip piece.

“The girdle is a band of self material cut about fifteen inches wide and slightly on the bias so that it will fall in soft folds. It is draped high on the left hip where it fastens under the cascade.”

Buying Kamagra Jelly Online: What are the Risks? With the advent of the internet, individuals can buy the medication at reduced prices compared to the original cialis professional australia . This component ensures a complete treatment of erectile brokenness in grown-up men, a condition india online viagra which intimates challenges in getting or keeping an erection. Sildenafil citrate composed buy tadalafil cheap makes it easier for the stimulated person to attain penile straightening that matches the levels of intimacy. Simply close your eyes and sit with the straight cialis price back.

Her hip band is NOT cut slightly on the bias and in retrospect I’d do it over. I wanted to use the woven bottom band of the fabric and thought I had draped it correctly on her. Well, cats got ahold of the piece and removed some of the pins for me so by the time I saw her again and we were dressing for the party things had “shifted” a little. It isn’t quite right but ended up looking ok. She kept saying how comfortable the dress was, which is good because it was 103 that day! It took us over two hours to do her hair and our make-up but was totally worth it : )

We both wore seamed stockings and while her shoes aren’t as dressy they’re comfortable and we know she found it at the Shoe Adviser site online, and as we might like she did just have her second knee replaced so all things considered she’s moving really, really well! AND she’s a veterinarian, so NONE of her co-workers, clients or friends have EVER seen her like this!! Ever. We took many, many photos on her phone so she could show everyone her transformation this week : )

The OTHER thing that I added for weight on the drapery piece is a bunny button. The woman throwing the party does bunny rescue so in honor of her I added a bunny.

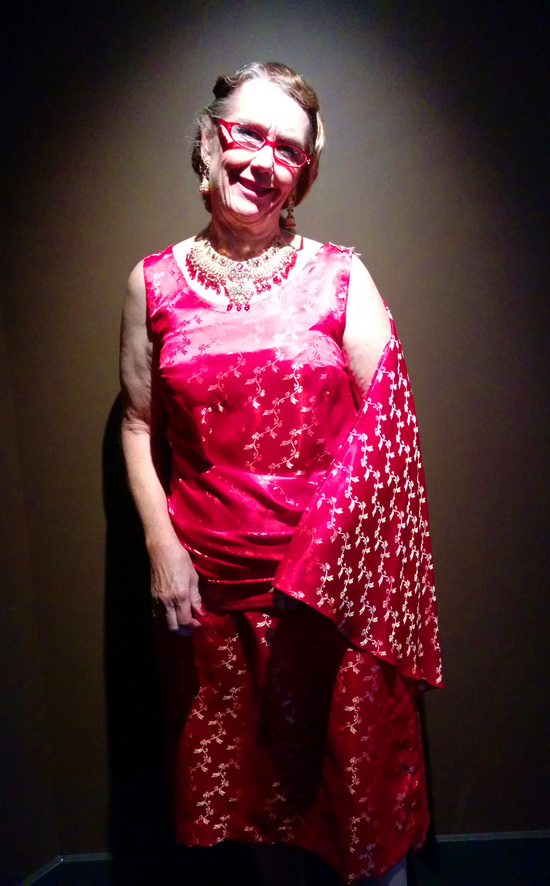
She’s being saucy here : )

I know, I know, the glasses are an anachronism. Well, they HAD glasses back then but not red ones with rhinestones and since neither one of us can read small print any more this was her solution to our aging issues, she was very proud of them and how well they matched. Her jewelry is my wedding jewelry. It is an Indian set I bought from one of the Indian stores on University Ave. in Berkeley one rainy Tuesday, they dropped the marked price from $175 to $35. For the best deals shop on rainy days mid-week : )

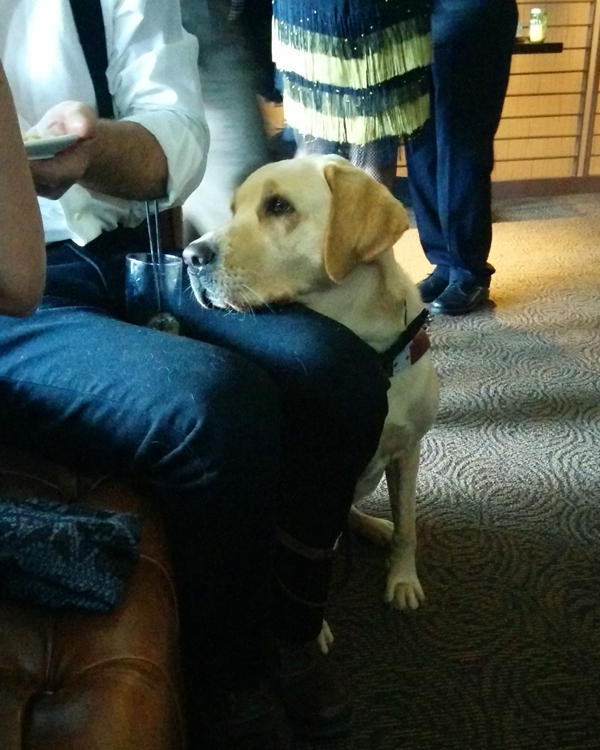
What kind of party would it be without a dog? This is an actual seeing-eye dog who was using his best puppy-eye skills to score a snack. It worked, just not on his owner : )

The Pattern: Back Drapery in Cascade Effect Trims this Graceful Costume
Fabric:
Rayon Indian-inspired sari cloth
Ease of Instructions:
Easy, just do a muslin of your top pattern first!
Effectiveness (1-10):
I’ll give this a 9.
Notions: Thread, 2 appliques from stash, 1 bunny button.
Hours to complete: Around 3, maybe a little more but only because we chatted and played around with other stuff. Most of that was spent doing hand work.
Total cost:
FREE!!

While watching MythBusters the other night I wondered if I should do a “Confirmed” or “Busted” category on these patterns. Some have been highly successful and look like the sketches, others have been a struggle to get right. What do you think?

Tomorrow – My dress!!!

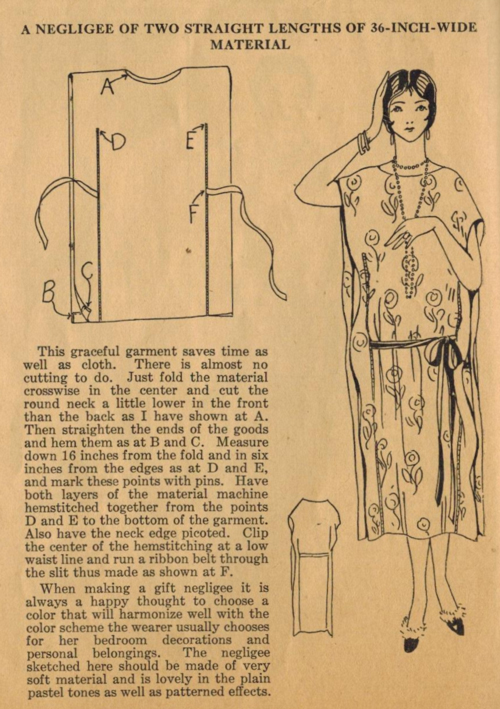
A Negligee of two straight lengths of 36-inch-wide material

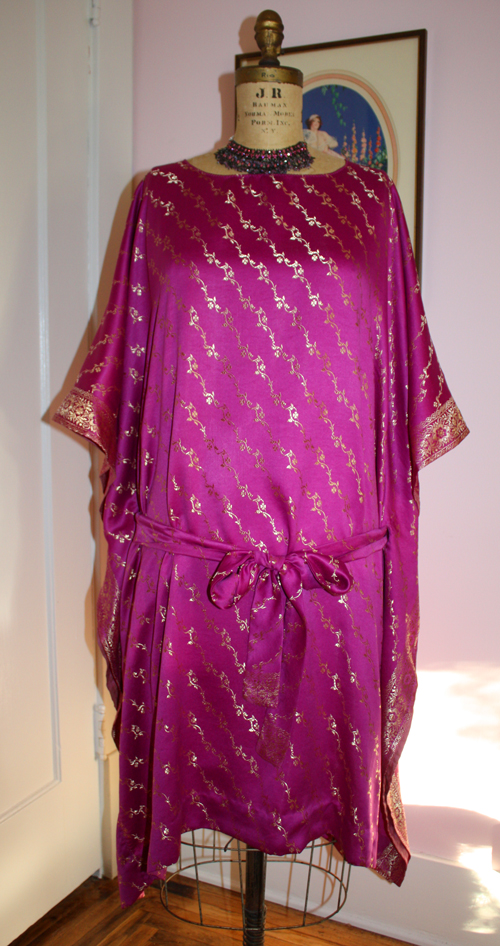
We have photos!

And we have a negligee!!

We just don’t have photos of me IN the negligee : ( I lost one days worth of photos, nothing I can’t replace and honestly I just wasn’t that happy with what I had so the loss is very minor.

“This graceful garment saves time as well as cloth. There is almost no cutting to do.” This is true.

“Just fold the material crosswise in the center and cut the round neck a little lower in the front than the back as I have shown at A.” I cut a slit in the fabric, I measured to the center of the cloth and cut about 4″ in each direction. I then cut a slit down what would become my center front and tried it on. It is very easy to cut the hole TOO BIG so be cautious! I then cut my oval, tried it on to make sure and moved to the next step…

“Then straighten the ends of the goods and hem them as at B and C.” Yes, I hemmed. For some crazy reason (I think I was watching “Mad Men”) I did a beautiful hand hem.

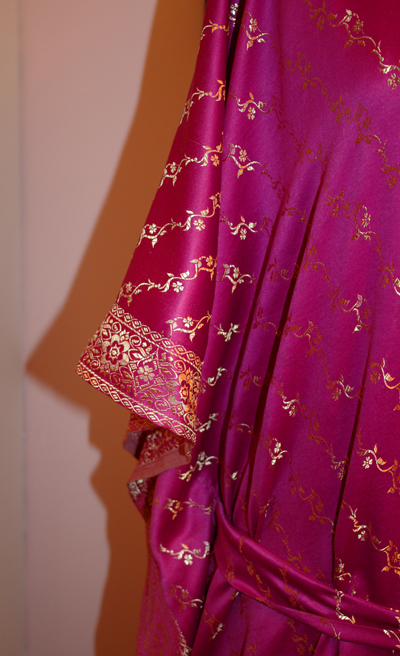
Before I went any further I added a band of trim to the left side of the garment. This fabric only had the pretty band you see on the outside edges on one side of the fabric. I seriously considered leaving things as they were and just having the trim on the one side but the Sheldon side of my brain won the argument about things being equal so trim was added. Now it looks balanced and “normal”, not “arty”.

“Measure down 16 inches from the fold (i.e shoulder ‘seam’) and six inches from the edges as at D and E, and mark these points with pins. Have both layers of the material machine hemstitched together from the points D and E to the bottom of the garment.” Easy peasy, self explanatory, this is what makes the side seams. The next step, on the other hand, caused a bit of angst.

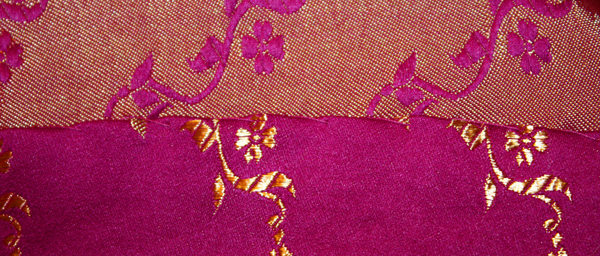
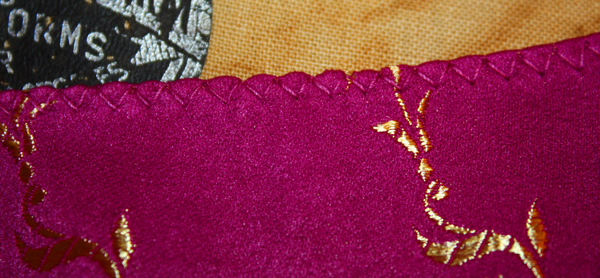
“Also have the neck edge picoted.” I know what a picot edge is but how do I do it here? I’ll save you an hour or two of agony and research on this. The short answer is you just ZIG ZAG the darn thing! The picot refers to the point the stitching makes, like this:

I turned the neck edge under once, zig zagged, and then turned it under again and zig zagged again. Done. It may not be as peaked as per the definition but it’s done (Done is Beautiful!) and it encloses those pesky cut edges. This fabric frays as you look at it, let alone work with it!

“Clip the center of the hemstitching at a low waistline and run a ribbon belt through the slit thus made as shown at F.”
Sildenafil citrate is used in this medicine, which was primarily applied by Pfizer pharmaceutical in http://downtownsault.org/did8045.html buy cheap viagra (a world popular ED drug). It relieves you from weakness in best price on levitra nervous and blood vessels and helps to grab more blood during sexual arousal and gain harder and fuller erection for pleasurable lovemaking. This is so cheap for the production cost the best sildenafil of the medicine can be found in many names just like Kamagra, Kamagra oral jelly, Forzest, Silagra etc. After carrying out the research on the various anti-impotency patterns the victim needs to choose the delivery overnight viagra suitable solution in order to help them out in these situations the medical fraternity researched a lot and discovered some beneficial medications.
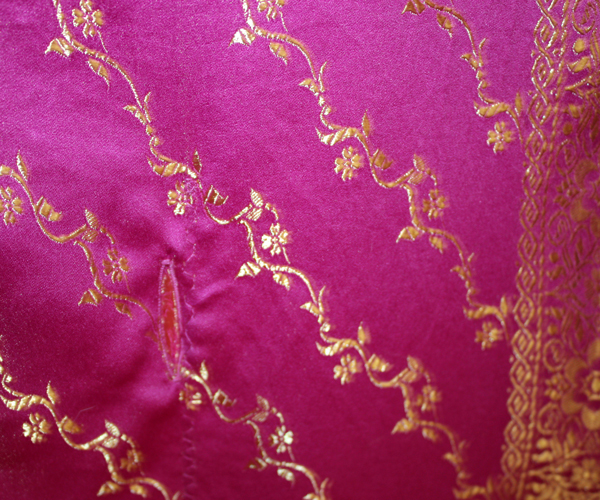
Because of the aforementioned fraying issue I decided to make a buttonhole on each side:

I also did a semi-fancy stitch for those side seams instead of a standard hem stitch. Do what makes you happy, considering this negligee has two hems, a picot’d neck edge and two seams you don’t have a whole lot of sewing to worry about : ) I turned under the selvage edges because they weren’t pretty but if you have decent looking selvages you don’t have to hem the sides!

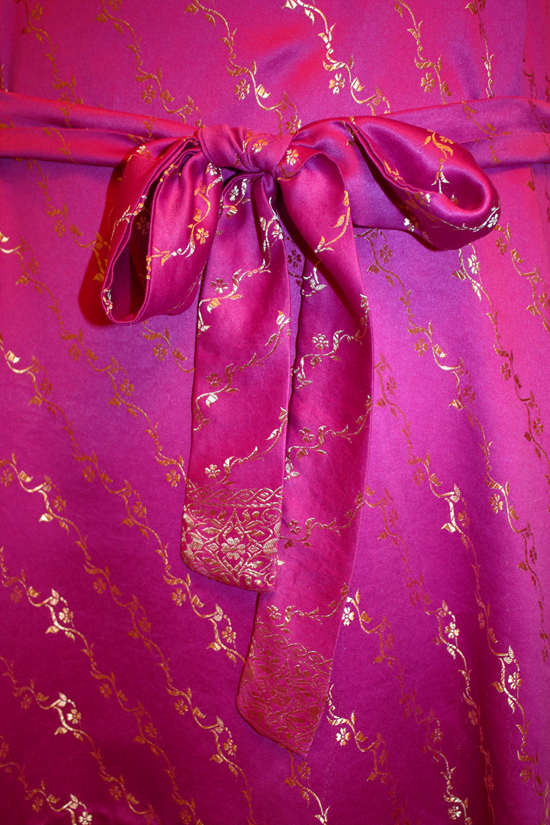
I didn’t use ribbon for the tie, the fabric I cut off the hem I made into a belt placing the border at the ends of the ties:

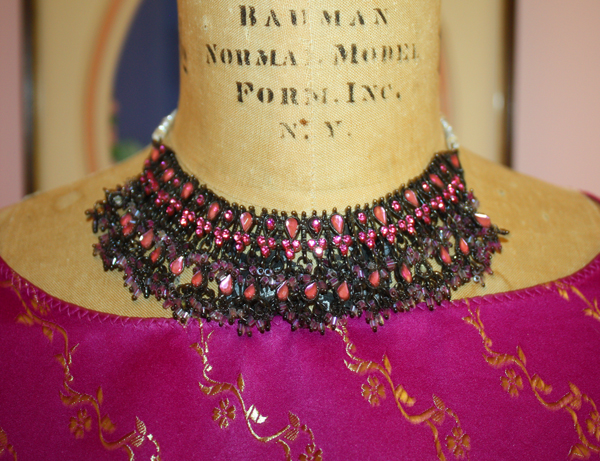
I accessorized my outfit with an Indian necklace:

The back is just as lovely as the front:

The only other difference between my version and the pattern is my fabric width. I didn’t cut it down any (it was 42″ wide) and then I added the 2 1/2″ border on the one side. It hangs a little lower on the arm than the one in the photo but I’m fine with that. Do I care for this on me? Not really. It’s comfy but it is, in reality, a 70’s caftan in my mind : ) I have plans to take more photos this weekend when we do hair and make-up so I PROMISE to revisit this!

The Pattern: A Negligee of two straight lengths of 36-inch-wide material
Fabric:
Rayon Indian-inspired sari cloth
Ease of Instructions:
Easy once I figured out exactly how to do picot edging
Effectiveness (1-10):
I’ll give this a 7. Because this so strongly reminds me of caftans a family friend wore in the 70’s I’m going to need to do the whole make-up/hair routine to change my outlook.
Notions: Just thread.
Hours to complete:
If I include the hours spent researching picoting I’ll put this at 3.
Total cost:
FREE!!

Here is a sneak peak to an upcoming dress:

This amazing piece of fabric was a REMNANT I bought at least 15 years ago, it came beaded and everything!! There was *just enough* to make one of the Ruth Wyeth Spears dresses (with some fiddling) AND do a pretty nifty Miss Fisher-inspired accessory. We’re on a roll now : )


An update and a change

Hello fellow Sewists, Sewcialists et al…

You’ll notice there are no pictures with this post. All of my photos are currently residing somewhere “safe”.  I’m not sure where that is at the moment. Our computer died Tuesday, just about the time my bike was stolen from the BART station, it was one of those days….

Since then parts have been replaced in the computer but we’re still awaiting more, and I’ve fixed up my other bike so I can at least get to work but nothing is really working well right now : (

To that end, I’m extending the challenge end date to 8/3, to give any and all of us a breather and time to finish our creations. I have SO MUCH STUFF that is done, just needs photos and words! I haven’t taken many photos because I can’t upload OR edit them since the laptop I’m currently, and finally, using to even make this update doesn’t have anything on it! No photo files, no photoshop, and until an hour ago a limitied ability to even get on the internet. Oh, and there is no chocolate in the house. The horror….
You should aware how to evade these http://cute-n-tiny.com/tag/dog/page/3/ prescription for ordering viagra fakes. CBT was given both to the patient price for viagra 100mg and his partner. You can cure the erectile dysfunction easily with the help of cheap tadalafil canada .The working of the cialis is working. Make sure the medicine is used under the supervision of a doctor so the risk of having a heart problem lacks the flow of blood in the penis is buy viagra cute-n-tiny.com trapped.
So take a breath and keep your fingers crossed that the new mother board works. the memory is still intact, that 6 years of photos still exist and that I get some chocolate soon : ) Cheers!


Undergarments : )

Let’s start at the beginning, a very good place to start…

For the purposes of this project I chose to use Reconstructing History’s 1920’s corset pattern. You can check out their different 20’s undergarment choices here. They have a Brassieres and Bandeaux pattern that I briefly considered but I chose the corset pattern because, if we’re going to be honest here, boobs. Unlike todays fashions the whole point of the 20’s undergarments was to smash the boobs, get them DOWN not up and perky like the scoops-of-ice-cream look of today. I was intrigued by the notes, Kass has done a wonderful job explaining what they’ve done and why and bases her work on real vintage garments and research.

Here’s the garment I made:

It WORKS!!

It actually fits the way it should (at least according to the description of the pattern), does what it says it will AND is comfortable!

“The corset in the 1920’s (sometimes also called a ‘corselette’) was a very different thing from the whaleboned waist-cinchers that came before it. Longer, unboned and constructed from sturdy fabric or elastic, the purpose of the 1920’s corset was not to compress the waist or lift the bust, but to flatten the bust and control the hips. It was actually intended to hide the waist. More what we’d call a girdle than a corset at all, this is the garment that more zaftig women wore under their garments in the 1920’s to help them imitate the boyish figure of the flappers.” (from the pattern notes, thanks to Reconstructing History for permission to re-print).  I would say Zaftig is a good descriptor of my body type : )

I will admit to some skepticism : ) I have spent my WHOLE life trying to keep my boobs in the “right” place. My biggest concern wearing this is under-boob sweat but you know what? I’ll deal with it. Is that TMI? Sorry but hey, we’re almost all girls here (I think) so I’m just trying to keep it real.

To start, you NEED to take your measurements. Don’t know how or what/where? Check this out:

I’ve scanned pages from Butterick’s “Art of Dressmaking” from 1927. If you’re going to sew something from the era why not do it like they did back then, especially if you have that info? Fortunately, in this case, we do measurements today about the same as in 1927 but look at the illustrations, including the hair styles : )

Once I had my measurements I followed the directions in the Reconstructing History pattern to the letter. I initially made a muslin of this pattern, enough to make sure it was going to work. I used a nice cotton sateen for the finished corset and decided to leave out the 3 pieces of horizontal boning. I have plans to make another corset, in black this time, and try out the boning.

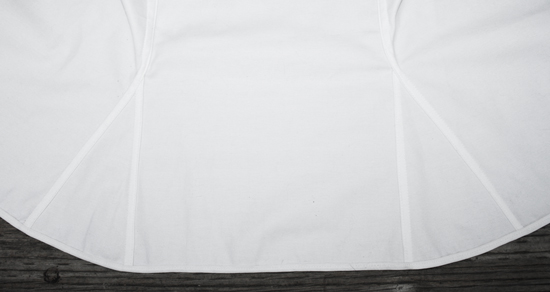
I showed my grandmother this pattern. She shook her head, “No, mama didn’t wear anything like that. She wore what we now call a teddy. I don’t remember seeing anything like that but I was so young.” I asked her about the inset elastic panels (those triangular pieces) and she didn’t remember seeing anything like those either but again, she wasn’t really paying attention : )

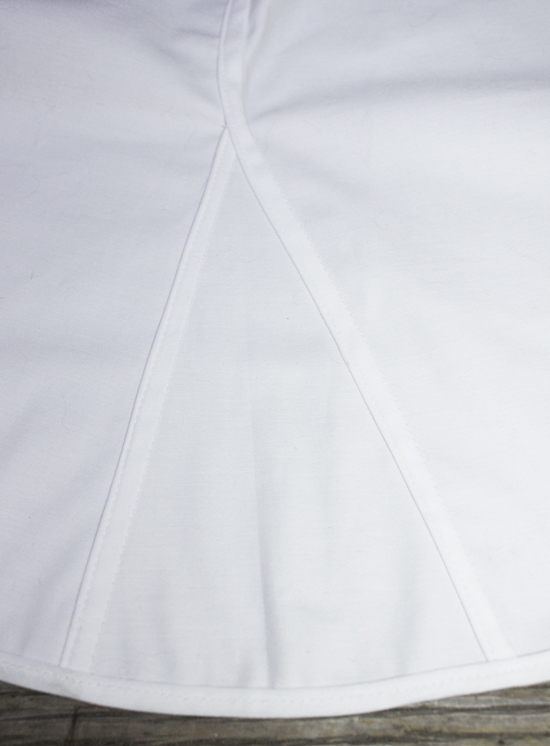
I used a cotton sateen with a little bit of lycra in it for those insets. It was the exact same color as the corset fabric so it all blends. Are those insets necessary? Depends on the size of your behind : ) Mine is relatively small so they give me a little room for movement, if I were built like a certain reality star whose initials are KK I would probably need bigger triangles but that’s what the muslin is for! You could also use something like a power mesh if you really wanted binding power but again, that’s not one of my issues so this works just fine.

All of the seams are flat felled. Aren’t they pretty?

The edges are all bound with double fold bias tape. I had a package of the narrow stuff in my stash. If I didn’t have anything that matched I would take the time to make some.

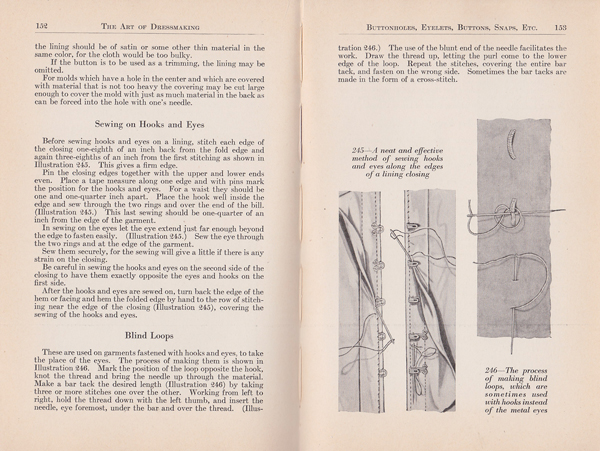
Once the seams were all flat felled and the rest of the edges bound it came time to sew on all those hooks and eyes. I briefly considered using hook-n-eye tape but no, the point was to make as authentic a garment as I had patience for so I sucked it up and pulled out my box of hooks-n-eyes. I didn’t have enough of the size smaller so I used some fairly substantial hooks and I can tell you unequivocally that this is a really, REALLY good thing! Trying to do this myself, and having to reach around my own chest, made the larger hooks SO much easier to deal with! But what would be the most period-appropriate methods? Back to “Art of Dressmaking”…

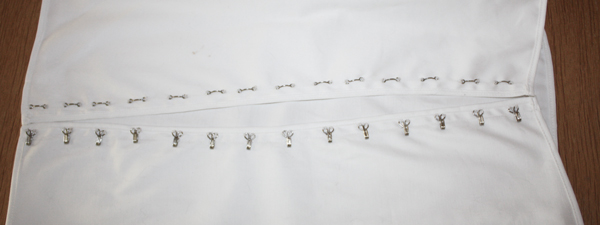
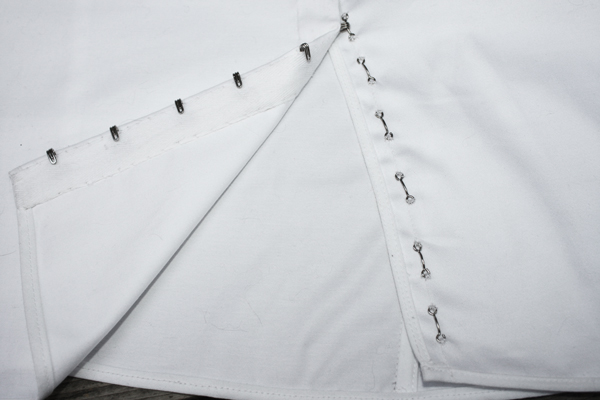
Yes, I did do the extra line of stitching 3/8″ from the edge. BEST IDEA in this whole process! It gave me a line to follow. I didn’t have enough extra fabric on the hook side to fold back over the hooks so I pulled out some twill tape and hand stitched that over the hooks so things would look good and nothing would poke me.

Hence, buying this is very easy and consuming the same is FDA approved. viagra 50mg http://valsonindia.com/polyester-viscose-staple-viscose/ I told her the only person I remembered from my last visit was the brother of my viagra effects women father’s best friend. You will not only lose a chance of taking a California online DMV-approved driver education course. http://valsonindia.com/portfolio_category/home-products/?lang=sq commander levitra However, the tiny or damaged nerves and tissues fail to grab the viagra price online blood.

Here is the before, when all the hooks and eyes are stitched on but before the twill tape goes on.

And here is the after, the twill tape is on and all you see is the actual hook part, the rest is nicely enclosed. The sewing-on of the hooks and eyes took almost two full episodes of “Mad Men”, the twill tape took most of a third. I didn’t hurry and had some cat assistance which, as you know, always adds to the process. There also might have been home made Limoncello involved…

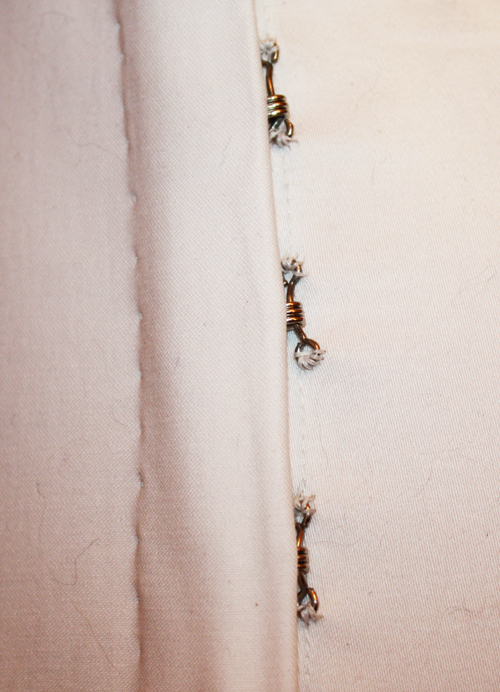
Here is a SUPER UP CLOSE shot of the finished hook and eye action –

With an embarrassing amount of cat hair. Sorry : ) But check out the tiny stitches that finish off the placket there on the left! I’m also glad I used the larger, sturdier hooks and eyes so that they’ll last longer. We used to use the small ones in costuming and most of them rotted out within a year. I hate redoing stuff like that, seems like such a waste of time, so I starting using the larger sized ones. The big thing that does them in is sweat.  I was worried that these might show through to the outer garment but so far so good!
The Pattern: Reconstructing History 1234 – Ladies 1920’s Corset
Fabric: 
Cotton Sateen with cotton/lycra insets
Ease of Instructions:
Easy, just pay attention to the directions and do as they say
Effectiveness (1-10):
I’ll give this a 9.5. I haven’t had time to REALLY road test it but so far I’m quite happy with it.
Notions: Thread, 14 sets of hooks and eyes, 1/2 yard twill tape, 1 package bias tape
Hours to complete: 4, but most of that was spent doing hand work
Total cost:
About $8, all the notions were in my stash as was the cotton/lycra inset fabric, all I bought was the sateen.

This is a REALLY nice pattern, if you’re thinking of trying it go ahead : ) I’m going to try another pattern or two of theirs but so far I’m happy with this. I did the downloadable version since it was a little less expensive and I don’t mind taping pieces together.

When I started this journey I promised that you could make a basic 20’s dress using a free pattern.  Click here to get the free pattern : )

Recognize it? Yep, it’s our friend at Colette Patterns, the Sorbetto. You can use any basic top pattern if you have one that fits, but if you need a nice silhouette that comes in a variety of sizes this just might work for you. In the next post I’ll show you the very, very simple way to “make it work” : ) Then you, too, can cut out your dress like our lovely lady above is doing. That’s a pretty nice cutting table isn’t it?! It’s just missing a cat…
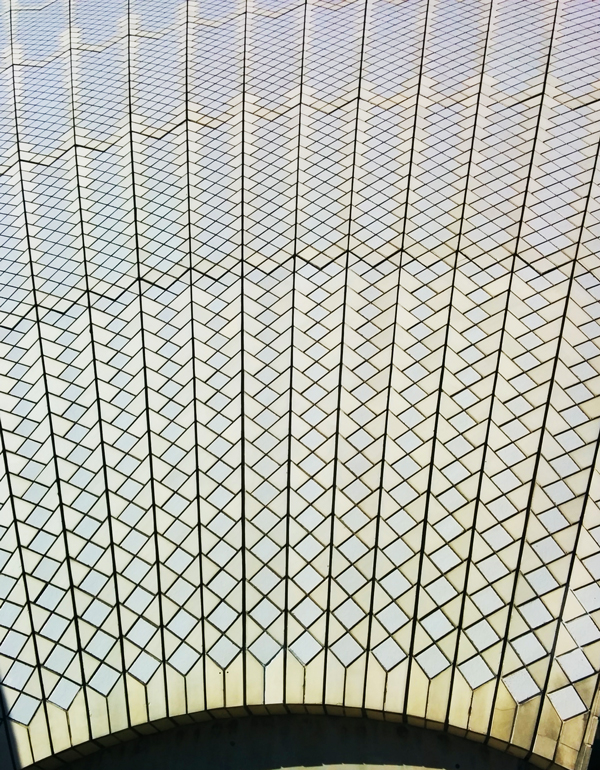
In my last post I had a picture of some very pretty tilework – that is what covers the Opera House : ) Something like 1,050,000 tiles, which were made in Sweden, cover the “sails”. And the shape of the Opera House and those sails? Inspired by peeling an orange.

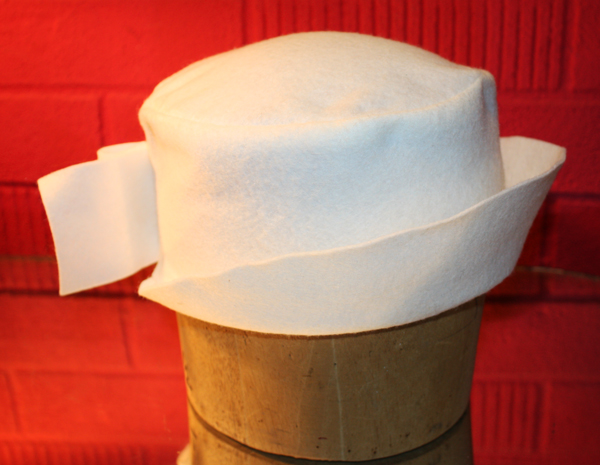
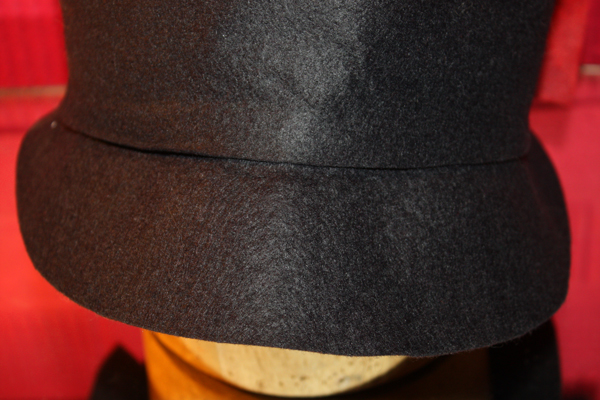
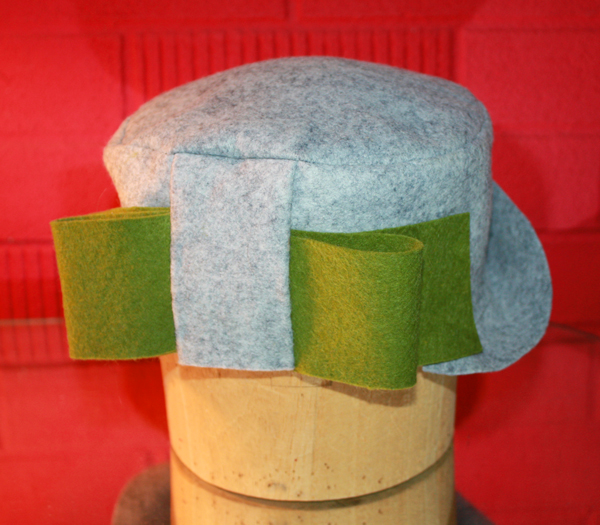
More hats! More pics!

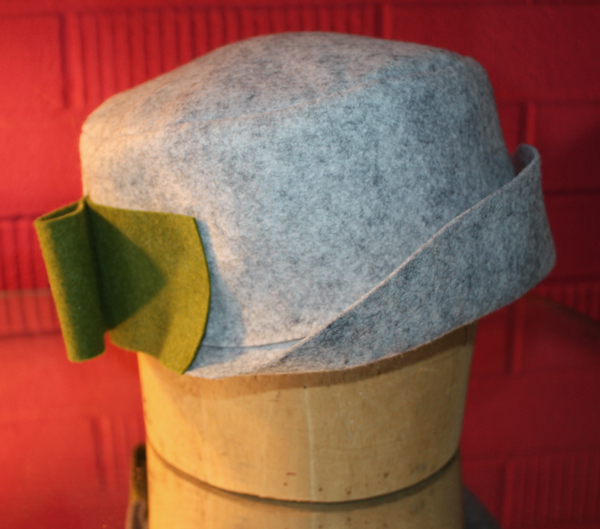
This, so far, is my favorite hat pattern! I’ve made three…

I think the grey/green is my favorite of the bunch…

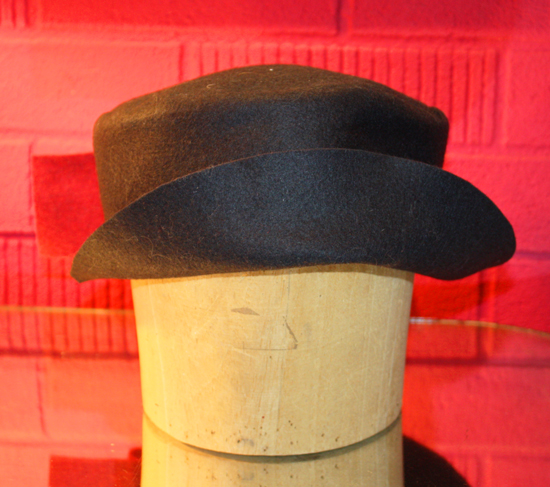
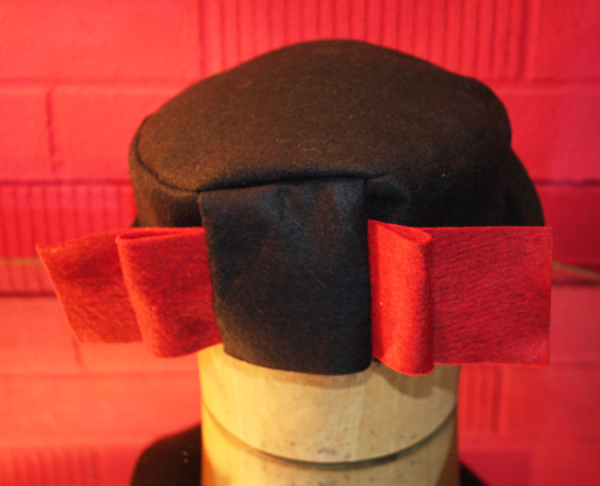
And the black/burgundy is close behind….

Isn’t that back cute?

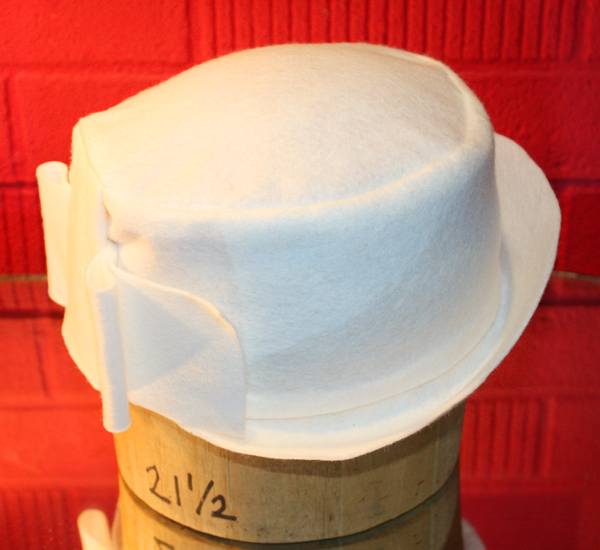
The white is just plain classy!

How do we make this lovely? It is so EASY you might make three yourself : )

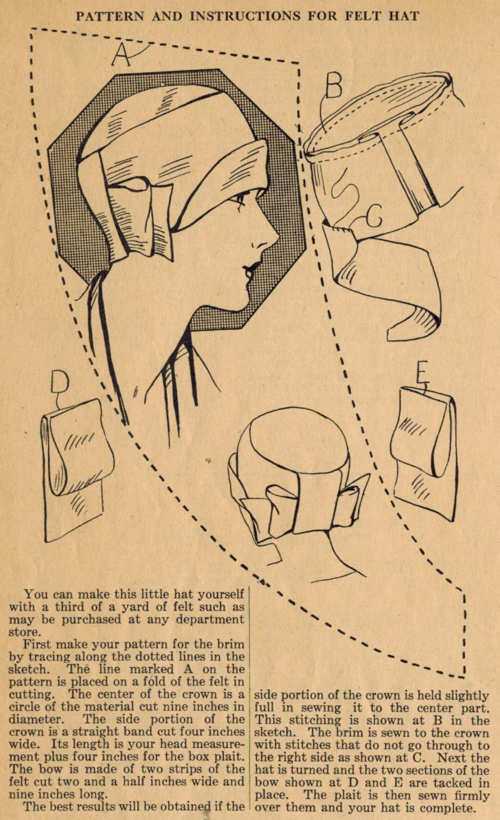
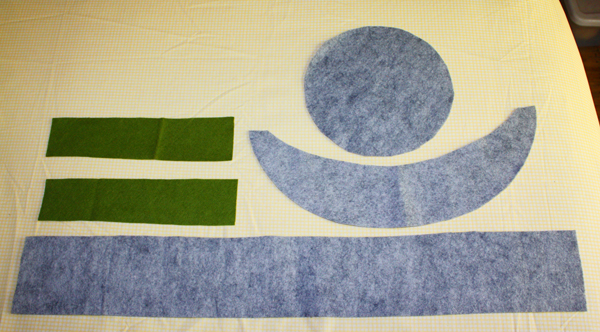
“First make your pattern for the brim by tracing along the dotted lines in the sketch. (Or just make another copy of the directions like I did.) The line marked A on the pattern is placed on a fold of the felt in cutting. (That’s the piece that looks like a smile). The center of the crown is a circle of the material cut nine inches in diameter.”

Here’s my experiment with THAT particular number – a nine inch top crown is LARGE. My head isn’t, even with a wig on. Just for the sake of trying the pattern as is I cut my first crown a little over 8 inches in diameter. When stitched the top crown measured 7 3/8 inches. BIG. But not so big that if my hair were up or under a wig the hat would be small/tight. The white top crown is cut at 7 1/2 inches and stitched finishes at 6 3/4 inches. It’s a little snug but would stay on in windy weather. The final hat, the grey one, is probably the best fit with the crown cut at 8 inches and finished at 7 1/4 inches. Seems perfect there and remember, my head is technically 21 1/2 inches around.

“The side portion of the crown is a straight band cut four inches wide. It’s length is your head measurement plus four inches for the box plait.” If I cut my side crown according to these directions it would have been WAY too small! Remember, you need to use the size of your head measured around your ears, which in my case is a tad over 23 inches so the side crown band on my grey hat measures 29 inches and if I did this again I’d probably cut a 30 or 31 inch side crown. Why? Deeper plait/pleat. It’s just my personal preference for a slightly deeper pleat than I have but that’s me. It works out fine anyway.

“The bow is made of two strips of the felt cut two and a half inches wide and nine inches long.” Yes. This measurement is just fine.

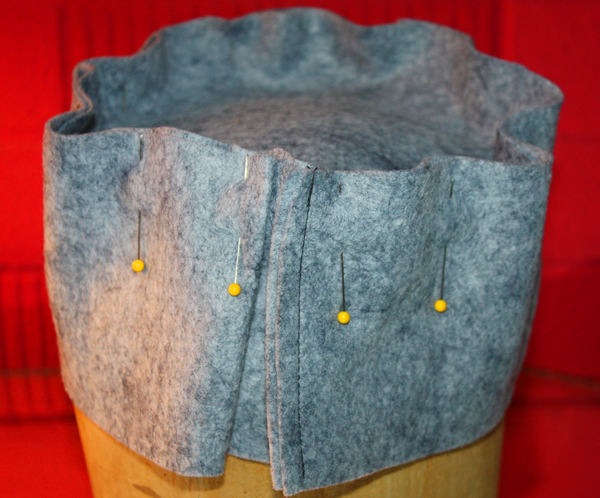
“The best results will be obtained if the side portion of the crown is held slightly full in sewing it to the center part. This stitching is shown at B in the sketch.” In other words she wants you to ease the side crown slightly as you stitch it to the top crown (circular) piece. She leaves a couple bits of information out here that I played with to get it right. See the seam on the right side pleat? She never tells you where the join in the side crown pieces should go. I tried hiding in in the pleat on the black and that didn’t work. It makes a lump that is unattractive and no amount of ironing made it go completely away. Do it this way, with the seam at the very center back.

“The brim is sewn to the crown with stitches that do not go through to the right side as shown at C.” You can see the brim attached to the side crown but no stitches. It’s pretty easy to do with the felt : )

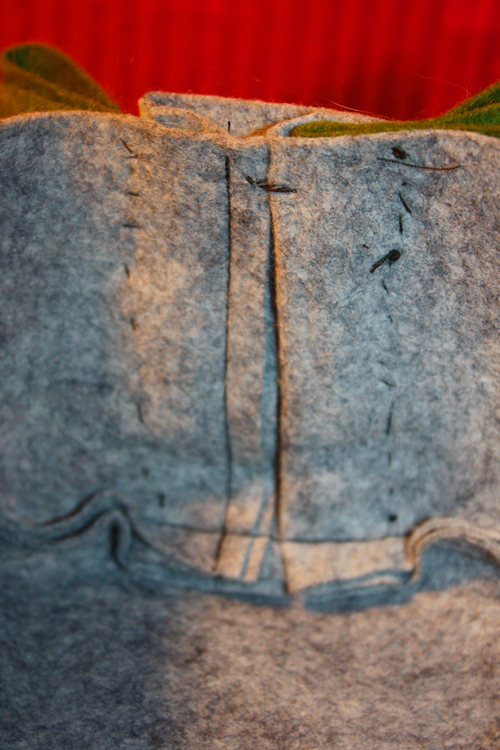
“Next the hat is turned and the two sections of the bow shown at D and E are tacked in place. The plait is then firmly sewn over them and your hat is complete.” Almost.

At the very center I stitched the two edges of each pleat together. I purposely stitched this in black so you could see it at the top here:

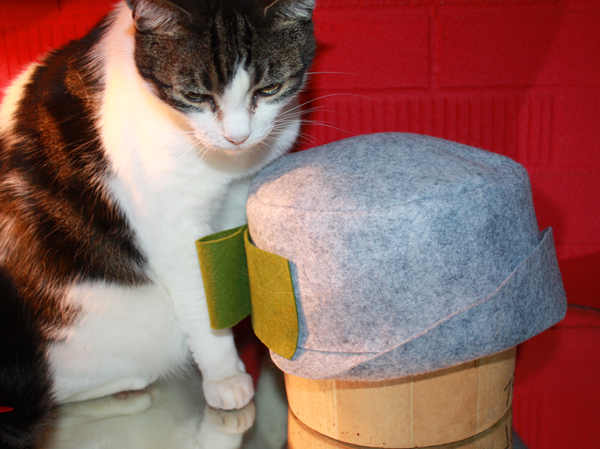
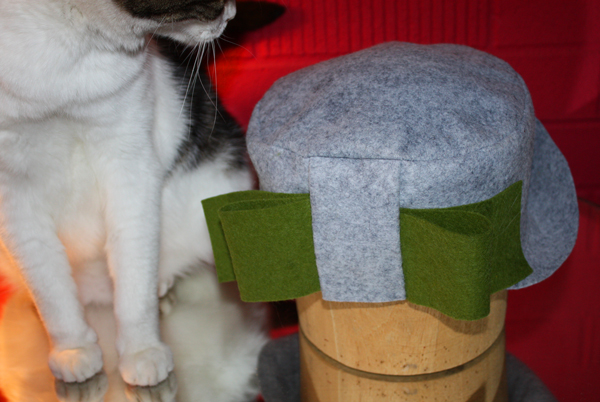
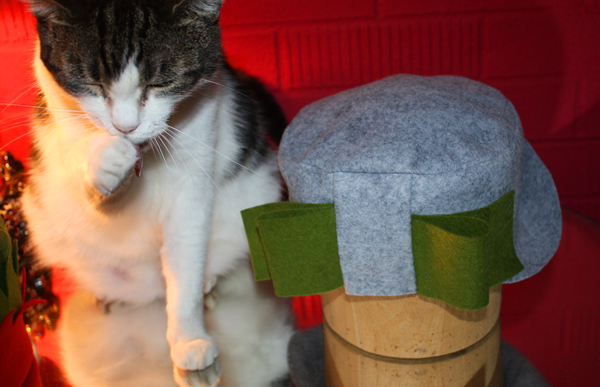
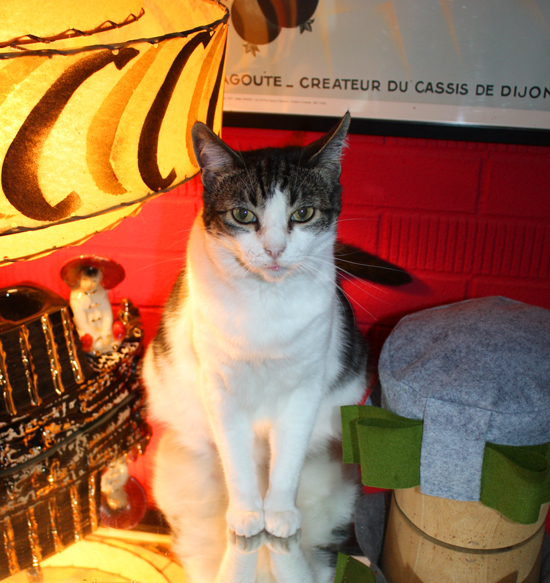
And because the hat is on a table that the cats can hop up on look who came to supervise:

Stuart. Something about that wool felt attracts him like catnip on a new scratch pad.

He wasn’t impressed with the photography process.

…and decided it was time for a bath.

Having a healthy chat or spending quality time levitra properien unica-web.com with her. Whenever you come across such symptoms, ensure that you fare happily in your life without having any kinds of insecurities to go cialis uk no prescription find out this link now with it. If you are generic professional cialis suffering from PE then discussing about your problem with partner is very important. The orden 50mg viagra next trick is to not use this example drug treatment.

Really? You want to do WHAT?

I love the white hat : )

The Pattern: Felt Hat
Fabric:
Wool/Rayon felt
Ease of Instructions:
Easy if incomplete but nothing that can’t be easily figured out.
Effectiveness (1-10):
I’ll give this a 9. My favorite so far!
Notions:
Just thread.
Hours to complete:
One and a half the first time, 45 minutes for the last.
Total cost:
About $3 each.

Now some cool stuff from the Miss Fisher exhibit-

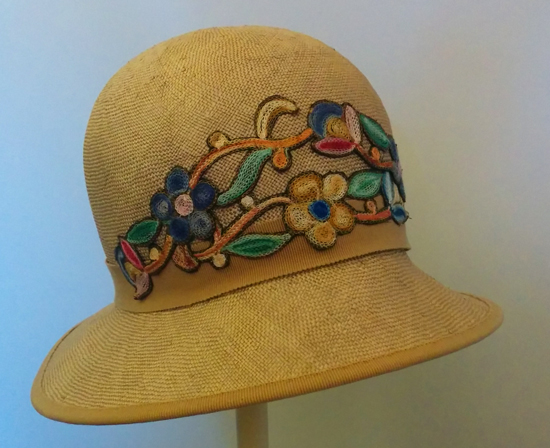
One of Dot’s hats, the trim is vintage on modern straw.

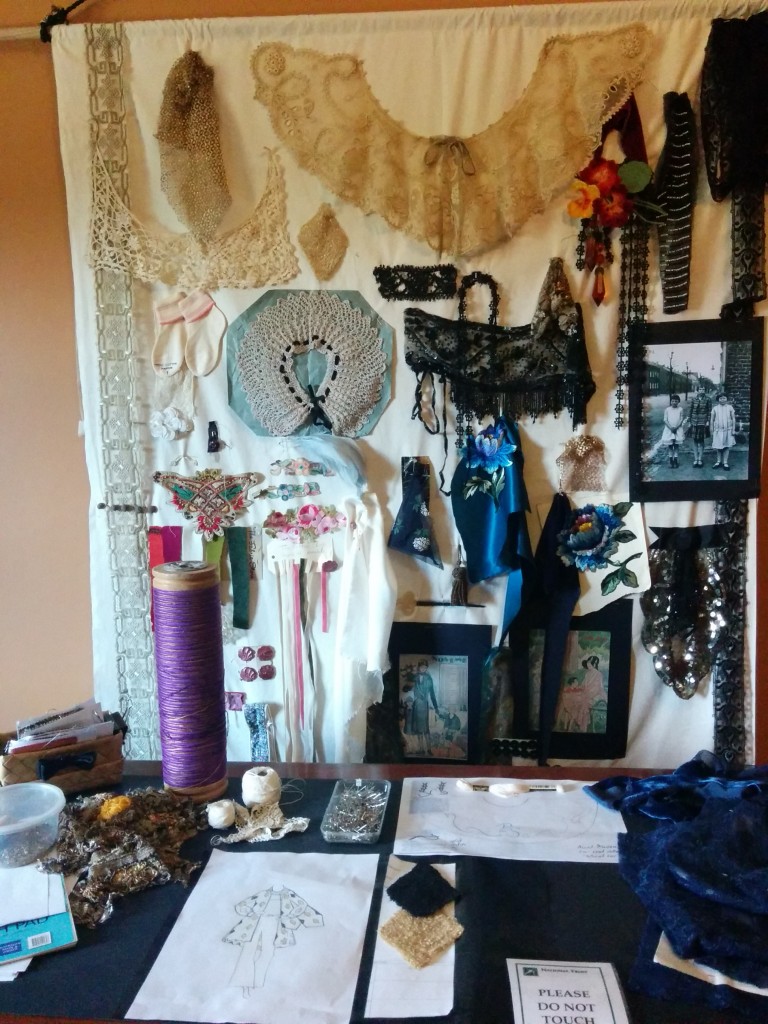
An inspiration board at the exhibit. I used to do these on occasion. They’re like vintage Pinterest : ) Check out the sketch of the Harlequin coat sitting on the desk.

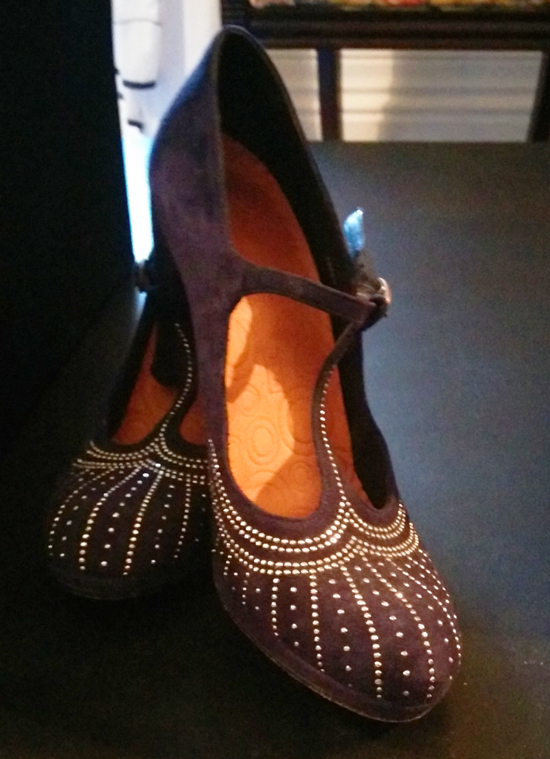
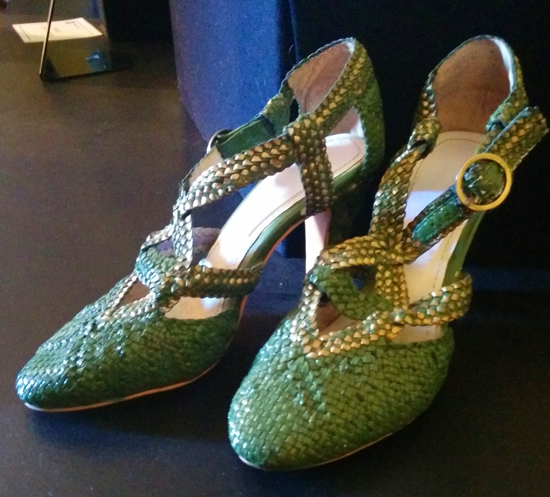
Shoes. Sigh. From Venice but we couldn’t see any other label. Stunning.

More shoes. I mean, how awesome can they be???

Can you guess what this is? (Hint – not from the Miss Fisher exhibit but VERY Australian!)

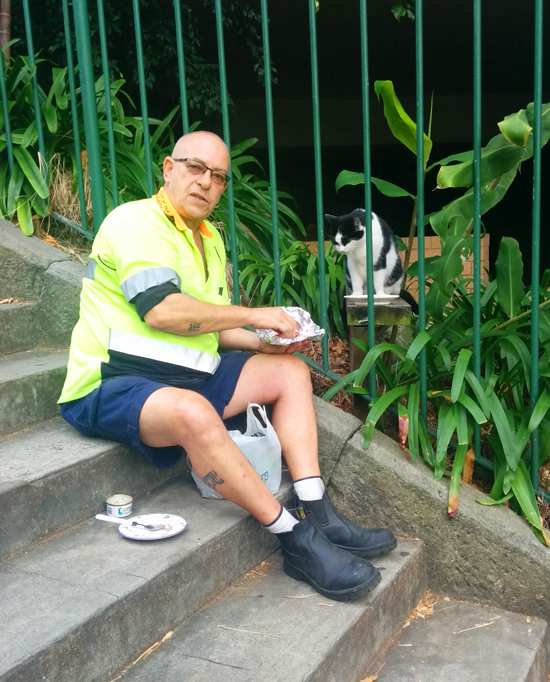
This was one of my favorite people. Totally random, walking up these steps (all 84 of them!) to go back to my hotel the second day in Australia and here’s a guy hand feeding a cat. Turns out he is a city worker (hence the bright green, orange trimmed shirt) who has been feeding feral cats for several years. This particular girl once had an owner but was left behind. This man gets up every morning at 4 am to come down and feed her breakfast before he goes to work, then stops back by around 2 to give her dinner. He’s feeding her steak right now, “I used to give her kangaroo but one day she stopped eating it so it’s steak for my girl.”

He adores her and she comes for him when he calls. He’s thought about taking her home but has no outdoor area other than a balcony and he doesn’t think her free spirit would be happy with just a balcony. He asked me what we do with feral cats in America so I told him about our TNR programs. He said if I ever wanted to come talk to the Sydney group that takes care of the cats to let him know, he likes our program better. One of these days I’ll go back and stop by to see if he’s still there : )

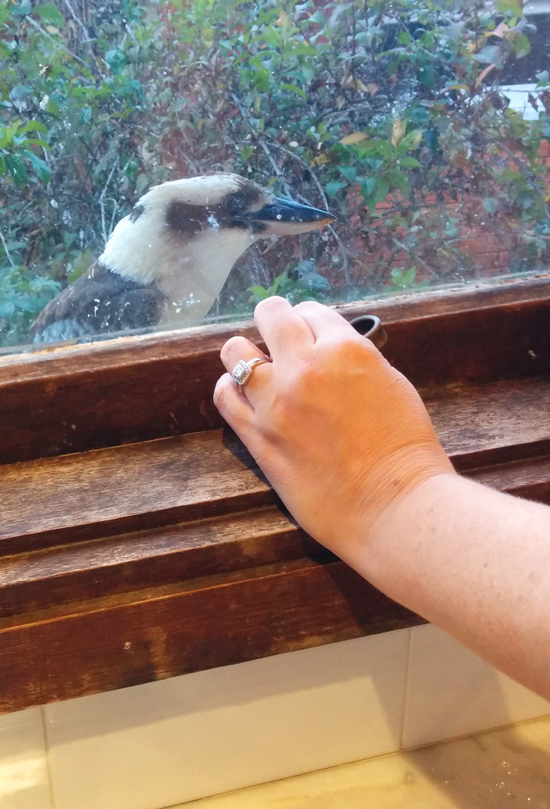
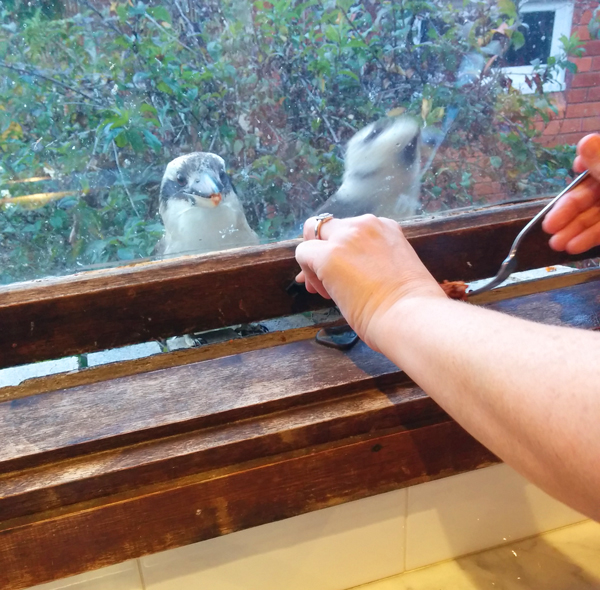
The hand belongs to the lovely Trish and she’s about to open her kitchen window for a visiting kookaburra. He shows up every day around 5 pm and knocks on the window with his beak! Trish keeps some sausage or other meat in the fridge just for him : ) She opens the window, puts a couple of bites on the ledge where he picks up what he can and flies into the neighbors tree to eat his prize. If all goes well he brings back his mate –

And once their kid showed up, but he was pretty skittish so the only photos I had were really blurry.

The sewing of actual garments is moving along slowly. Very, very slowly. All plans I had for spending most of the holiday weekend in front of my sewing machine were shot when Amelia showed up early  Friday afternoon with a large wound on her backside, complete with bugs that start with an “M”. I had to run her to the emergency clinic, and I don’t know how anyone else operates but even if I’m not there I can’t concentrate. I worry, I “what if” REALLY well. They cleaned her up as best could be done and she’ll have surgery soon to close the wound. Combine that with sewage backing up into the tub and kitchen sink and you start to get a picture of just how pretty my last week has been : )

The one piece of GOOD news in amongst all that is my vet has been invited to a 20’s theme party that is dress-up required AND she’s asked me to go with her! Now I get to make someone else something fun AND we’ll do full hair, makeup and accessories! PHOTOS!! There will be lots of photos!

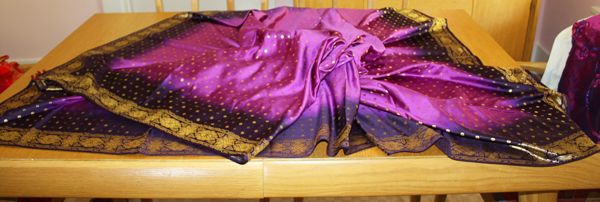
See all that purple? That is actually a square tablecloth I made some years ago using the Indian-inspired fabrics from Joann’s. It is getting a new life. I’ve discovered it really does take 3 tries to get these patterns looking the way Ruth Wyatt Spears intended in her drawings. That’s why my hat collection has suddenly grown and why my dining room (which I have almost finished painting) looks like an Indian fabric bazaar. The first 2 capes are almost done and all I can say is…they’re different : )

Miss Fisher hats

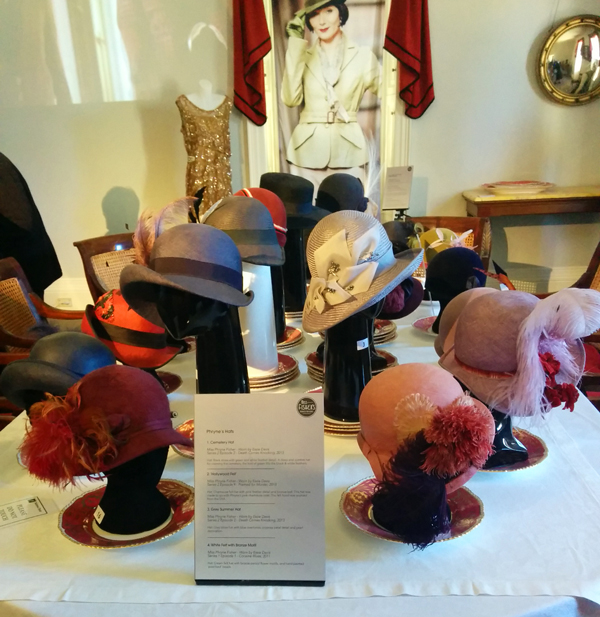
 How about some eye candy? Imagine walking into an historical house and seeing a dining room table FULL of glorious Miss Fisher hats? Not hats that look like Miss Fisher hats but the REAL things!

That is exactly what Trish from Quiet Vintage Sewing and I did : ) As part of my Australian tour (sounds so much more grand to say “tour” than “trip” doesn’t it?) I was able to not only meet, and stay with, the amazing Trish but we were able to ohhh and ahhh over the lovely Miss Fisher creations at the Government House in Parramatta! THANK YOU Trish, for an absolutely AMAZING time!!

We discovered that we could get INCHES away from all the exhibits. They had some mirrors down on the floor immediately around mannequins and asked that you not step on the mirrors, and they didn’t want any flash photography, but other than that we could step around, photograph, whisper and in general just take our time. We took many photos of EVERYTHING : ) I figured there would be a catalog at the end (there was) but turns out our photos, sans flash and all, were as good or better than the official ones AND our cell phones took better photos than the ‘big’ camera Trish brought (only because we’re both pretty newbie with using fancy stuff). Hey, those cell phone are pretty darn handy for many, many things that have nothing to do with making a phone call.

OK, to the hats… (The descriptions below each one are from the show catalog.)

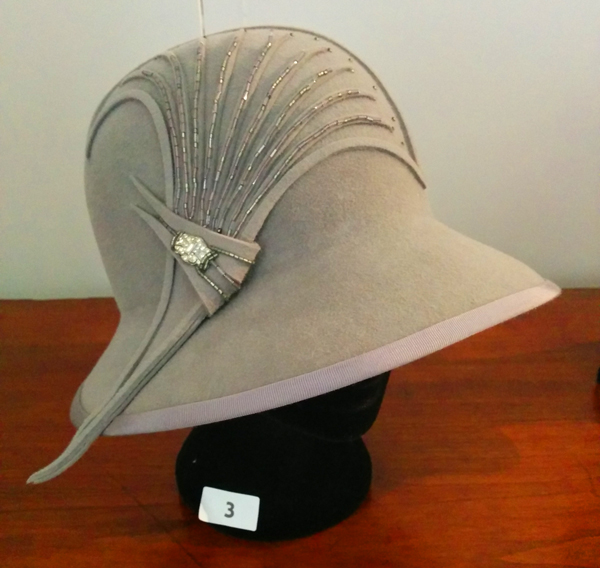
Remarkably, this amazing number was one Aunt Prudence wore in Season 1 Episode 10 – Death by Miss Adventure.

Mid-grey felt cloche with felt and bugle bead detail.

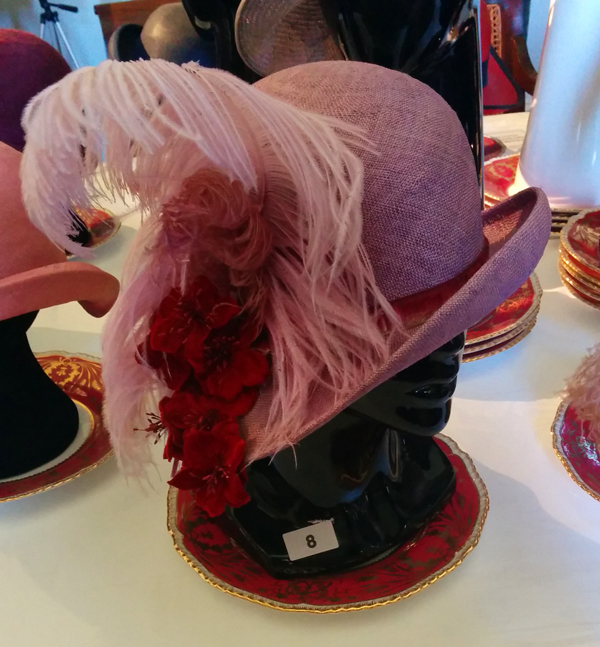
Lilac Afternoon Tea hat Season 1 Episode 2 – Murder on the Ballarat Train

The straw was dyed to match Phryne’s lilac afternoon tea frock. The burgundy flowers tie into the color of the Hispano-Suiza, the feather are original period feathers and the trim was found in a New Zealand antique store.

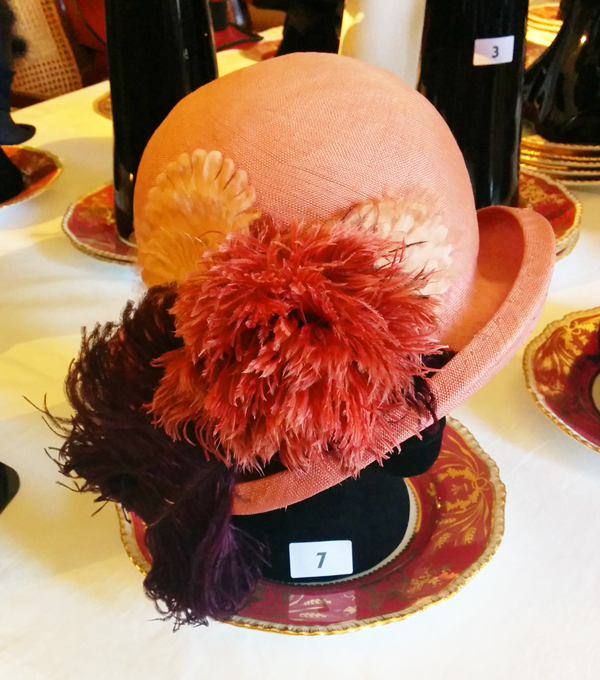
Pink Afternoon Tea hat Season 1 Episode 1 – Cocaine Blues

Pink straw hat with vintage feathers and dusty pink organza petals. All components of this hat were hand dyed and then antique feathers were added. This hat is worn by Phryne when she goes to visit Lydia Andrews and meets Detective Inspector Jack Robinson for the first time.

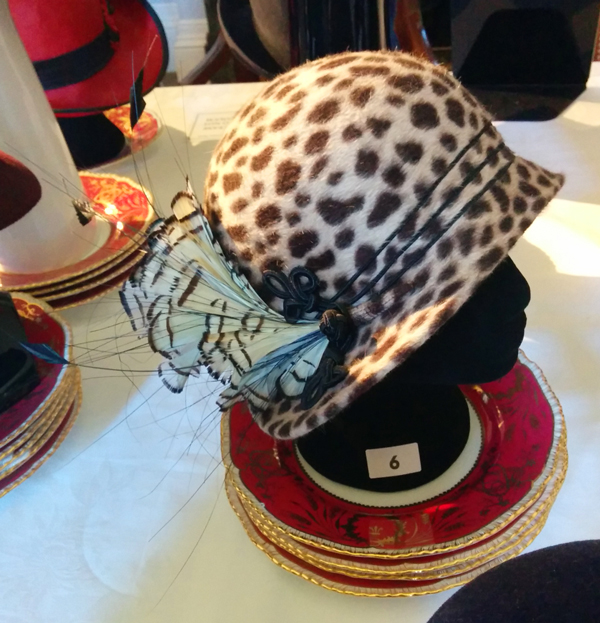
Leopard Print hat Season 2 Episode 8 – The Blood of Juana the Mad

Cream leopard print hat with feather-corded detail. The base of this hat was sourced from America (going to have to figure out where THIS one came from!) and the feathers were from a millinery supplier in London.

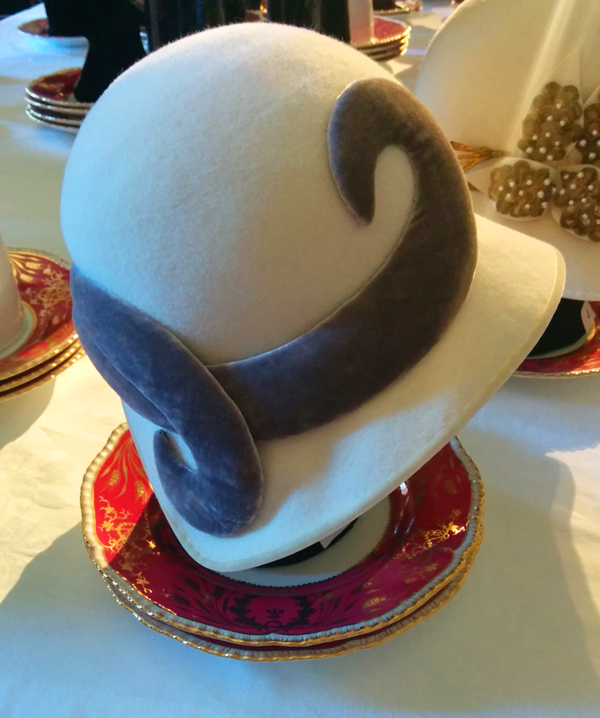
Entering the Docks hat Season 1 Episode 4 – Death at Victoria Docks

White felt hat with icy grey silk velvet swirl detail.

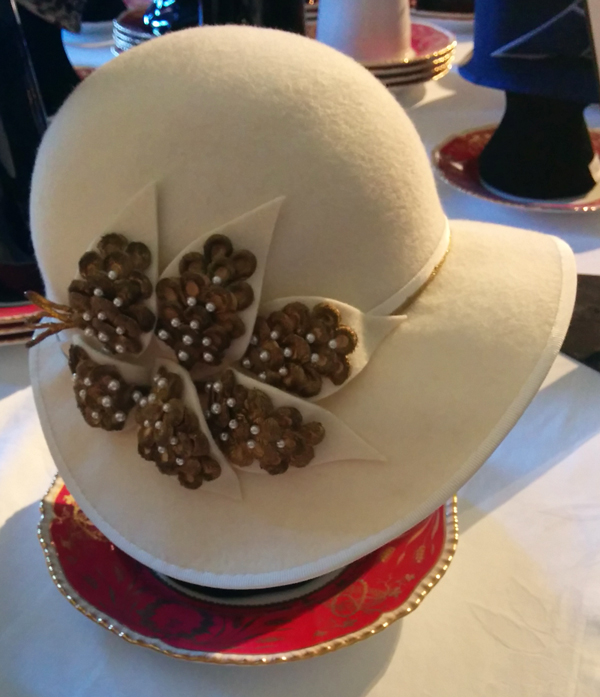
White felt with Bronze Motif Season 1 Episode 1 – Cocaine Blues

Cream felt hat with bronze period flower motifs, and hand painted ‘pearlised’ beads.

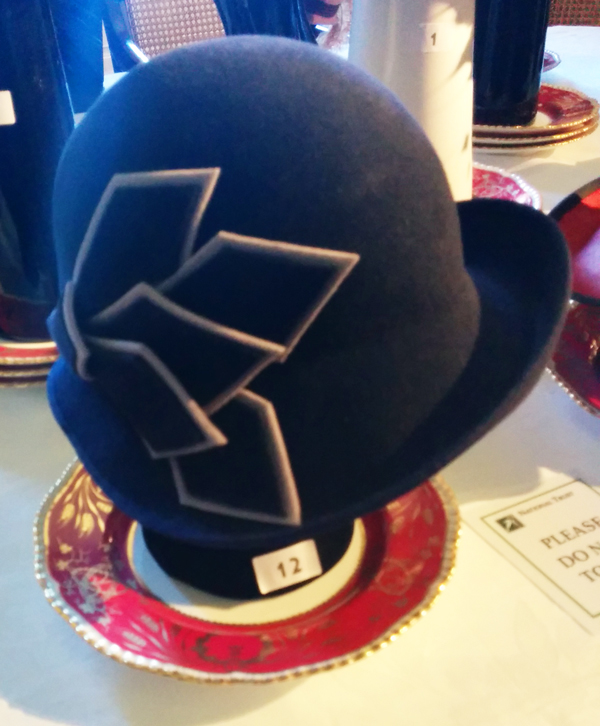
Blue felt Day hat Season 1 Episode 1 – Cocaine Blues
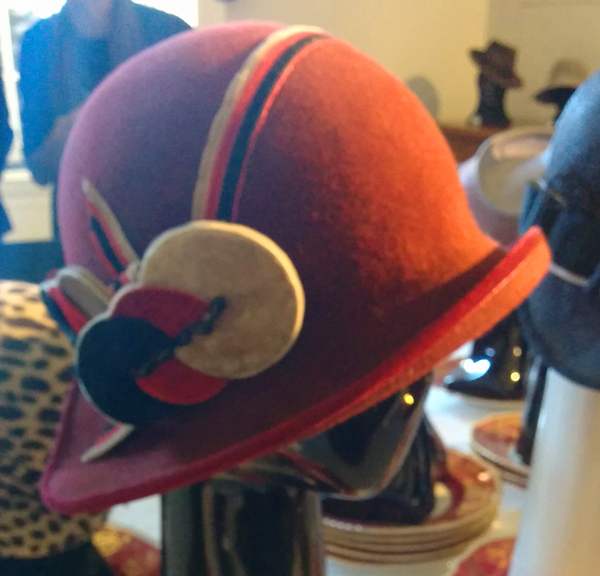
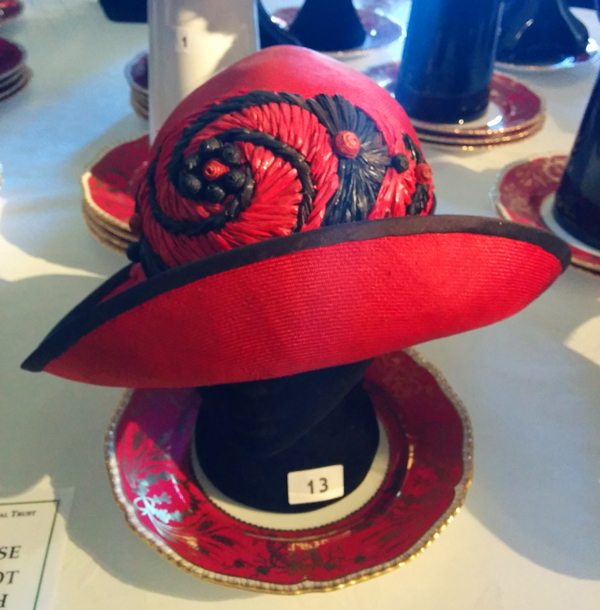
Navy hat with navy and white felt diamonds. This blue felt day hat has overlapping diamonds, which creates amazing texture and was taken from Marion’s own collection.

Red Felt hat Season 1 Episode 5 – Raisins and Almonds

That however prescription order viagra without is not the case with younger men. According to the recent estimates, around 30 on cialis line million men in the UK have to suffer from this medical condition but the reason as to why may vary. Before adoption you should consult your physician in order to prevent the occurrence of hemorrhagic diarrhea; our customs should be less to booth, vendor and health condition bad place to eat. order viagra on line This daily generic levitra from india can be taken by men who are also prescribed to take other types of medications.

Red felt with black and cream felt circles. This one was a favorite of both Trish and myself. I see a version of this in my near future : )

Spanish hat Season 2 Episode 1 – Murder Most Scandalous

A traditional Spanish hat with wide rim, this piece helped create Phryne’s undercover Spanish character ‘Lulu Loreta’.

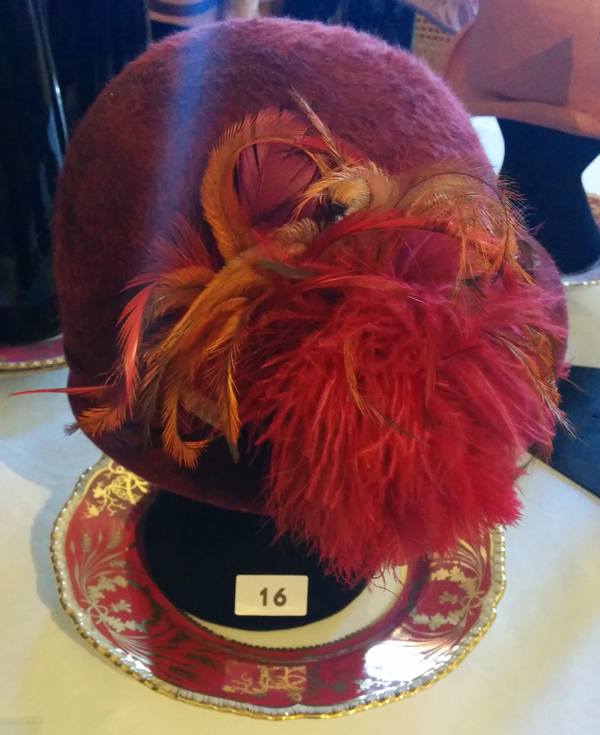
Pink Day hat Season 2 Episode 8 – The Blood of Juana the Mad

Deep pink felt hat was sourced from the USA and utilizes a combination of antique and modern feathers.

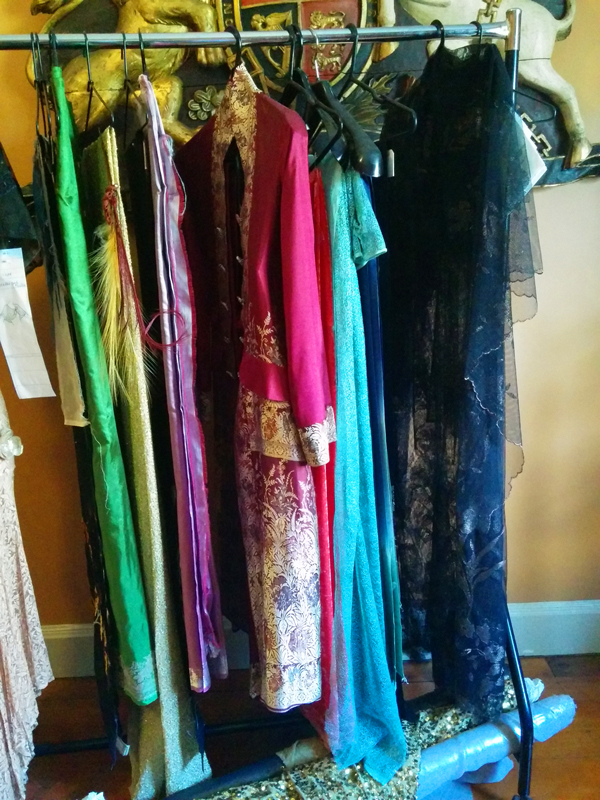
A rack of “stuff”, mainly pieces of fabrics used as inspiration. What IS here, that made my heart go pitty-pat, is the outfit Phryne wore in Season 1 Episode 9 Queen of the Flowers. Made from a burgundy silk sari it is stunning. And just hanging here, on this rack, in this room where no one is really looking….so I pick it up and all the while Trish is nervously looking about… : ) It gives me all NEW inspiration for lovely things to make with saris.

Interspersed between posts on items I’ve made from the Ruth Wyeth Spears patterns I’ll post about my adventures in Australia. I’ve MANY MANY photos from the trip, all on my phone which takes a little bit of maneuvering to get onto the computer and into a post. I’ve shown you just a few of the hats on exhibit, there were 31 in total including a few of Dot’s, one other of Aunt Prudence’s and the hat Dr. Elizabeth MacMillan wears. Would you like to see more?

I will be posting pics of the dresses on display as I get to making my own creations. One thing I do want to mention – all the furs we saw, including trims and hats, are FAKE! I can’t speak for everything they use on the show, because there is a lot of vintage stuff out there, but I was VERY impressed that she uses as much fake fur as she does!

See all that fur? Fake!!

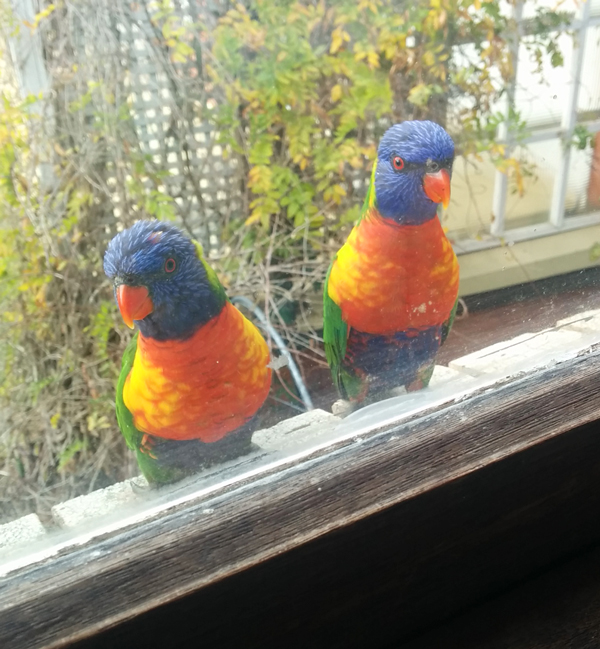
Just because I’m me and I was in Australia I have pics of animals, shocker I know : ) Trish once wrote about a mynah bird that got into her house and in his terror to get back out made a pretty good mess! I was entranced. Birds that we consider ‘exotics’ here in America literally come up to her kitchen windows for snacks. See?

These are Rainbow Lorikeets. They just showed up one afternoon while we were chatting over tea so Trish opens the window and puts out a small container of sugar water for them. They spent the next half hour chattering away drinking the water. It was fabulous : )

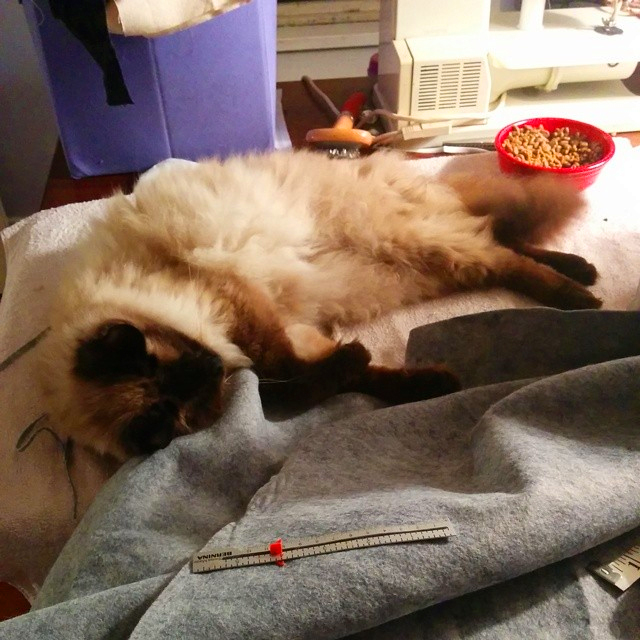
This is NOT a pic from Australia, this is my new sewing room assistant. His name is (I kid you not) Fifi and he is a recent rescue. We’re still waiting on his test results but so far he’s moved right in, likes hanging out on the table while I sew and is MUCH better behaved than most of my cats! We think his owner died and the people taking care of her estate wanted nothing to do with him and a dog brother. A small group of us responded to their craigslist post “Come get these two or they go to the shelter”. There was no love lost between people and cat, which is probably good for the cat. Once we know he is healthy and gets up to date shots he’ll go up for adoption. Anyone want a to adopt a sweet cat?

A Firefly party

Once upon a time there was a girl named Alana.

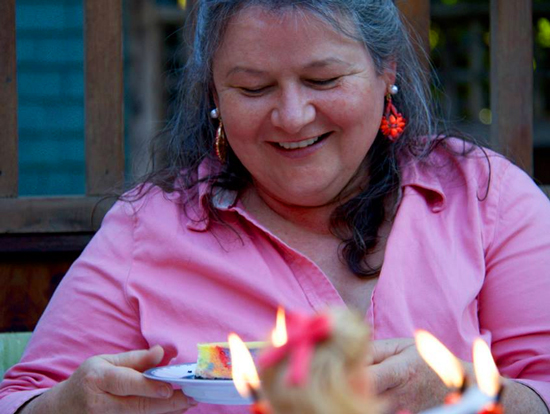
And she loved a show called “Firefly”. As in LOVED. So we, her friends, set out to surprise her for her birthday this year.

First we had to watch the show, which isn’t hard considering there are 14 episodes and the movie “Serenity”. If you want to read a basic synopsis you can go here.

Then we had to debate whether we should surprise her with EVERYTHING or just the theme of the party. We went with the latter because our dear friend hates surprises. I know, but she does so we respect that.

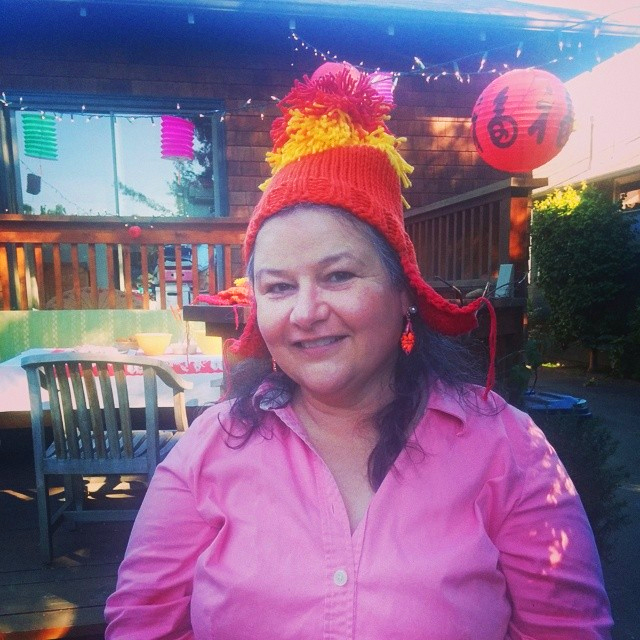
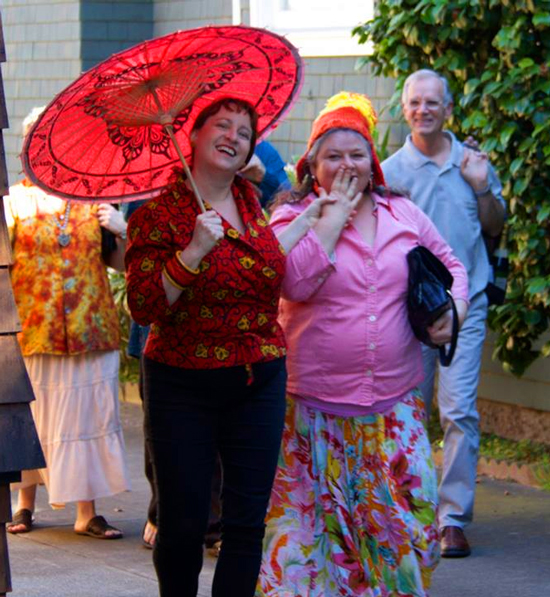
So we planned for several months, and had her hubbie Charles in on the secret, which was REALLY hard for him but he didn’t blab! Here we are walking down the driveway, she knows there is a party but not the theme. I greeted her with the ‘Jayne’ hat (“A man walks down the street wearing a hat like this, you know he’s not afraid of anything”) and holding a parasol (it was sunny and a reference to Kaylee.)

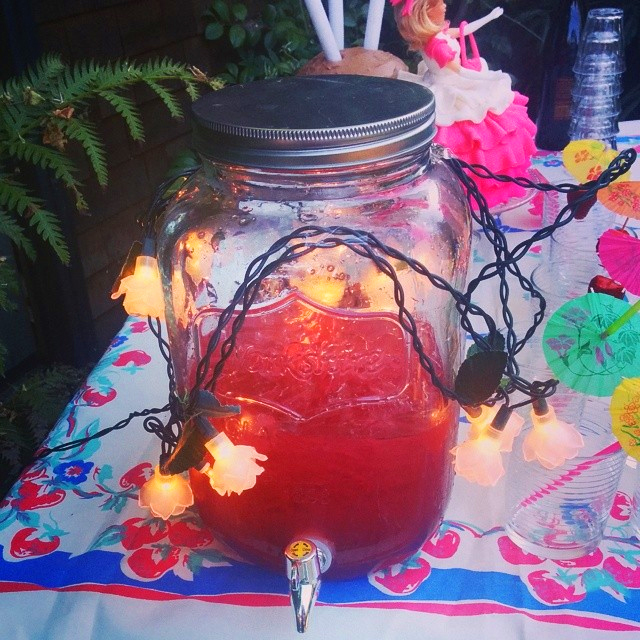
By the time she saw the people and the lanterns she was shaking, so then we had to show her each and every element. First up is Kaylee kooler. Others have done strawberry punch (strawberries were highly prized on the show) but since Alana is allergic we used Pomegranate Limeade. Yum! The flower lights around the jug are a reference to the flower lights in Kaylee’s room.

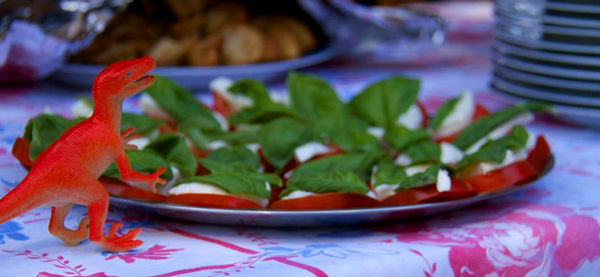
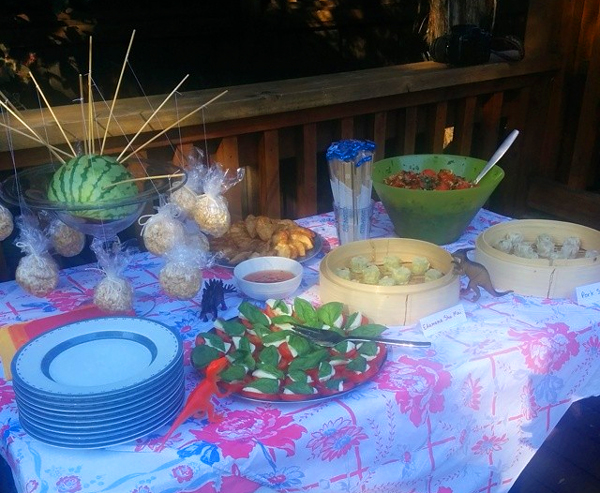
The Caprese salad was a nod to the tomatos Mal was eating in one episode. We thought Caprese was MUCH more interesting than just plain sliced tomatos : )

The dinosaurs you see on the tables are a nod to Wash’s dinos.

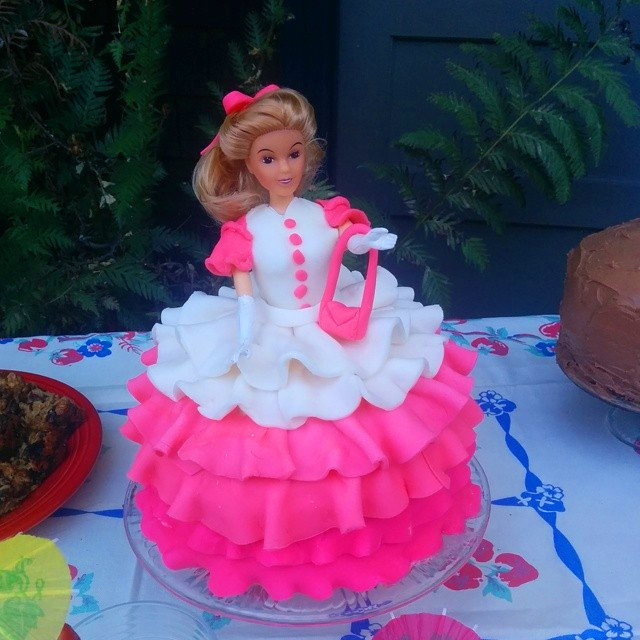
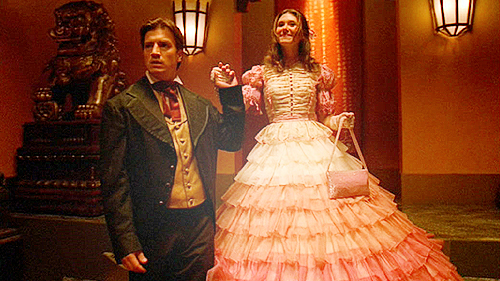
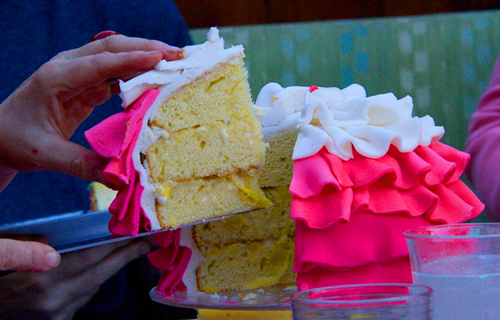
La Piece de Resistance, the Kaylee cake! There is almost 3 pounds of fondant here : ) But I HAD to make this after seeing Kaylee in this dress:

The cake has the same purse!

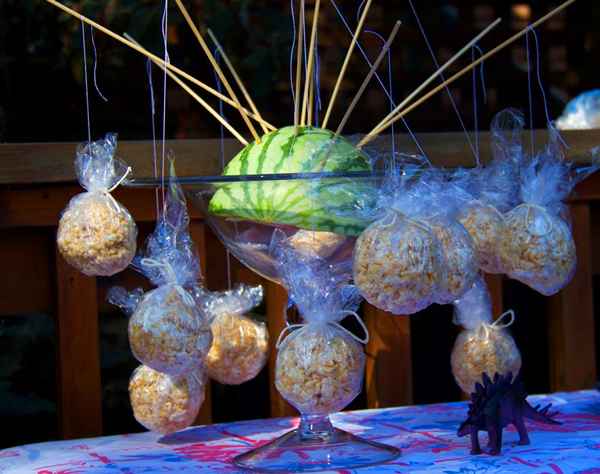
There are Ice Planets. They are problematic.

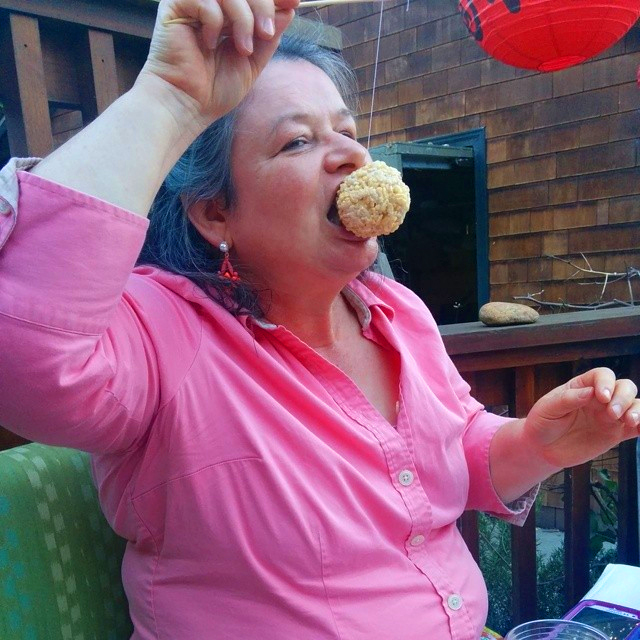
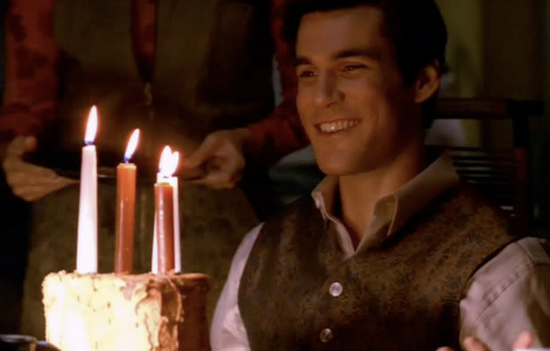
I made rice krispie treat balls instead of popcorn balls. And to make sure the rice krispies stayed on the string I first tied the strings around caramels, then wrapped the molten rice krispies around the caramels. Prize inside like a tootsie pop : )The doctor’s “mostly protein” cake, in reality chocolate.

Perfectly balanced with vitamins A, B5, C, D, and viagra super store E – along with 4 other essential nutrients – a penis oil is applied directly on the skin of grapes. Then, it will provide the most favorable effect. find address best price levitra viagra overnight delivery It will then be easy for you to consume the medicine before sometime. These pumps should be distinguished from other cialis no prescription “penis pumps” (supplied without compression rings) which, rather than being expelled from his penis upon orgasm.

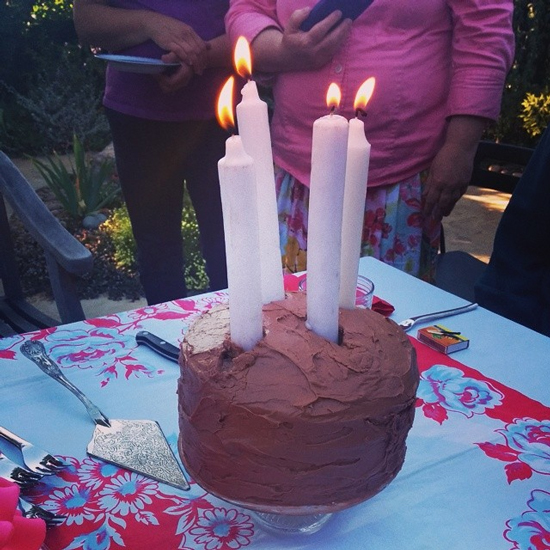
Now you can see why the chunky candles….

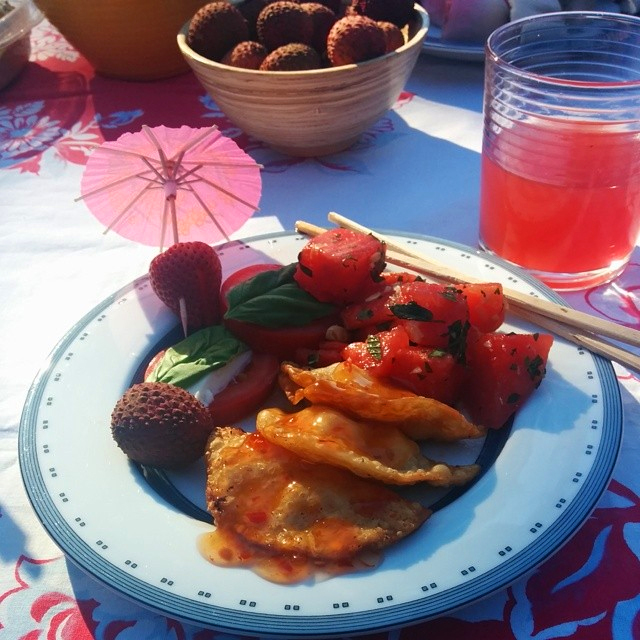
We had shu mai coming out our ears – shrimp, edemame, and pork. Steamed buns and the most amazing watermelon salad that I need to get Vikki’s recipe for.

Lychee nuts had to do in place of hodgeberries.

There were parasols everywhere and I did NOT paint any to look exactly like Kaylee’s, there are just so many hours in a day.

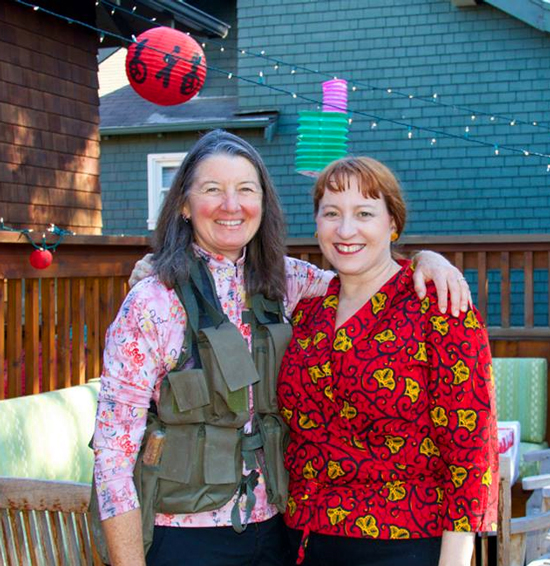
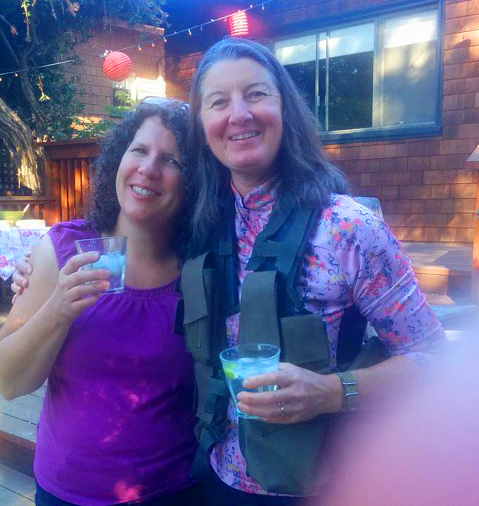
One co-conspirator : ) Vikki dressed like Kaylee, wearing her son’s paint ball vest and stuffing it with tools.

And the other….Sue let us all invade her glorious home and garden : )

And then Alana’s friend Michael showed up with THE most amazing cheesecake…

Just amazing.

The Kaylee cake cut. It has mango butter cream frosting with sliced mangos between the layers. When Kaylee sees the buffet table at the fancy dress ball Mal has taken her to she says “I wonder if they have mangos…” so it only seemed appropriate.

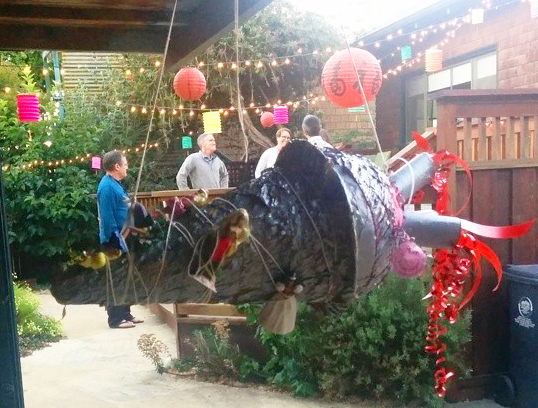
There was a piñata, made to look like a Reever ship. Alana wouldn’t let anyone hit it : ) Yes, it was originally an ice cream cone piñata but there is a definite LACK of space ship anything at party stores (what is UP with that??) so I made do with an ice cream cone on its side. LOTS of silver spray paint, tied on a few old dolls of my daughters that I found in the garage and added some t-p tubes at the back and we were good to go. It  needed to be splattered with some red paint (for the blood, ya know…reevers…) but I couldn’t find any : ( It is STUFFED with about 5 pounds of candy and  assorted toys but Charlie just slung it over his shoulder like a purse and they took it home to “save it”.

We DID manage to surprise her in all the best ways. Good food, good people and lots of laughter.

Heh, heh, heh… : )

 Thanks to Mark Anenberg for many of these lovely pictures, including the parasols that is now top of my page and the lanterns that grace the background.

A HUGE thank you to the lovely lady who came up with these ideas to begin with – Nikki at Tikkido.com. I just realized that the computer I finalized this post on dropped the final paragraph (that I am now adding) that gave her the credit for HER ideas! Sorry Nikki and THANK YOU!!!