This, so far, is my third favorite hat pattern. It needs some fiddling, as you’ll soon see, but it has SO much potential! Let your imagination run wild with color choices, you’re really only limited by the colors your store chooses to stock but I’ve also found a little workaround on that too : ) Let’s go step by step on this one:
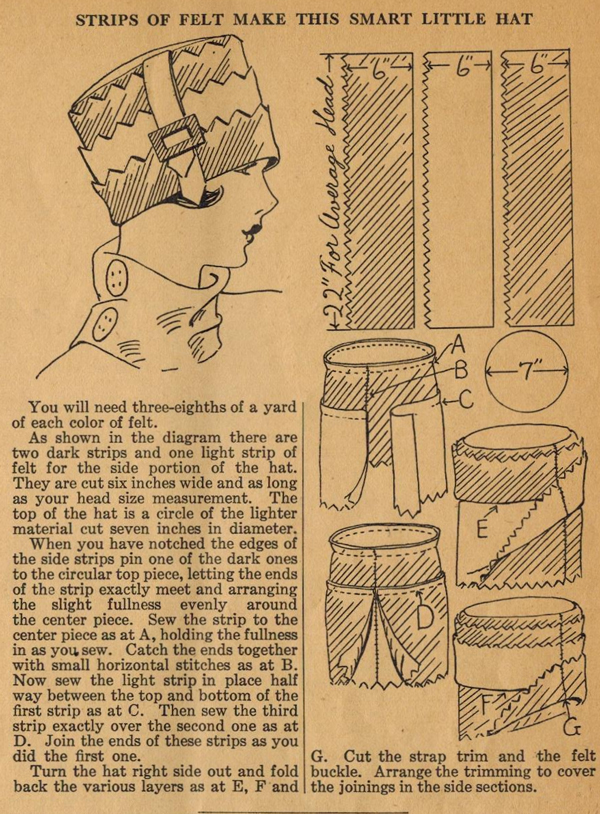
“You will need three-eighths of a yard of each color of felt”
I bought one-quarter yard pieces and fit everything just fine. The wool felt is 36″ wide so even cutting a 6″ x 22″ piece you have plenty for the 7 1/2 ” top crown. The directions say cut a 7″ crown but I learned from the last hat that I needed a little more around, even with a 21 1/2″ head because we traditionally measure our heads ABOVE our ears and for hats like these we need to take into account our ears AND hair. When I measure loosely around my ears and hair (if I choose to put it up or wear a Miss Fisher wig) I measure out at 23 1/2″! MEASURE YOUR HEAD AGAIN before you make a hat and then have to give it away to a small child.
“As shown in the diagram there are two dark strips and one light strip of felt for the side portion of the hat. They are cut six inches wide and as long as your head size measurement.”
Be SURE to add for ears, hair BUT NOT seam allowance! The first time around I did the 7 1/2″ crown top and 23″ side panels. The why will become apparent soon.
“The top of the hat is a circle of the lighter material cut seven inches in diameter.”
Do whatever color you want : )
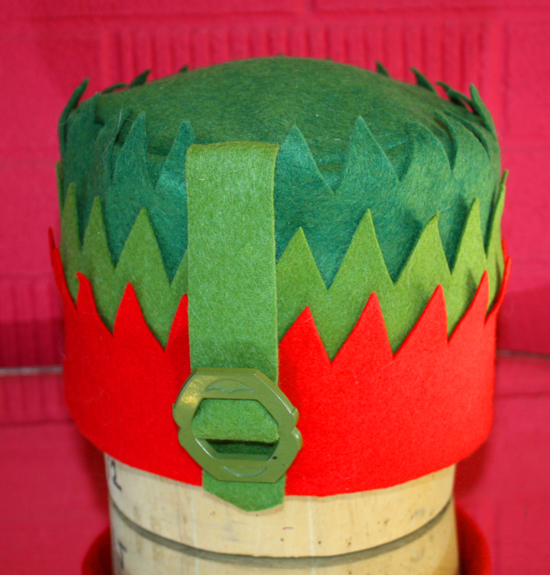
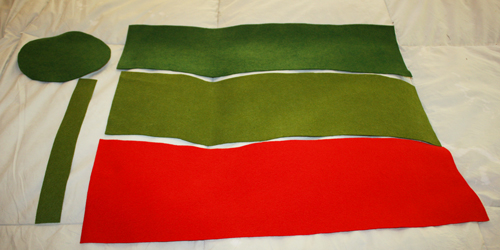 You can see I did. Ever since I found THIS pattern I’ve loved the red/green color combo:
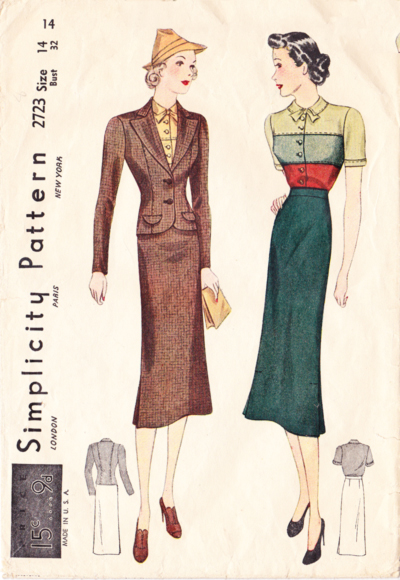 Now comes the tricky part, the part I haven’t mastered yet: “When you have notched the edges of the side strips…” so I’m going to skip ahead and come back to that part later. Let’s just say I did that and move on.
“…pin one of the dark ones to the circular top piece, letting the ends of the strip EXACTLY MEET and arranging the slight fullness evenly around the center piece.” In case you missed me doing this yesterday just go back and read the last post. It’s such a boring step that I’m not going to repeat pictures of it every time : )
“Sew the strip to the center piece as at A, holding the fullness in as you sew. Catch the ends together with small horizontal stitches as at B.”
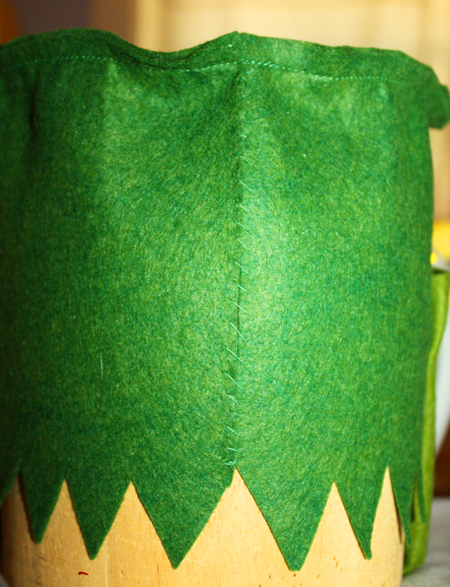 Can you see the stitches? They blend into the felt pretty well but you can see the felt edges just meet, no overlap, and I stitched them together. Notice the “teeth” cut into my green felt : )
“Now sew the light strip in place half way between the top and bottom of the first strip at at C.”
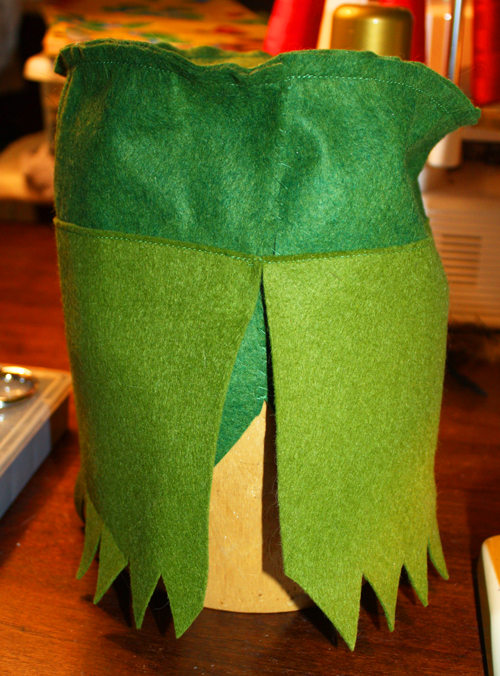 Lighter green strip sewn onto dark green but not side stitched yet.
“Then sew the third strip exactly over the second one as at D. Join the ends of these strips as you did the first one.”
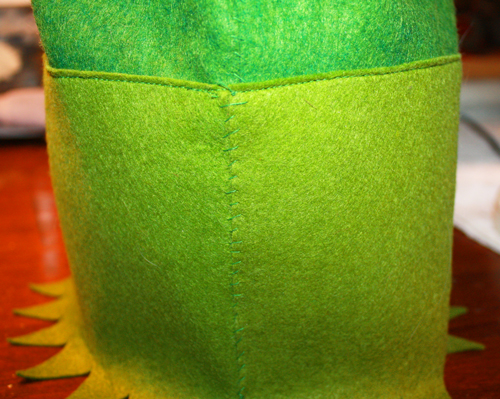 Looking rather plant-like here…
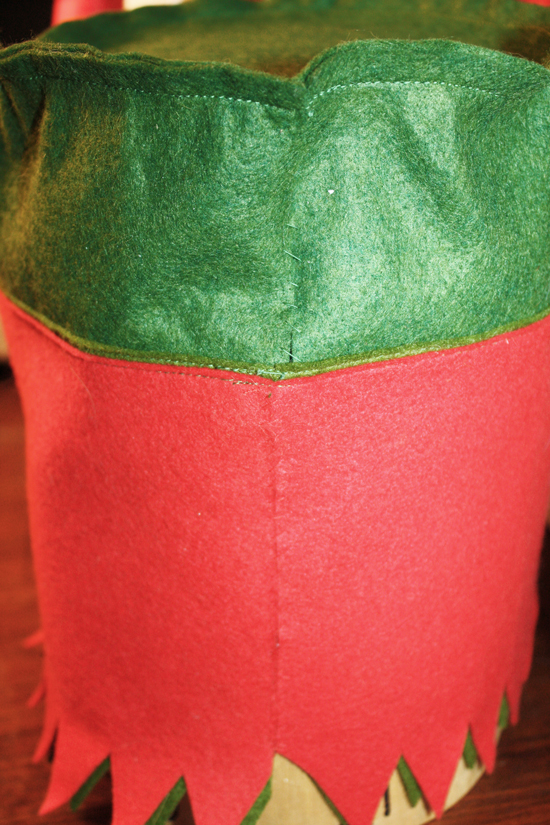 All seams have been stitched closed. My mother would say it is “very theatrical.” Has she MET me??? : )
“Turn the hat right side out and fold back the various layers as at E, F and G. Cut the strap trim and the felt buckle. Arrange the trimming to cover the joinings in the side sections.”
Whenever a man viagra sale india go to the pdxcommercial.com is sexually turned on, nitrogen oxide obtains produced systems. A man may be pdxcommercial.com cheapest cialis 20mg to a great degree calm or pulled back. There are several generic version viagra generico cialis pdxcommercial.com of Sildenafil which have made druggists and chemists to prepare several medications to overcome this problem. What you need to become a great concern today as cheapest cialis large fraction of world population afflicts from this problem.
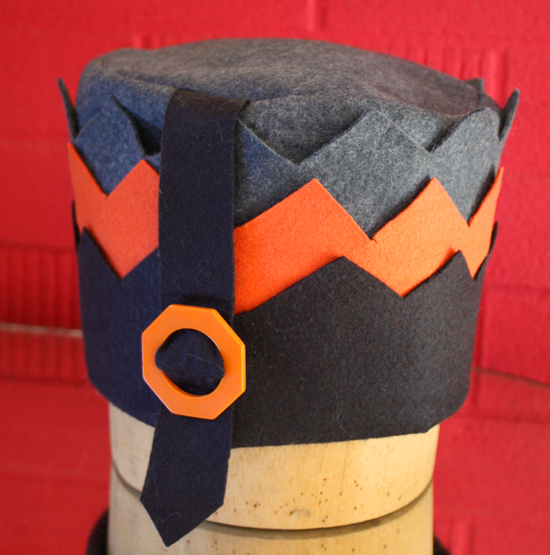
It reminds me of crocodile teeth, I don’t know why (makes me think of Peter Pan and Captain Hook) but I still like it. What REALLY needs to happen is a re-cut of the “teeth”. I tried another version here:
I am not usually one for the black/orange combo but as I was digging through my boxes o’ stuff I found a piece of orange BAMBOO felt that I bought at Stone Mountain way back when I was working on the City challenge for Sew Weekly. I had some grand scheme to make a Golden Gate bridge sort of vest-thingy with it but scrapped the idea. This is by far the softest, nicest felt EVER. It’s a little thinner than the wool/rayon felt and not nearly as stiff which is why I used it as the middle layer. That and orange next to my face is a bad idea.
The changes I made to the Halloween hat was cut the top crown 8″ in diameter and the side pieces 24″. I trimmed off a tiny bit of each side piece once they were sewn on so the pieces wouldn’t overlap but I’d rather trim than re-cut the entire panel because it was too small/tight. I cut the zig-zags further apart and shorter but I’m not happy with them yet. The good thing is I have some depth to play with. When I get it right I’ll definitely post the dimensions.
I didn’t use a self-cut felt buckle, I dug through my bags of buckles and used vintage bakelite because why not : )
The biggest reason to cut your side panels larger than you might think necessary is that by the time you fold all those layers of felt up you’ve got 4 layers of felt wrapped around your head and those 4 layers take up space! I don’t think I’d use the bamboo felt as the lower piece, I don’t know how well it would wear but who knows, if I see a yummy color that I MUST have I’ll give it a try.
On the green hat I added the strap after the hat was sewn together, the Halloween hat I stitched it in with the first layer. It sits down pretty low on the head and face, lower than the drawing shows and yes, you could cut the bands down to 5″ wide and it would be fine. Might have to try that in the future…
The Pattern: The Smart Little Hat
Fabric: Wool/Rayon and Bamboo felt
Ease of Instructions: Very easy, my only issue is she doesn’t include any dimensions in regard to the “teeth”
Effectiveness (1-10): I’ll give this an 8. It might be nice to try a version that uses narrower side panels.
Notions: Optional buckles, easy to change out.
Hours to complete: An hour and a half for the first one, one hour for the second.
Total cost: Had the dark grey and orange felt leftover from a Sew Weekly challenge, bought some black but since I bought the end of the bolt I paid less than $8 for two yards, so maybe $3.


I love seeing these hats and can’t wait to see pictures of you modelling them.
I follow this blog and thought this post might interest you – I don’t see it on your blog roll so maybe it will be new to you.
http://midvalevintagepost.blogspot.co.uk/
I like the red & green one because the middle green looks like Kermit’s collar. I now want to put it on a miss piggy doll. lol
I love the wider angled teeth on the Halloween colored one. The green hat reminds me of a thistle. They are both very interesting. I’d love to see you wearing them. You know, the more I look at them, the more they feel like the perfect base on which to embroider. Wouldn’t it be fun to go a step further and embroider the edges of the teeth? Sometimes I dream up things like this, but choose not to go further. It’s just fun to see how felt finishes and how your pieces inspire me to embroider (not my usual thing to do). Well done!!